Photo to Sketch Online Free: How to Turn Any Picture Into a Pencil, Charcoal or Outline Sketch

A detailed visual display in an art studio showing the photo to sketch transformation.

To turn a photo to sketch online free, open the X2X Image to Sketch converter, upload your JPG or PNG, and pick Pencil Sketch, Charcoal or Outline. The preview updates instantly. When you like the result, click Download Sketch. No account or payment is needed, and the whole job takes under a minute.

Why people search for a photo to sketch tool

Most people who look for a photo to sketch tool want one of three things. They want a drawing reference that is easier to copy than a full colour photo. They want a gift or social post that looks hand drawn. Or they want clean lines they can trace, colour or engrave.

I have worked on image tools long enough to see the same frustration over and over. Someone uploads a photo, gets a grey, smudgy mess, and decides the tool is broken. In almost every case the tool did exactly what it was built to do. The photo and the style just didn’t suit each other.

So this guide does two jobs. It shows you how to use the free photo to sketch converter on X2X Converter step by step, and it explains how to pick the right photo and the right style so your sketch looks like a drawing, not a filter accident.

Before you start: a 30 second prep checklist

A little prep makes every photo to sketch conversion better. Here is what I check before I upload anything:

  • Is the photo sharp? Focus matters more than resolution. Blurry eyes give blurry lines.
  • Is the file a sensible size? Phone photos can be very large. If the preview feels slow, shrink the photo first with the free image size converter and then upload the smaller copy.
  • Is the background busy? Clutter behind your subject turns into clutter in the sketch. You can soften a distracting background before converting with the image blur tool, because blurred areas produce far fewer lines.
  • Is the subject big enough in the frame? Crop so your subject fills most of the picture.
  • Do you own the photo? If you plan to publish or sell the sketch, this matters. I cover it near the end.

That is it. Five checks, and your photo to sketch result will already look better than most.

What is photo to sketch conversion?

Photo to sketch conversion is the process of turning a photograph into an image that looks hand drawn, usually in black and white, by keeping the important edges and some tonal shading while removing colour and fine photographic detail.

The word “sketch” comes from traditional art. A sketch is a quickly made freehand drawing that usually isn’t meant as a finished piece. Artists make sketches in pencil, graphite, charcoal or pen, and they build them from two basic elements: line and shading.

A digital photo to sketch tool imitates those two elements. Lines come from the edges in your photo. Shading comes from the light and dark tones. Change how much of each the tool keeps, and you get different sketch styles.

Image to sketch vs photo to sketch: is there a difference?

No. “Image to sketch”, “picture to sketch” and “photo to sketch” all describe the same process. People use “image” when they think of files, and “photo” when they think of camera pictures. The X2X tool is called Image to Sketch, and it works for photos, scans, screenshots and digital artwork alike.

How to turn a photo to sketch with X2X Converter (step by step)

Here is the exact process on our tool.

Step 1: Open the photo to sketch converter

Go to the X2X Image to Sketch page in any modern browser. It works on Windows, Mac, Android phones and iPhones, so you don’t need to install an app.

Step 2: Upload your photo

Click the upload area or drag your image onto the photo to sketch converter. JPG and PNG files are the most common and work well. If your picture is a HEIC file from an iPhone, export or share it as JPG first.

Step 3: Choose a sketch style

You will see three styles:

  • Pencil Sketch: a classic pencil drawing effect with fine lines and soft shading.
  • Charcoal: a darker, bolder sketch effect with stronger contrast.
  • Outline: a simple line drawing effect with no shading.

Step 4: Check the instant preview

The preview shows the sketch effect on your image straight away. Switch between all three photo to sketch styles before you decide. I often guess wrong about which one will suit a photo, and the preview costs nothing.

Step 5: Download your sketch

Click Download Sketch. The tool is built to give you a high resolution file you can share, print or keep editing.

Step 6: Use or print it

Post it, frame it, trace it or print it. If you are printing a batch of sketches, for example colouring pages for a class, you can combine them into a single file with the free image to PDF converter and print everything in one go.

Pencil vs charcoal vs outline: which photo to sketch style is right for you?

Choosing the right photo to sketch style is the single biggest factor after choosing the right photo. Here is how I decide.

Pencil Sketch: for detail and realism

In a photo to sketch tool, pencil keeps fine lines and soft greys. It is the closest thing to a realistic sketch, so it is my default for:

  • Portraits and selfies
  • Pets, especially furry ones
  • Detailed objects like jewellery, flowers or vintage cars
  • Photos with gentle, even light

Pencil works best when your photo has a full range of tones, from bright highlights to deep shadows. Flat, evenly lit photos can look faint in pencil.

Charcoal: for drama and mood

In traditional art, charcoal is a black, crumbly carbon drawing material often used for sketching and underdrawing. It makes looser, darker marks than a hard graphite pencil.

The Charcoal style in a photo to sketch tool copies that look with heavier blacks and stronger contrast. I reach for it with:

  • Dramatic portraits with strong side light
  • Old buildings, bridges and street scenes
  • Landscapes with stormy skies
  • Black and white photos that already have punch

Outline: for tracing, colouring and crafts

The Outline photo to sketch style throws away shading and keeps only the edges. It gives you a clean line drawing, which is ideal for:

  • Colouring pages for kids
  • Tracing a reference before painting
  • Embroidery and craft patterns
  • Laser engraving or cutting drafts
  • First ideas for a tattoo (a tattoo artist should always make the final stencil)

Quick style picker

Your photoBest styleWhy 
Portrait with soft lightPencil SketchKeeps gentle shading on skin
Portrait with strong side lightCharcoalShadows become bold, moody marks
Pet with lots of furPencil SketchFine lines suit texture
Building or streetCharcoal or OutlineStrong edges look sharp
Simple object or logoOutlineClean lines, no clutter
Photo for colouring or tracingOutlineLeaves white space to fill

How does a photo to sketch converter work?

A photo to sketch converter finds the edges in your image, then rebuilds the picture from those edges plus a simplified version of its light and dark tones.

Edges are found with a family of methods called edge detection, which identifies the points in a digital image where brightness changes sharply. The border between a dark coat and a pale wall is an edge. So is the line of a jaw against a background.

Most pencil effects follow a pattern like this:

  1. Convert the photo to greyscale.
  2. Make an inverted copy (light becomes dark).
  3. Blur the inverted copy.
  4. Blend the two together so flat areas wash out to white and edges stay grey.

Outline effects lean more heavily on edge detection and drop most of the tonal shading. Charcoal effects push contrast further so dark areas become solid, heavy marks.

Knowing this helps you predict results. A photo to sketch tool can only draw what your photo gives it. Weak contrast means weak edges, which means a faint sketch. A busy background means lots of edges, which means a cluttered sketch.

Can a photo to sketch tool give a true hand-drawn sketch effect?

A good photo to sketch tool gets you very close to a hand-drawn sketch effect, and for most uses that is enough. Cards, posts, colouring pages and references all work well straight from the converter.

What a converter can’t do is decide what matters. An artist drawing by hand leaves out a stray hair, softens a wrinkle and puts extra weight on the eyes. A photo to sketch converter treats every edge the same way, because it has no idea which edges you care about.

If you want a sketch that feels personal, I recommend a simple hybrid routine:

  1. Run your photo to sketch conversion in the Outline style.
  2. Print the outline lightly, or place it under tracing paper.
  3. Trace only the lines that matter to you.
  4. Add shading by hand while looking at the Pencil Sketch version on screen.

This keeps proportions accurate, because the photo to sketch tool found them for you, while every final mark comes from your own hand. It is also a great way to practise drawing if you are a beginner.

Which photos make the best photo to sketch results?

I would rather spend 30 seconds choosing a photo than 10 minutes fixing a bad result. These rules hold for every photo to sketch tool I have used.

Look for side light

Light coming from one side creates shadows, and shadows describe shape. Window light is perfect. A phone flash pointed straight at a face flattens it, and the sketch loses depth.

Choose a plain background

Sky, a painted wall, or a soft blurred background gives the cleanest sketch. Bookshelves, crowds and patterned wallpaper all turn into stray lines.

Keep the subject large

For a portrait sketch, the face should fill most of the frame. For a pet, get close. Wide shots with a tiny subject lose detail.

Get the focus right

The eyes must be sharp in a portrait. The main lines must be sharp in a building. Everything else can be soft.

Photos to avoid

  • Dark night photos with grainy noise
  • Backlit subjects that are mostly silhouette
  • Screenshots of photos from social apps
  • Heavily filtered photos with strong colour effects

JPG to sketch: does the file format matter?

Yes, a little. JPG is the most common input for a photo to sketch tool, and it works well as long as the file isn’t heavily compressed.

According to the MDN image file type guide, JPEG uses lossy compression and is well suited to photographs, while PNG is lossless and better for line art, diagrams and images with sharp edges. That lines up with what I see in practice:

  • Input: use the original JPG from your camera or phone. Avoid copies that have been saved, sent and resaved many times, because compression blocks can show up as extra marks.
  • Output: a sketch is mostly sharp lines on a light background, which is the kind of image lossless formats handle best. If you plan to edit your sketch further, keep a lossless copy.

So JPG to sketch works fine. Just start from the best quality JPG you have.

How to get a high quality photo to sketch result

People often ask me how to get a “high quality” photo to sketch result. In my experience it comes down to five habits.

1. Start from the original file

Use the photo straight from your camera roll, not a version downloaded from a chat app or social network. Those copies are often resized and compressed.

2. Don’t go too small or too huge

Very small images produce jagged lines. Extremely large images can slow down any browser based tool. A long side of roughly 1,500 to 3,000 pixels is a comfortable working range in my experience, and the image size converter can get you there in seconds.

3. Lift contrast slightly before converting

A small contrast boost in your phone’s photo editor makes edges clearer. Don’t overdo it, or shadows turn into black blobs.

4. Compare all three styles

Every photo reacts differently. Click through Pencil Sketch, Charcoal and Outline before downloading. It takes ten seconds.

5. Zoom in before you print

Open the downloaded file and zoom to 100%. Check the eyes, the hands and the edges. If something looks off, try a different photo or style rather than printing a weak result.

Photo to sketch without watermark: what to check

A watermark ruins a printed gift, so it is worth checking for one before you commit to any tool. Many free sketch apps and websites add a logo, shrink your download, or ask you to sign up before you can save.

The X2X Image to Sketch converter is listed as free to use with no registration or payment required. Whatever tool you use, my advice is the same:

  • Convert one test image first.
  • Open the download and zoom into all four corners.
  • Check the pixel dimensions match what you expected.

If a tool passes those three checks, you can trust it with a full batch.

Is your photo private when you convert it?

X2X Converter states that its conversions happen locally in your browser and that nothing is uploaded. For a photo to sketch tool, that matters, because the photos people convert are often personal: family portraits, children, pets and homes.

As a general habit with any online tool, I still recommend you avoid uploading photos that contain sensitive information you wouldn’t want anyone to see, such as ID documents or private paperwork. If a photo includes a face or detail you’d rather hide, you can blur that area first before converting.

Popular ways to use a photo to sketch result

Here are the photo to sketch uses I see most often, with the style I would pick for each.

Drawing references for artists

Artists use a pencil photo to sketch version to study light, shadow and proportion before drawing by hand. The sketch makes it easier to see shapes without colour getting in the way.

Personalised gifts

A pencil or charcoal portrait of a parent, partner or pet makes a thoughtful framed gift or birthday card. Pick a photo with good side light and a simple background.

Colouring pages for kids

Turn family photos, pets or favourite toys into outline sketches, print them and let children colour them in. This is one of my favourite uses.

Tattoo and craft ideas

An outline sketch is a good starting point for a tattoo concept, an embroidery pattern or a laser engraving draft. For tattoos, always hand the idea to a professional artist who will redraw it as a proper stencil.

Social media posts and profile pictures

A photo to sketch effect stands out in a feed full of filtered photos. Charcoal works especially well for moody profile pictures.

Students and school projects

Students use sketches for art assignments, presentation slides and posters. The outline style is handy when a project needs simple diagrams of real objects.

When a sketch isn’t the right look

Bright, colourful photos sometimes lose their charm in black and white. If that happens, try the image to cartoon converter instead, which keeps colour and adds a bold comic, anime or 3D cartoon style.

Common photo to sketch problems and quick fixes

ProblemLikely causeQuick fix 
Sketch is too faintLow contrast photoRaise contrast slightly or try Charcoal
Sketch is too darkHeavy shadows in the photoBrighten shadows or switch to Pencil Sketch
Background full of random linesBusy backgroundCrop tighter or blur the background first
Jagged, pixelated linesPhoto is too smallUse the original, larger file
Face looks oddFlat lighting or soft focusChoose a photo with side light and sharp eyes
Blocky marks around edgesHeavily compressed JPGUse a fresh copy of the original photo

Can you legally sketch someone else’s photo?

You can run your own photos through a photo to sketch tool freely. Other people’s photos need more care. The US Copyright Office lists “a drawing based on a photograph” as an example of a derivative work in its circular on derivative works, and it explains that only the copyright owner has the right to prepare or authorise adaptations of a work.

In plain terms (this is general information, not legal advice):

  • Your own photos: convert and use them however you like.
  • Photos of friends and family: usually fine for private gifts, but ask before posting publicly.
  • Stock photos: check the licence before using a sketch commercially.
  • Random internet images or other photographers’ work: don’t sell sketches of them without permission.

If you plan to sell sketches, a quick conversation with the photographer or a legal professional is worth it.

Key Takeaways

  • Photo to sketch conversion keeps the edges and tones of a photo and removes colour, creating a hand drawn look.
  • On X2X Converter you can turn a photo to sketch online free in under a minute: upload, choose a style, preview, download.
  • Pencil Sketch suits portraits and pets, Charcoal suits dramatic scenes, and Outline suits tracing, colouring and crafts.
  • Sharp focus, side light and a plain background matter more than megapixels.
  • Start from the original JPG or PNG, aim for a sensible image size, and compare all three styles before downloading.
  • Check any tool’s download for watermarks and resolution before converting a batch.
  • Use your own photos, or get permission, before publishing or selling a sketch.

Frequently Asked Questions

How do I turn a picture into a sketch?

Open the X2X Image to Sketch converter, upload your picture, and choose Pencil Sketch, Charcoal or Outline. Check the instant preview, switch styles if needed, then click Download Sketch. For the best result, use a sharp photo with side lighting and a plain background, and crop so your subject fills the frame.

Is photo to sketch free?

Yes. The X2X photo to sketch converter is free to use with no registration or payment required. You can convert as many photos as you like in your browser. Some other apps limit free downloads or add watermarks, so it is always worth testing one image with any tool before converting a full batch.

Can I convert a photo to sketch online free on my phone?

Yes. The X2X converter runs in the browser, so it works on Android phones and iPhones without installing an app. Open the page, tap the upload area, pick a photo from your gallery, choose a style and download the sketch straight to your phone.

What is the difference between image to sketch and photo to sketch?

There is no real difference. Image to sketch, picture to sketch and photo to sketch all describe turning a picture into a drawing like image. The same tool handles camera photos, scans, screenshots and digital artwork, as long as the file is a common format like JPG or PNG.

Which sketch style is best for a portrait sketch?

Pencil Sketch is usually best for a portrait sketch because it keeps soft shading on skin and fine detail around the eyes. Choose Charcoal if the portrait has strong side light and you want a dramatic look. Use Outline if you plan to trace, paint or colour the portrait.

How do I get a realistic sketch from a photo?

Pick a sharp photo with side lighting and a simple background, then use the Pencil Sketch style. Start from the original camera file, raise contrast slightly if the photo looks flat, and crop so your subject is large in the frame. These steps give the converter strong, clear edges to work with.

Can I convert a JPG to sketch?

Yes. JPG is the most common format for photo to sketch conversion and works well. Use the original high quality JPG from your camera or phone rather than a compressed copy from a messaging app, because heavy compression can add blocky artefacts that show up as extra marks in the sketch.

How do I get a high quality photo to sketch result?

Start with the original, sharp photo, keep the long side roughly between 1,500 and 3,000 pixels, and lift contrast slightly before converting. Compare all three styles, then zoom into the downloaded file at full size to check the eyes, edges and corners before you print or share it.

Is there a photo to sketch tool without watermark?

The X2X Image to Sketch converter is listed as free with no registration or payment required. With any tool, convert one test image first, open the download and zoom into the corners, and check the pixel size. If all three look right, the tool is safe to use for a full batch.

Can I use a sketch of my photo for a tattoo?

You can use an outline sketch as a starting idea for a tattoo. Take it to a professional tattoo artist, who will adjust the design and redraw it as a stencil suited to your skin and placement. Make sure the original photo is yours or that you have permission to use it.

Conclusion

Turning a photo to sketch is quick when you know what the tool needs. Give it a sharp photo with side light and a simple background, choose the style that matches your subject, and compare all three options before you download. Pencil for detail, charcoal for drama, outline for tracing and colouring.

In my experience, the people who love their results are the ones who spend a few seconds picking the right photo. Everything after that is a click.

Ready to try it? Open the X2X Image to Sketch converter, upload one of your favourite photos, and see it as a pencil, charcoal and outline sketch in seconds. It is free, it runs in your browser, and you don’t need an account to get started.

XML vs JSON: Key Differences, Performance and When to Use Each

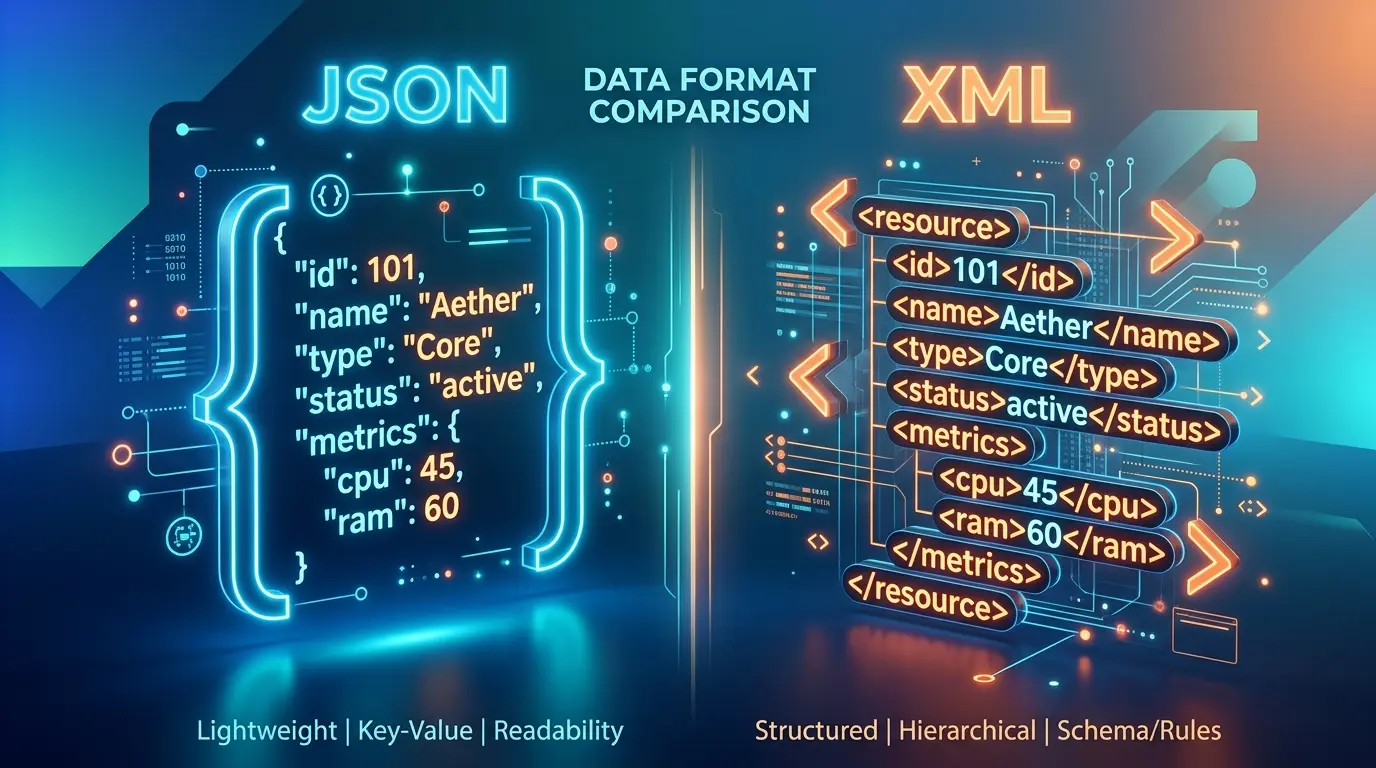
XML vs JSON comparison showing JSON for modern web APIs and XML for enterprise systems.

XML vs JSON comes down to structure versus simplicity. JSON is a lightweight key value format that is shorter, faster to parse in most web stacks and native to JavaScript, so it dominates REST APIs. XML uses tags, attributes, namespaces and schemas, which makes it stronger for documents, strict validation and older enterprise systems.

Introduction

If you have ever opened an API response and wondered why one service sends curly braces while another sends angle brackets, you have already met the XML vs JSON question. I get asked about it all the time, usually by people who just need their data to move from one system to another without breaking.

Here is my honest take after working with both sides of XML vs JSON on conversion tools: neither one is “better” in every case. JSON wins most modern web work. XML still wins in places where documents need strict rules, mixed content or long term stability. The trick is knowing which situation you are in.

Below you will find the real differences, the same data written in both formats, an honest XML vs JSON look at performance and security, and a simple way to decide. If you already know you need to switch formats, you can paste your file into our free XML to JSON converter and get clean output in seconds.

What Is XML?

Before we compare XML vs JSON, let’s define each one. XML stands for Extensible Markup Language. It is a text based markup language that stores data inside custom tags you define yourself, like <customer> or <price>. Every opening tag needs a matching closing tag, and the whole document must sit inside one root element.

XML became a W3C Recommendation in February 1998, and the current XML 1.0 Fifth Edition was published in November 2008. One line in the official design goals tells you a lot about the format: the W3C states that terseness in XML markup is of minimal importance. In other words, XML was never built to be short. It was built to be explicit, self describing and easy for programs to validate.

Key features of XML:

  • Custom tags that describe the meaning of the data
  • Attributes for extra details inside a tag
  • Namespaces to avoid name clashes when you mix vocabularies
  • Comments, processing instructions and CDATA sections
  • Schema support (DTD and XSD) for strict validation
  • Mixed content, meaning text and tags can sit side by side in one element

What Is JSON?

The second half of the XML vs JSON pair is JSON, which stands for JavaScript Object Notation. It is a lightweight data interchange format built from key value pairs and arrays. JSON came from JavaScript object syntax, but today almost every programming language can read and write it.

The current standard, RFC 8259 from the IETF, says JSON can represent four primitive types (strings, numbers, booleans and null) and two structured types (objects and arrays). That is the whole vocabulary. This small rule set is exactly why JSON feels so easy.

Key features of JSON:

  • Objects in curly braces { } and arrays in square brackets [ ]
  • Native data types, so numbers and booleans are not just text
  • No closing tags, so files are shorter
  • Direct mapping to objects in JavaScript, Python, PHP and most modern languages
  • No comments allowed in standard JSON

When you work with JSON every day, readability matters. Our JSON prettifier formats messy or minified JSON into clean, indented text so you can spot mistakes quickly.

XML vs JSON: Same Data, Two Formats

The fastest way to understand XML vs JSON is to look at one small record written both ways. Here is a simple online order.

In XML:

<order id=”1042″>
  <customer>Sara Khan</customer>
  <items>
    <item sku=”TSH-01″ qty=”2″>T-shirt</item>
    <item sku=”CAP-07″ qty=”1″>Cap</item>
  </items>
  <paid>true</paid>
</order>

In JSON:

{
  “order”: {
    “id”: 1042,
    “customer”: “Sara Khan”,
    “items”: [
      { “sku”: “TSH-01”, “qty”: 2, “name”: “T-shirt” },
      { “sku”: “CAP-07”, “qty”: 1, “name”: “Cap” }
    ],
    “paid”: true
  }
}

A few things jump out:

  1. XML repeats every tag name twice, once to open and once to close.
  2. XML uses attributes (sku, qty) while JSON turns them into normal keys.
  3. In JSON, 1042 is a number and true is a boolean. In XML, everything is text unless a schema says otherwise.
  4. JSON needs an explicit array for the list of items. XML just repeats the <item> element.

I ran a quick size check on these two exact snippets. With whitespace removed, the XML came to 165 bytes and the JSON to 146 bytes. That is a small sample, and the gap changes a lot with your data shape. Attribute heavy XML can be compact, while deeply nested XML with long tag names grows fast.

XML vs JSON Comparison Table

Here is the XML vs JSON comparison at a glance. Bookmark it if you need a fast XML vs JSON reference during a project:

FeatureXMLJSON 
Full nameExtensible Markup LanguageJavaScript Object Notation
TypeMarkup languageData interchange format
StructureTree of elements and attributesObjects, arrays, key value pairs
Data typesText by default, types via schemaString, number, boolean, null, object, array
CommentsSupportedNot supported
NamespacesSupportedNot supported
Schema validationDTD, XSD (very mature)JSON Schema
Mixed contentYesNo
Typical sizeLarger (closing tags)Smaller
Browser parsingDOMParserJSON.parse()
Common usesDocuments, SOAP, RSS, office files, configsREST APIs, web apps, NoSQL, configs
EncodingUTF-8 or UTF-16 required supportUTF-8 for open data exchange

XML vs JSON Syntax Differences

Syntax is where most beginners feel the XML vs JSON difference first.

Tags versus key value pairs

XML wraps every value in named tags. JSON writes a key, a colon and a value. That alone removes a lot of characters from JSON files.

Attributes versus nested keys

XML lets you place data either inside an element or as an attribute. Teams often argue about which one to use. JSON has no attributes, so there is only one way to store a value. Fewer choices means fewer style fights.

Arrays

JSON has real arrays. XML has no array type. You simply repeat elements, and the receiving program has to know that <item> can appear many times. This causes a classic conversion bug I see often: when an XML list contains only one item, some converters output a single object instead of an array. Always check this after converting.

Quotes and strict rules

JSON requires double quotes around keys and strings. No single quotes, no trailing commas and no comments. XML is strict too: tags are case sensitive, every tag must close, and special characters like < and & must be escaped.

Binary data

On binary data, XML vs JSON is a tie. Both formats are text, so neither can hold raw binary data like images or PDFs. The usual fix in both cases is to encode the file as a Base64 string and place it inside an element or a key. If you need to do that by hand, our Base64 converter encodes and decodes strings in one step. Keep in mind that Base64 makes data roughly a third larger, so large files are better sent as links.

XML vs JSON Performance: Which Is Faster?

In most web applications, JSON is faster to parse and lighter to send. That is the short answer to the XML vs JSON performance question, but the details matter.

Why JSON usually wins

These are the main reasons JSON leads most XML vs JSON performance tests:

  • Smaller payloads. No closing tags means fewer bytes over the network.
  • Simpler grammar. JSON parsers have less to handle: no namespaces, no entities, no DTDs.
  • Native browser support. JavaScript turns JSON text into objects with one call to JSON.parse().
  • Modern libraries. For example, Microsoft describes its System.Text.Json library for .NET as designed for high performance and low memory allocation, with built in UTF-8 support.

When the gap shrinks

  • Compression. With gzip or Brotli turned on, repeated XML tags compress very well, so the wire size difference gets smaller.
  • Streaming parsers. XML has mature streaming parsers (SAX and StAX) that read huge files without loading everything into memory.
  • Your actual bottleneck. In my experience, database queries and network latency usually cost more time than parsing. Do not switch formats only for speed unless you have measured the problem.

So for XML vs JSON performance, measure your own payloads before you decide. A quick test with real data beats any general rule.

XML vs JSON Validation and Schemas

Validation is where XML has a long head start in the XML vs JSON debate.

XML has two main schema options. DTD is the older one, built into the W3C XML 1.0 specification itself. XSD (XML Schema Definition) is much richer. The current W3C XML Schema Definition Language (XSD) 1.1 lets you define data types, required elements, value ranges, patterns and even assertions. Banks, healthcare systems and government data exchanges lean on XSD because it can reject bad documents before they enter a system.

JSON has JSON Schema, which covers most of the same ground: types, required fields, enums, patterns and nested rules. It is widely used in API design and tools like OpenAPI. It is younger than XSD, but for typical web data it is more than enough.

My rule of thumb: if a regulator, partner or legacy system already gives you an XSD, stay with XML. If you are designing a new API, JSON Schema is easier for your team to write and read.

XML vs JSON Security: Is JSON More Secure Than XML?

Neither format is secure or insecure on its own. Security depends on the parser and how you use it. Still, the XML vs JSON security picture is different in a few important ways.

XML risks

Most XML vs JSON security differences start here. XML supports entities and DTDs, and that flexibility opens real attack paths:

  • XML External Entity (XXE) injection. A malicious document can tell a weakly configured parser to read local files or call internal URLs.
  • Entity expansion attacks. Nested entities can blow up memory use, often called the billion laughs attack.

The OWASP XML External Entity Prevention Cheat Sheet recommends disabling DTDs whenever possible and turning off external entity resolution. If you accept XML from users or third parties, follow that advice.

JSON risks

JSON has a smaller attack surface because it has no entities or external references. But it is not risk free:

  • Never parse JSON with eval(). The RFC 8259 JSON standard itself warns that this is an unacceptable security risk.
  • Watch for duplicate keys, huge numbers and deeply nested payloads that can confuse or overload parsers.
  • Validate input with a schema before trusting it.

So is JSON more secure than XML? It is simpler to handle safely, which helps. But a careless JSON setup can still be attacked, and a hardened XML parser can be perfectly safe.

Advantages of JSON Over XML

When people search XML vs JSON, they usually want to know what each side brings. Here are the advantages of JSON over XML that matter most in daily work:

  1. Shorter and cleaner. No closing tags, so files are smaller and easier to scan.
  2. Real data types. Numbers, booleans and null are built in.
  3. Native to JavaScript. Front end developers can use JSON directly.
  4. Arrays are explicit. Lists are clear, so there is less guessing during parsing.
  5. Faster to learn. A beginner can understand JSON syntax in a few minutes.
  6. First choice for REST APIs. Most public web APIs today send and receive JSON.
  7. Database support. Document databases store JSON natively, and Microsoft SQL Server has included JSON functions since SQL Server 2016.

Advantages of XML Over JSON

XML is older, but it still holds its ground in the XML vs JSON comparison with these strengths:

  1. Rich validation. XSD can define strict, detailed rules.
  2. Namespaces. You can combine vocabularies from different sources without name clashes.
  3. Comments. You can document a file right inside it.
  4. Mixed content. Text and markup can live together, which suits books, legal texts and articles.
  5. Transformation tools. XSLT can turn XML into HTML, PDF layouts or other XML.
  6. Querying. XPath and XQuery give precise ways to find data inside large documents.
  7. Long term stability. Many industry standards, file formats and government systems are built on XML and are not going away.

When to Use XML vs JSON

Choosing between XML vs JSON gets easier when you look at the job, not the format.

Choose JSON when

In the XML vs JSON decision, JSON is the safer default when:

  • You are building or calling a REST API
  • Your front end runs on JavaScript or a modern framework
  • You store data in a document database
  • You want small, fast payloads for mobile apps
  • Your data is mostly records: users, products, orders, settings

Choose XML when

XML is the stronger side of XML vs JSON when:

  • A partner, government body or legacy system requires it
  • You work with SOAP web services
  • You need strict validation with XSD
  • Your content is document style with mixed text and markup
  • You produce RSS feeds, sitemaps or office file formats (DOCX and XLSX are XML inside zip packages)

A simple decision checklist

Ask these four questions:

  1. Does the system on the other end already expect one format? Use that.
  2. Is the data a document or a record? Documents lean XML, records lean JSON.
  3. Do you need comments, namespaces or mixed content? That points to XML.
  4. Is speed in a browser or mobile app the priority? That points to JSON.

XML vs JSON in Real Projects

Theory is useful, but XML vs JSON decisions usually happen inside a real task. Here are four situations I see often and how I would call each one.

A mobile app talking to its own backend. This is the easiest XML vs JSON call. Use JSON. You control both ends, payloads stay small and every mobile platform parses it well.

An online store syncing orders with an accounting system. Check the accounting side first. Many ERP and invoicing systems still accept XML only, so XML vs JSON here is decided by the receiver, not by you. Convert at the edge if your store speaks JSON.

A content team publishing long articles with footnotes and inline formatting. XML or an XML based format handles mixed content far better. In this XML vs JSON case, JSON would force you to split text into awkward chunks.

A settings file for a small script. Either works. JSON is shorter, but if your team wants comments in the file, XML (or YAML) is friendlier. This is the rare XML vs JSON case where team habit is a fair tiebreaker.

Is XML Still Used in 2026?

Yes, XML is still used, and widely. It just moved out of the spotlight. XML vs JSON is no longer a fight for the same territory. Each format settled where it fits best.

You will find XML today in:

  • XML sitemaps that help search engines discover your pages
  • RSS and Atom feeds for blogs and podcasts
  • SOAP services in banking, insurance and telecom
  • Office documents and many e-invoicing standards
  • Android layout files and many Java build files
  • SVG graphics, which are XML too

Why Is JSON Replacing XML in Web Development?

JSON took over web development for practical reasons. AJAX made browsers fetch data constantly, and JSON matched JavaScript objects with zero extra work. REST APIs grew, mobile apps needed lighter payloads, and NoSQL databases stored JSON documents directly.

Can JSON replace XML completely? Not really. JSON cannot do mixed content, has no namespaces and no comments. For document heavy and strictly validated systems, XML stays. In my view, the smarter question in any XML vs JSON discussion is “which one does this specific job need?”

How to Convert XML to JSON (and Back)

Once you settle the XML vs JSON question, the next step is often conversion. Most teams eventually need to convert data between formats. Maybe an old supplier sends XML, but your app speaks JSON. Here is a simple process.

Step by step: XML to JSON

  1. Open the XML to JSON tool on X2X Converter.
  2. Paste your XML or upload the file.
  3. Click convert.
  4. Check the output: attributes, arrays and empty elements.
  5. Copy or download the JSON.

Conversion runs in your browser, so the data stays on your device.

Common conversion problems to check

  • Attributes. Many converters prefix them with @ or place them in a separate object. Decide on one convention.
  • Single item lists. One <item> may become an object instead of an array.
  • Text with attributes. An element like <item sku=”A”>Cap</item> needs a key for the text, often #text.
  • Data types. XML text like “1042” might stay a string. Fix types where your app needs numbers.
  • Namespaces. Prefixes such as ns:price may appear in your keys.

JSON to XML

Going the other way, every JSON key becomes an element. Arrays become repeated elements, and you need to choose a root element name because JSON does not require one. Keys with spaces or starting with numbers are not valid XML tag names, so they must be renamed.

Related data tools

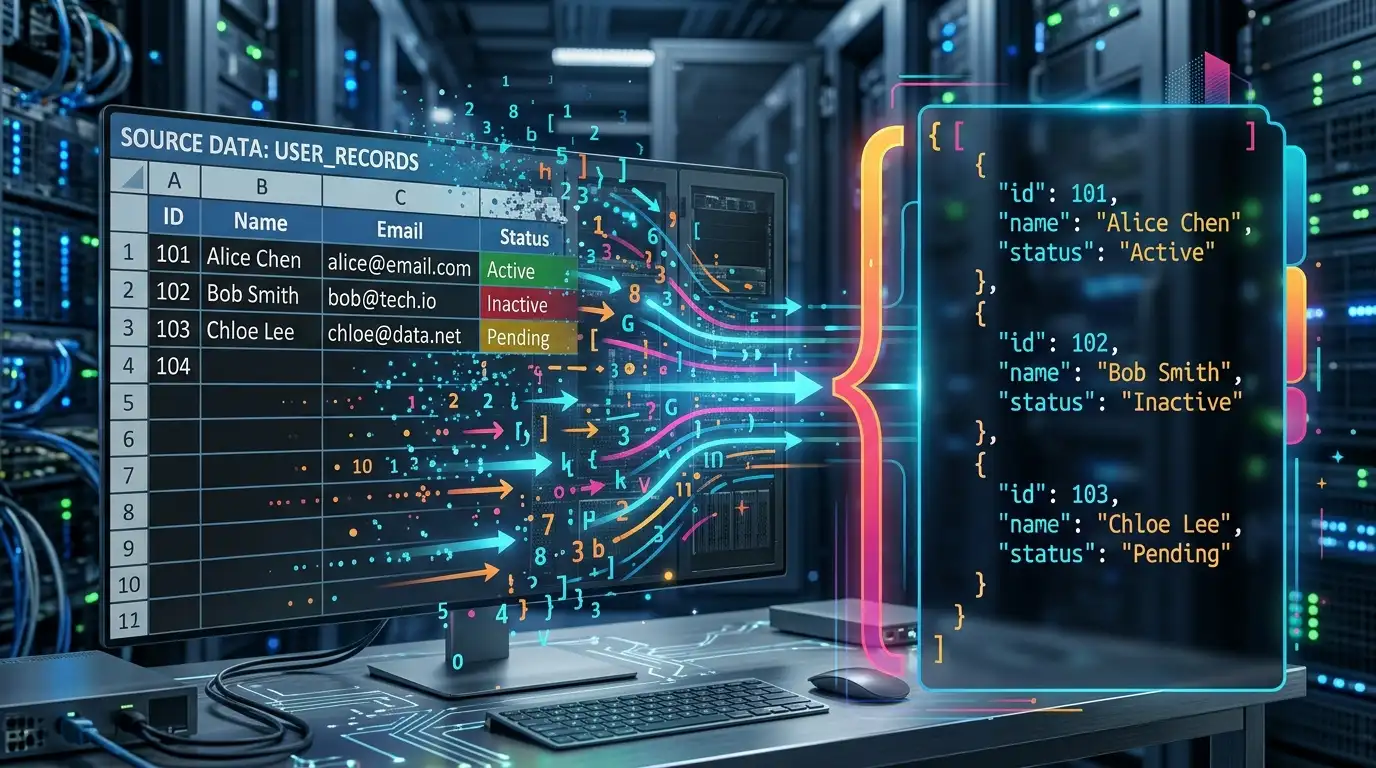
Once your data is in JSON, you can do more with it. If you start from a spreadsheet, the Excel to JSON converter turns rows into clean JSON objects. And if you need to show JSON data on a web page, the JSON to HTML table converter builds a readable table for you.

Common Mistakes When Choosing Between XML and JSON

I see the same XML vs JSON mistakes again and again:

  1. Treating XML vs JSON as a fashion choice. Picking a format because it feels modern is not a technical reason.
  2. Switching formats without a reason. If an XML integration works and partners depend on it, rewriting it to JSON adds risk with little gain.
  3. Ignoring the receiver. The other system’s needs matter more than your preference.
  4. Assuming JSON is always secure. Validate every input.
  5. Leaving XML parsers on default settings. Disable DTDs and external entities for untrusted input.
  6. Forgetting about arrays during conversion. Test with one item, many items and zero items.
  7. Adding comments to JSON files. Standard JSON parsers will reject them.

XML vs JSON for SEO and Structured Data

This is a question I find interesting as someone who works on websites. For SEO, XML vs JSON is not an either or question. Both formats show up, but in different roles.

  • XML powers sitemaps. Search engines read your sitemap.xml to find pages.
  • JSON powers structured data. Google recommends JSON-LD, a JSON based format, for schema markup on web pages.

So for site owners, XML vs JSON is not a choice at all. You will likely use both on the same website.

Key Takeaways

  • XML vs JSON is a trade off between strict structure and lightweight simplicity.
  • JSON is shorter, uses native data types and is the default for REST APIs and web apps.
  • XML offers namespaces, comments, mixed content and mature XSD validation.
  • JSON usually parses faster, but compression and real bottlenecks matter more than format alone.
  • Security depends on parser setup: disable DTDs for XML and never use eval() for JSON.
  • XML is still used for sitemaps, RSS, SOAP, office files and many industry standards.
  • Most real XML vs JSON decisions are made by the receiving system, not by personal taste.
  • Converting is easy, but check attributes, arrays and data types after every conversion.

Frequently Asked Questions

1. What is the main difference between XML and JSON?

In the XML vs JSON comparison, XML is a markup language that stores data in custom tags and attributes, with support for namespaces, comments and schemas. JSON is a lightweight data format built from key value pairs and arrays. JSON is shorter and simpler, while XML is more expressive and better for strict document validation.

2. Is JSON better than XML?

In the XML vs JSON choice, JSON is better for most web APIs, mobile apps and JavaScript projects because it is smaller, faster to parse and easier to read. XML is better when you need strict validation, namespaces, comments or document style content. The right choice depends on your project and on what the receiving system expects.

3. Which is faster, XML or JSON?

In most XML vs JSON speed tests, JSON is faster to parse and transfer because it has a simpler grammar and no closing tags. The gap gets smaller when you compress data or use streaming XML parsers. For real projects, test with your own data, since network and database time often matter more than parsing.

4. Can JSON replace XML completely?

No. In the XML vs JSON shift, JSON has replaced XML in most web APIs, but it cannot handle mixed content, namespaces or comments. Sitemaps, RSS feeds, SOAP services, office files and many industry standards still rely on XML, so both formats will keep working side by side.

5. Is JSON more secure than XML?

On the XML vs JSON security question, JSON has a smaller attack surface because it has no entities or external references, so XXE attacks do not apply. That does not make it automatically safe. You still need to validate input, avoid eval and limit payload size. A properly hardened XML parser can be just as safe.

6. Why is JSON replacing XML?

JSON matches JavaScript objects directly, which tipped the XML vs JSON balance and made it a natural fit for AJAX, REST APIs and single page apps. It is also lighter for mobile networks and maps easily to modern databases. Developers find it quicker to write and read, so it became the default for new web services.

7. Is XML still used today?

Yes. Despite the XML vs JSON debate, XML is still used in XML sitemaps, RSS and Atom feeds, SOAP web services, office document formats, SVG graphics, e-invoicing and many banking and healthcare systems. It is less common in new web APIs, but it remains a core format across many industries.

8. Can I convert XML to JSON without losing data?

Usually yes. Whichever side of XML vs JSON you start from, you need to check a few things. Attributes, repeated elements, mixed text and namespaces need clear rules during conversion. After converting, confirm that single items still appear as arrays where needed and that numbers and booleans have the right types.

9. Does JSON support comments?

No. Standard JSON does not allow comments, and most parsers will reject a file that contains them. Some tools accept extended formats such as JSONC or JSON5, but those are not standard JSON. If you need comments, put notes in a separate field or use a format that supports them.

10. Which format is easier for beginners to learn?

In XML vs JSON terms, JSON is easier for most beginners. It has only a few rules: objects, arrays, key value pairs and six data types. XML has more concepts to learn, such as attributes, namespaces, entities and schemas. That said, basic XML is still readable, especially when tag names are descriptive.

Conclusion

The XML vs JSON choice is easier than it first looks once you focus on the job in front of you. Use JSON for modern APIs, web apps and anything that talks to JavaScript. Use XML when you need strict validation, namespaces, mixed content or when an existing system expects it. Most real projects end up using both.

When your data arrives in the wrong format, you do not need to rewrite anything by hand. Paste your file into the X2X Converter XML to JSON tool, check the output, and move on with your project. It is free, needs no sign up and runs right in your browser.

SSL Certificate Formats Explained: PEM, CRT, DER, PFX and How to Convert Them

Cybersecurity analyst working with SSL certificate formats on a monitor.

Quick Answer

SSL certificate formats are the different ways a certificate and its private key are stored in a file. The main ones are PEM (Base64 encoded text), DER (binary encoded), PFX or P12 (a password-protected bundle with the private key) and P7B (a chain without a private key). Extensions like .crt and .cer only name the file; the encoding inside is what matters.

Introduction

The first time I installed a certificate on a Windows server, the certificate authority sent me a ZIP with a .crt file, a .ca-bundle file and nothing else. IIS asked for a .pfx. I spent an hour thinking I had downloaded the wrong thing. I hadn’t. I just didn’t understand SSL certificate formats yet.

If you are here, you probably have a similar problem. Your hosting panel wants one file type, your certificate provider gave you another, and every forum answer starts with a different OpenSSL command. The good news is that the whole topic is smaller than it looks. Once you know the difference between encoding and file extension, and which servers want which bundle, almost every certificate error makes sense.

In this guide I walk through every common format, show you how to tell them apart in seconds, and give you the exact commands I use to convert between them. If you would rather skip the terminal, our free SSL certificate converter handles PEM, CER and PFX conversions directly in your browser. It is one of the many free online converter tools we built for exactly this kind of everyday file headache.

What Are SSL Certificate Formats?

SSL certificate formats are standardized ways of packaging an X.509 certificate, and sometimes its private key and chain, into a file that software can read. The certificate data itself is the same everywhere. What changes is how that data is encoded (text or binary) and what else is bundled with it.

It helps to separate three ideas that people often mix up:

  1. The certificate structure. Every SSL/TLS certificate follows the X.509 standard. It contains the domain name, the public key, the issuer, validity dates and a signature.
  2. The encoding. That X.509 structure can be saved as raw binary (DER) or as Base64 text wrapped in header lines (PEM).
  3. The container. Some SSL certificate formats are containers that hold more than one item. PKCS#12 (PFX/P12) can hold the certificate, the private key and the chain together. PKCS#7 (P7B) holds certificates only.

When I explain this to clients, I compare it to a document. The words are the certificate. PEM and DER are like saving it as plain text or as a compressed file. PFX is like zipping the document together with a key and putting a password on the ZIP.

Base64 encoded vs binary encoded certificates

This one distinction solves most confusion around SSL certificate formats.

  • Binary encoded (DER): The certificate is stored as raw bytes. If you open it in Notepad, you see unreadable symbols.
  • Base64 encoded (PEM): The same binary bytes are converted into readable ASCII characters and wrapped between lines like —–BEGIN CERTIFICATE—– and —–END CERTIFICATE—–.

PEM is literally DER that has been Base64 encoded. If you want to see how that text conversion works under the hood, try pasting a small string into our Base64 encoder and decoder. The same principle turns a binary certificate into the readable block you copy into a hosting panel. I also wrote a separate explainer on how Base64 encoding works if you want the full picture of why data grows by about a third when it is encoded.

The IETF formalized these text labels in RFC 7468 textual encodings, which defines labels such as CERTIFICATE, PRIVATE KEY and PKCS7. That is why every tool, from OpenSSL to Windows, recognizes the same header lines.

SSL Certificate File Types at a Glance

Here is the comparison table of SSL certificate formats I keep pinned for my own work. It covers the SSL certificate file types you will meet on almost any project.

FormatCommon extensionsEncodingHolds private key?Holds chain?Typical platforms
PEM.pem, .crt, .cer, .keyBase64 textCan (in a separate block or file)Yes, stackedApache, Nginx, Linux, cPanel
DER.der, .cerBinaryNo (usually)NoJava, some Windows tools, embedded devices
PKCS#12.pfx, .p12Binary, password protectedYesYesIIS, Windows, Azure, Exchange, Tomcat
PKCS#7.p7b, .p7cBase64 or binaryNoYesWindows, Java keystores, Tomcat
Private key.keyUsually Base64 PEMIt is the keyNoPaired with PEM certificates

Two things from this table are worth remembering. First, only PFX/P12 carries the private key inside the same protected file. Second, the same extension (.cer or .crt) can appear in more than one row, which is why extensions alone are unreliable.

SSL Certificate File Extensions: Why .crt and .cer Can Be Anything

SSL certificate file extensions are labels, not proof of what is inside. A .crt file from one certificate authority can be PEM text, while a .crt from another can be binary DER. Windows tends to call certificates .cer, while Linux tools prefer .crt or .pem.

What is a CRT file?

A CRT file is a certificate file, usually containing a single X.509 certificate for your domain or an intermediate CA. In most Linux and Apache setups, a .crt file is PEM encoded, so you can open it in a text editor and see the BEGIN CERTIFICATE header. It does not contain your private key.

What is a CER file?

A CER file is the same idea with a Windows flavor. Windows can export a .cer as either “DER encoded binary X.509” or “Base-64 encoded X.509”. Same extension, two different encodings. In my experience, this is the single most common cause of “unable to load certificate” errors, because someone renamed a binary .cer to .pem and expected it to work.

PEM vs CRT: is there a difference?

The PEM vs CRT question comes up constantly, and the honest answer is that they are not opposites. PEM describes an encoding. CRT describes a file extension. A .crt file is very often a PEM encoded certificate. So when a panel asks for a “PEM certificate” and you have cert.crt, open it first. If you see the BEGIN CERTIFICATE line, it already is PEM, and in most cases you can upload it as is or simply rename it to .pem.

The difference matters only when the .crt is binary. Then you need to convert it from DER to PEM, which I cover below.

The .key file

The .key file holds your private key, normally in PEM format with a header such as —–BEGIN PRIVATE KEY—– or —–BEGIN RSA PRIVATE KEY—–. Treat it like a password. Never email it, never paste it into a public tool you do not trust, and keep a secure backup. If you lose it, the matching certificate becomes useless and you must reissue.

How to Identify a Certificate Format in 30 Seconds

Before converting anything, I always confirm what I actually have, because SSL certificate formats can look identical from the file name alone. Here is my quick routine.

  1. Open the file in a plain text editor. If you see —–BEGIN CERTIFICATE—–, it is PEM. If you see random symbols, it is binary (DER or PFX).
  2. Count the BEGIN blocks. One block means a single certificate. Two or three blocks mean a chain bundle (your certificate plus intermediates).
  3. Look for a key block. A BEGIN PRIVATE KEY section means the file contains the private key too.
  4. Check the size and name. A binary file named .pfx or .p12 that asks for a password when opened in Windows is PKCS#12.
  5. Confirm with OpenSSL. Run the OpenSSL command below. If it prints certificate details, the file is a PEM certificate.

openssl x509 -in certificate.crt -text -noout

If that command fails with an error about loading the certificate, add -inform der. If it then works, your file is binary DER.

openssl x509 -in certificate.cer -inform der -text -noout

This two-step check has saved me from countless wrong conversions. I also use the output to confirm the domain name in the Subject Alternative Name list. When a client sends me a long URL and I need to be sure which hostname the certificate must cover, I drop it into a URL parser for extracting the hostname and compare the result with the SAN entries.

Which SSL Certificate Format Does Your Server Need?

Knowing the theory is nice. Knowing which SSL certificate formats your platform expects is what actually gets HTTPS working. This is the cheat sheet I use.

Apache and cPanel

Apache uses separate PEM files: one for the certificate, one for the private key, and usually one for the intermediate chain (or the chain appended to the certificate file in newer versions). cPanel asks you to paste the certificate, private key and CA bundle as PEM text into three boxes.

Nginx

Nginx wants PEM too, but it prefers your certificate and intermediates in one file. The official Nginx ssl_certificate directive says the primary certificate goes first, followed by the intermediate certificates, and the private key sits in a separate file referenced by ssl_certificate_key. Getting this order wrong is a classic cause of “incomplete chain” warnings on mobile browsers.

Microsoft IIS and Windows Server

IIS works best with a PFX file because it imports the certificate and private key in one step. If you generated the CSR on the same Windows server, you can complete the request with the .cer file instead. If you generated it elsewhere, you need a PFX.

Microsoft Azure App Service

Azure is strict. Microsoft’s own guide on uploading a password-protected PFX to Azure App Service lists the requirements: the certificate must be exported as a password-protected PFX and include the full chain of intermediate and root certificates. The page also notes that OpenSSL 3 changed the default PFX encryption, and it gives extra flags to keep the file compatible. I cover those flags in the conversion section.

Java, Tomcat and Android

Java applications traditionally used JKS keystores, but modern Java versions handle PKCS#12 keystores well, so a .p12 or .pfx is often the easiest route. Tomcat can point directly at a PKCS#12 file. Some older Java tools still expect DER or P7B for importing CA certificates.

Load balancers, CDNs and hosting panels

Most cloud consoles and CDNs ask for PEM text: the certificate body, the private key and the chain in separate fields. If you only have a PFX, you will need to convert PFX to PEM first.

How to Convert SSL Certificate Formats (OpenSSL Commands I Use)

OpenSSL is the standard tool for converting SSL certificate formats on Linux and macOS, and you can install it on Windows too. Below are the exact commands I reach for, with a short note on when each one applies. Replace the file names with your own.

Convert PEM to PFX

Use this when you have a PEM certificate and key from a Linux server and need to move to IIS, Azure or another Windows system.

openssl pkcs12 -export -out certificate.pfx -inkey private.key -in certificate.crt -certfile ca-bundle.crt

  • -export tells OpenSSL to create a PKCS#12 file instead of reading one.
  • -inkey is your private key.
  • -in is your domain certificate.
  • -certfile adds the intermediate chain.

OpenSSL will ask you to set an export password. Use a strong one. This is what makes it a password-protected PFX.

Compatibility tip: OpenSSL 3 encrypts PFX files with AES-256 by default. Some older Windows versions and services cannot read that. If an import fails with a vague “password incorrect” error even though the password is right, rebuild the file with the legacy settings Microsoft documents:

openssl pkcs12 -export -out certificate.pfx -inkey private.key -in certificate.crt -certfile ca-bundle.crt -keypbe PBE-SHA1-3DES -certpbe PBE-SHA1-3DES -macalg SHA1

Convert PFX to PEM

Use this when you receive a PFX from a Windows admin or a certificate authority and need PEM files for Apache, Nginx or a hosting panel.

Extract everything (certificate, chain and unencrypted key) into one file:

openssl pkcs12 -in certificate.pfx -out certificate.pem -noenc

Extract only the certificate:

openssl pkcs12 -in certificate.pfx -clcerts -nokeys -out certificate.crt

Extract only the private key:

openssl pkcs12 -in certificate.pfx -nocerts -noenc -out private.key

A few notes from experience. The official OpenSSL pkcs12 command reference explains that -nodes is deprecated since OpenSSL 3.0 and -noenc replaces it. Older tutorials still show -nodes, and it usually still works, but -noenc is the current option. If OpenSSL 3 refuses to open an older PFX with an “unsupported algorithm” error, add -legacy to the command, because older files often use RC2 or 3DES encryption that OpenSSL 3 only loads through its legacy provider.

Convert CRT to PEM

First, check the file with the identification routine above.

  • If your .crt already shows —–BEGIN CERTIFICATE—–, it is PEM. Rename it to .pem or copy it. No conversion needed.
  • If it is binary, convert it:

openssl x509 -in certificate.crt -inform der -out certificate.pem -outform pem

Convert DER to PEM

This is the same operation as converting a binary .crt or .cer:

openssl x509 -in certificate.der -inform der -out certificate.pem

And the reverse, PEM to DER, for Java tools or devices that only accept binary:

openssl x509 -in certificate.pem -outform der -out certificate.der

Convert P7B to PEM

P7B files often arrive from Windows-based certificate authorities. To pull every certificate out as PEM:

openssl pkcs7 -print_certs -in certificate.p7b -out certificate.pem

Remember that a P7B never contains a private key. If you need a PFX from a P7B, you must also have the original private key from when you created the CSR.

Check that a certificate and private key match

Before uploading anything, I confirm the key belongs to the certificate. For RSA keys, both commands should print the same hash:

openssl x509 -noout -modulus -in certificate.crt | openssl md5
openssl rsa -noout -modulus -in private.key | openssl md5

If the hashes differ, the key is from a different CSR, and no conversion will fix it.

Using an SSL Certificate Converter Online

Not everyone has OpenSSL installed, and typing long commands on a production server at midnight is nobody’s idea of fun. An online SSL certificate converter is useful when you need to switch between SSL certificate formats quickly, such as PEM, CER or PFX.

What I look for in any online converter:

  • Processing in the browser. Ideally the conversion happens locally so your private key is not uploaded to a server. Our converter at x2xconverter.com works client side for this reason.
  • Password support for PFX. It should let you set or enter the PFX password.
  • Clear input and output choices. You should pick the source and target format explicitly instead of relying on file extensions.

My honest advice: for public certificates and chains, an online tool is perfectly fine. For private keys on high-value production systems, I still prefer running OpenSSL on a machine I control. Use whichever matches your security policy.

Common Mistakes I See With Certificate Formats

Most certificate problems I troubleshoot are not caused by bad certificates. They come from small mistakes with SSL certificate formats. These are the ones I see most often.

  1. Renaming instead of converting. Changing cert.cer to cert.pem does nothing if the file is binary. Convert it properly.
  2. Missing intermediate certificates. The site works on your laptop but fails on some phones. The fix is almost always adding the CA bundle to the chain.
  3. Wrong chain order. For Nginx and Azure merges, your certificate goes first, then intermediates, then (where required) the root.
  4. Losing the private key. The key is created when you generate the CSR. If you generate the CSR on one server and try to install on another, carry the key with you, ideally inside a PFX.
  5. Extra spaces or missing lines when pasting PEM. Copying from an email can add spaces or break the BEGIN and END lines. Paste into a plain text editor first.
  6. Windows line endings on Linux. A PEM file edited in some Windows editors can carry hidden carriage returns that confuse older tools. Saving with Unix line endings fixes it.
  7. Forgetting the PFX password. Store it in your password manager the moment you set it. There is no recovery option.
  8. Using an unencrypted key longer than needed. After extracting a key with -noenc, restrict its file permissions and delete temporary copies.

A Real-World Walkthrough: Moving a Certificate From Linux to Windows

Here is a scenario I run into regularly, and it shows how SSL certificate formats change when you switch platforms. I wrote it step by step so you can follow along.

A site has been running on an Ubuntu server with Nginx. The owner wants to move it to a Windows server with IIS, keeping the same certificate until it expires.

  1. Collect the files from the Nginx server. Look at the Nginx config to find the ssl_certificate and ssl_certificate_key paths. You will usually find a full chain PEM file and a .key file.
  2. Confirm the formats. Open both in a text editor. The chain file shows two or more BEGIN CERTIFICATE blocks. The key file shows BEGIN PRIVATE KEY.
  3. Check that they match. Run the modulus comparison above.
  4. Build the PFX. Because the chain file already holds the certificate and intermediates, you can pass it directly:

openssl pkcs12 -export -out site.pfx -inkey private.key -in fullchain.pem

  1. Set a strong export password and note it securely.
  2. Copy site.pfx to the Windows server and import it in IIS Manager under Server Certificates.
  3. Bind it to the site on port 443 and test in a browser and with an SSL checker.

If the import complains about the password even though you typed it correctly, rebuild the PFX with the 3DES flags shown earlier. That one detail is the reason many people believe their PFX is corrupt when it is not.

Security Best Practices When Handling Certificate Files

Converting between SSL certificate formats means moving private keys around, so a few habits are worth building.

  • Keep private keys off shared drives and out of email and chat.
  • Use password-protected PFX files whenever a key has to travel between machines.
  • Set strict file permissions on .key files, for example readable only by the web server user.
  • Delete temporary conversion files once the certificate is installed.
  • Track expiry dates. Formats do not matter if the certificate has expired.
  • Keep a clean archive: certificate, chain, key (encrypted) and the CSR, labeled with the domain and expiry date.

If you want to understand the container behind PFX in more depth, the PKCS #12 personal information exchange standard describes how it protects private keys and certificates using password-based privacy and integrity modes. You do not need to read it to use PFX files, but it explains why the password is so important.

Key Takeaways

  • SSL certificate formats differ in encoding (Base64 text or binary) and in what they bundle (certificate, chain, private key).
  • PEM is Base64 encoded text with BEGIN and END lines. DER is the same data in binary form.
  • .crt and .cer are just extensions. They can be PEM or DER, so always open the file to check.
  • PFX/P12 is the only common format that bundles the certificate, chain and private key in one password-protected file.
  • P7B holds certificates and chains but never a private key.
  • Apache, Nginx and most hosting panels want PEM. IIS and Azure want PFX. Java handles PKCS#12 well.
  • OpenSSL can convert PEM to PFX, PFX to PEM, CRT to PEM and DER to PEM in one line each.
  • Most errors come from renaming instead of converting, missing intermediates, wrong chain order or a lost private key.

Frequently Asked Questions

1. What are the most common SSL certificate formats?

The most common SSL certificate formats are PEM, DER, PKCS#12 (PFX or P12) and PKCS#7 (P7B). PEM is used by Apache, Nginx and most Linux systems. PFX is preferred by Windows, IIS and Azure. DER appears in Java and some embedded devices, and P7B is often used to deliver certificate chains.

2. What is the difference between PEM and CRT?

PEM is an encoding, while CRT is a file extension. A .crt file is usually a PEM encoded certificate, so in many cases they are the same thing with different names. If your .crt file opens as readable text with a BEGIN CERTIFICATE line, it is already PEM.

3. What is a CRT file used for?

A CRT file stores a public SSL/TLS certificate, either for your domain or for an intermediate certificate authority. Web servers use it, along with the private key, to prove the site’s identity to browsers. It does not contain the private key itself.

4. Can I just rename a .cer file to .pem?

Only if the .cer file is already Base64 encoded. Open it in a text editor first. If you see BEGIN CERTIFICATE, renaming works. If you see unreadable characters, the file is binary DER and must be converted with OpenSSL before it can be used as PEM.

5. How do I convert PEM to PFX?

Run openssl pkcs12 with the export option, passing your private key, your certificate and the CA bundle, then set an export password. The result is a single password-protected PFX file that IIS, Azure and other Windows-based systems can import directly.

6. How do I convert PFX to PEM?

Use openssl pkcs12 with the input PFX file and an output PEM file. You can extract everything at once, or extract the certificate and private key separately with the nokeys and nocerts options. You will need the PFX password to complete the conversion.

7. Does a PFX file contain the private key?

Yes. A PFX or P12 file normally contains the certificate, the private key and often the intermediate chain, all protected by a password. That is why it is the safest format for moving a certificate between servers, and why you should guard both the file and its password.

8. What does Base64 encoded mean for a certificate?

It means the binary certificate data has been converted into plain ASCII characters so it can be stored and copied as text. Base64 encoded certificates are wrapped in BEGIN and END lines. Binary encoded certificates, known as DER, store the same information as raw bytes.

9. Why does my server say it cannot load the certificate?

The most common causes are a binary file being read as PEM, a damaged copy and paste with missing lines or extra spaces, the wrong file order in a chain, or a private key that does not match the certificate. Check the encoding first, then confirm the key and certificate match.

10. Is it safe to use an online SSL certificate converter?

It is generally safe for public certificates and chains. For private keys, choose a converter that processes files in your browser rather than uploading them, or use OpenSSL on a computer you control. Follow your organization’s security policy for production keys.

Conclusion

Once you separate encoding from file extension, SSL certificate formats stop being mysterious. PEM and DER are two ways of writing the same certificate, PFX bundles the key and chain behind a password, and P7B carries the chain on its own. Match the format to your server, check the file before you convert, and keep your private key safe at every step.

When you need a fast conversion without opening a terminal, try the free SSL certificate converter on X2X Converter. It converts between PEM, CER and PFX right in your browser, so you can get your certificate installed and move on with your day.

What Is Base64 Encoding? Decode Your First String in Seconds

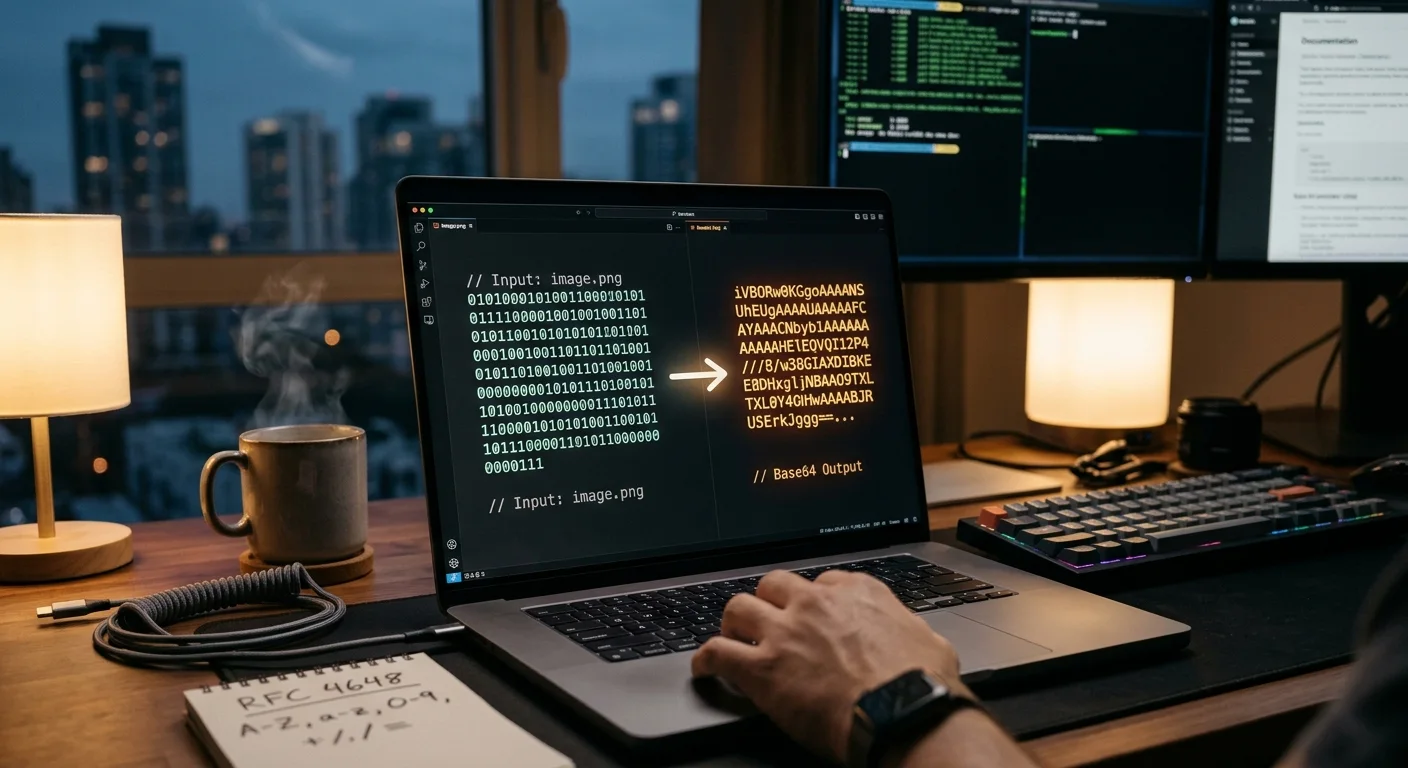
Laptop screen displaying binary data converting into a base64 encoding string.

Quick answer: What is base64 encoding? It’s a method for writing binary data with 64 printable characters, so files and images can travel through text-only systems. Every three bytes become four characters, and equals signs pad the end when the input doesn’t divide evenly. Base64 is encoding, not encryption, so it never hides data.

You’ve probably met one without realizing it, and if you’ve asked yourself what is base64 encoding, you’re in good company. It’s a long string of letters and numbers, often ending in one or two equals signs, buried in a JSON response, an email header, or a stylesheet. The first reaction for many developers is suspicion, as if the text were scrambled on purpose. It isn’t. Base64 is a translation, and this guide walks through it with worked examples, tools you can use right away, and the places where it commonly breaks.

The fastest way to understand it is to test it. Paste a short phrase into the Base64 converter and compare the output with the original. The converter runs in your browser, so you can experiment without writing a script. If your goal is an image rather than text, the image to Base64 tool produces the string you’d place in an img tag or a CSS file. And when a base64 value sits inside a large API response, run the response through a JSON prettifier first, so you can find the field before you decode anything.

What is base64 encoding, exactly?

Computers store everything as bytes, which are numbers from 0 to 255. Many channels were built for printable characters only. Email transports, text editors, and some APIs can truncate or reject raw bytes. Base64 avoids that problem by using only characters that survive text channels intact.

The formal definition is in RFC 4648, the IETF standard for base encodings. It describes base 64 as a 65-character subset of US-ASCII. Sixty-four of those characters carry six bits each, and the equals sign handles padding. In practice, I think of base64 as a lookup. Take bytes, regroup their bits, and map each new group to a readable character.

What is base64 encoding used for?

You’ll meet base64 in a handful of recurring places. Email attachments use it so binary files can pass through mail servers that expect text. Data URIs use it to embed small images and fonts directly in HTML or CSS. HTTP Basic authentication uses it to package a username and password into a header. APIs use it to carry binary payloads inside JSON or XML. Certificates and keys use it to wrap their binary content in a text format that editors and tools can handle.

The common thread is the same in every case. The destination understands text, and the source data doesn’t.

The encoding has a long history in mail. Privacy-Enhanced Mail, proposed in RFC 989 in 1987, used a printable encoding built on the same idea. MIME, the standard behind modern email attachments, adopted a close variant and set a maximum line length of 76 characters. That limit explains why base64 blocks in raw email source are wrapped at fixed widths, and understanding it makes those line breaks far less mysterious.

How does base64 work?

To see what is base64 encoding doing at the bit level, start with groups of three bytes. Three bytes hold 24 bits, and those 24 bits split into four groups of six bits. Each six-bit value runs from 0 to 63, and each one selects a single character from the alphabet. Three bytes in, four characters out.

RFC 4648 uses the word Man as its worked example. The letters M, a, and n are the bytes 77, 97, and 110. In binary, those are 01001101, 01100001, and 01101110. Regroup the bits into six-bit chunks and you get 010011, 010110, 000101, and 101110. Those are the decimal values 19, 22, 5, and 46, which map to T, W, F, and u. So Man becomes TWFu. The table below lays out each step, which is the quickest way to check your understanding:

StepSix-bit groupDecimal valueOutput character
First six bits01001119T
Second six bits01011022W
Third six bits0001015F
Fourth six bits10111046u

Real input seldom divides evenly, so the last group needs padding. Most libraries use a lookup table with 64 entries, read the next three bytes, combine them into a 24-bit value, and emit four table lookups. When one byte is left over, the output ends with two characters and two equals signs. When two bytes are left over, it ends with three characters and one equals sign. The RFC’s test vectors show the rule clearly. The string f encodes as Zg==, fo encodes as Zm8=, and foobar encodes as Zm9vYmFy, which has no padding because six bytes form two complete groups.

Decoding is the same process run backward. Each block of four characters returns to three bytes, and the padding tells the decoder how many bytes the last block should produce. No key, salt, or randomness is involved, so the same input always gives the same output.

The base64 character set

The standard alphabet starts with uppercase A through Z, continues with lowercase a through z, then the digits 0 through 9, and ends with plus and slash. Position matters. A is 0, Z is 25, a is 26, z is 51, 0 is 52, 9 is 61, plus is 62, and slash is 63. Those positions are what every compliant encoder and decoder agree on, which is why the same string decodes correctly across languages.

Plus and slash cause the most practical trouble. Slash is a path separator, so a base64 value inside a URL path can break routing. Plus can turn into a space when it passes through a query string without encoding, and the decoder then produces corrupted output with no error message.

Not every system uses this alphabet. IMAP mailbox names, for example, use a different pair of symbols, and the Wikipedia article on Base64 lists a number of variants that swap characters or change line lengths. When a value won’t decode, the first question to ask is which variant produced it.

The URL-safe variant, often called base64url, replaces plus with hyphen and slash with underscore, and it commonly omits the padding. RFC 4648 says this variant should not be regarded as the same as plain base64, so don’t swap one for the other without checking the specification you’re following. JSON Web Tokens use the URL-safe form. If you’re putting a base64url value into a query string, paste the full URL into a URL parser to see how the parameters split before you debug the decoder.

Base64 size increase

Base64 makes data bigger, and that cost is predictable. Every three input bytes become four output characters, so the encoded text runs about 33% larger than the binary it represents. The Wikipedia article on Base64 describes the same overhead, noting that the encoding itself adds 33 percent, with about 4 percent more when line breaks are inserted at a typical length.

The arithmetic is easy to check. A 300 KB image becomes roughly 400 KB of text, because 300 multiplied by four and divided by three equals 400. Padding adds at most three characters. Knowing what is base64 encoding does to file size lets you decide whether inlining is worth it before you ship. Inline encoding saves a network round trip, which helps for small icons and fonts. For large or frequently cached files, serving the binary with the correct content type is usually the better choice.

The table below shows the effect at a few sizes. These are estimates based on the four-to-three ratio, before line breaks and padding are added.

Original sizeApproximate encoded size
3 bytes4 characters
1 KBabout 1.33 KB
10 KBabout 13.3 KB
300 KBabout 400 KB

Base64 inside JSON and APIs

JSON only supports text, so APIs carry binary content as base64 strings in ordinary fields. That works well, but the field can become a long, unreadable value, and debugging gets harder when a large response prints on a single line. Formatting the response first, as the JSON prettifier from the introduction does, makes the structure visible. It won’t decode the value for you, so decoding is still a separate step.

When you decode, check what the field is supposed to contain. A base64 value might hold a PNG, a PDF, a serialized object, or plain text. Decoding under the wrong assumption produces output that looks like a bug in your code, even when the bytes arrived intact.

A quick way to confirm the decoded bytes are what you expect is to inspect the first few of them. A PNG file starts with the bytes 89 50 4E 47, which spell the characters PNG after the first byte. A PDF starts with the text %PDF. If the decoded output starts with something else, the problem is probably upstream, in how the value was produced or truncated, rather than in your decoder.

Base64 in PHP

PHP ships two functions, base64_encode() and base64_decode(). Encoding takes one line:

php

<?php
$encoded = base64_encode(‘This is an encoded string’);
echo $encoded; // VGhpcyBpcyBhbiBlbmNvZGVkIHN0cmluZw==
?>

Decoding has an option that tutorials often skip. Pass true as the second argument, and base64_decode() returns false when the input contains characters outside the alphabet. Without that flag, invalid characters are discarded silently, and corruption can stay hidden until it causes a larger failure.

php

<?php
$decoded = base64_decode($encoded, true);
if ($decoded === false) {
// Reject the input rather than storing damaged data.
}
?>

The base64_decode function page in the PHP manual documents both behaviors. For data from users, forms, or external services, I’d default to strict mode. Also replace spaces with plus signs before decoding when a value came through a URL or form, because plus signs often arrive as spaces and the manual’s user notes describe that problem with canvas data.

If you’re building a data URI in PHP, the same function does most of the work. Read the file, encode it, and prefix the result with its media type:

php

<?php $path = ‘logo.png’; $mime = mime_content_type($path); $dataUri = ‘data:’ . $mime . ‘;base64,’ . base64_encode(file_get_contents($path)); ?>

Keep the output for small assets only, since every byte of the image now lives inside the page markup.

Base64 in JavaScript

If you’re wondering what is base64 encoding in JavaScript terms, start with btoa() and atob(). They only handle strings whose characters fit into a single byte. Pass an emoji or any character outside the Latin-1 range to btoa() and it throws an error. The code looks correct, which makes this easy to miss.

The reliable pattern converts the string to UTF-8 bytes first, then encodes those bytes:

javascript

const bytes = new TextEncoder().encode(‘hello ✓’);
let binary = ”;
bytes.forEach((b) => { binary += String.fromCharCode(b); });
const encoded = btoa(binary);

The base64 encoding strings in JavaScript article on web.dev explains why this works, since JavaScript stores strings as UTF-16. It also warns about lone surrogates, which can make a decoder silently replace characters. Validate input that comes from outside your system before you encode or decode it.

What is base64 encoding in .NET?

In .NET, the equivalent methods are Convert.ToBase64String() and Convert.FromBase64String(). The Convert.ToBase64String method takes a byte array and returns the encoded string. Two details from the documentation matter in practice. The method expects the complete data in one array, so streams should use ToBase64Transform instead. And when line breaks are requested, .NET inserts one every 76 characters, which follows the MIME convention.

A minimal round trip looks like this. The string “Man” becomes the bytes 77, 97, and 110, which encode to TWFu, and decoding returns the original bytes:

csharp

byte[] bytes = System.Text.Encoding.UTF8.GetBytes(“Man”);
string encoded = Convert.ToBase64String(bytes); // TWFu
byte[] decoded = Convert.FromBase64String(encoded);

Most other languages offer the same operation under different names. Once you understand the bit regrouping, the APIs look familiar.

Can base64 be decrypted?

You don’t decrypt base64. You decode it. There’s no key and no secret, so anyone holding the string can recover the original bytes. People who ask what is base64 encoding often assume it adds some protection, and it doesn’t. RFC 4648 says it plainly in its security considerations: base encoding hides visible patterns but provides no computational confidentiality.

The stakes are highest with credentials. HTTP Basic authentication sends a header that base64 encodes a username and password joined by a colon. Anyone who reads that header can read the password. Keep authorization headers out of logs, and never treat an encoded value as a secret.

Here is a concrete example. The header Authorization: Basic dXNlcjpwYXNz carries the string user:pass. Paste dXNlcjpwYXNz into the Base64 converter and the password appears immediately. No key was needed, and that’s the whole point of the warning.

If you need confidentiality, use encryption. TLS protects data in transit, and a well-established cipher protects data at rest. If the ciphertext needs to be text, base64 can carry it afterward. The encoding is never the protection.

Base64 decode: a practical checklist

When a string won’t decode, check these things before blaming the library. Start with the alphabet. Standard base64 uses plus and slash, base64url uses hyphen and underscore, and mixing them causes many failures. Next check the length. Padded standard base64 has a length that’s a multiple of four, so a value that’s off by one or two characters usually means something was truncated or the padding was stripped.

Then look for whitespace and line breaks. Some formats ignore them, and stricter decoders reject them. The RFC says implementations must reject characters outside the base alphabet unless the referring specification says otherwise, so know which behavior your format expects. If the value came from a data URI, strip the prefix. A data URI looks like data:image/png;base64, followed by the payload, and only the part after the comma is base64.

Finally, decide what the output should be. Decoded data may be binary. Paste a value into the Base64 converter if you want to test a short string, and treat anything that isn’t clearly text as bytes rather than a string.

Two quick test strings are useful for checking your setup. TWFu should decode to Man, and Zg== should decode to f. If a converter or library returns anything else, the problem is in the tool or the way you’re feeding it data, not in the encoding itself. Testing with known values like these separates a broken pipeline from a misunderstanding of the format.

Common mistakes to avoid

Treating base64 as security is the most expensive mistake, and the earlier section explains why it fails. The second is using standard base64 in URLs without switching to the URL-safe variant, which breaks paths and mangles parameters. The third is double encoding, where two layers of code both encode the same value. Each pass adds about a third to the size, and the decoding path stops matching the encoding path.

Padding is the next trap. Some decoders require it and others infer it from length. If you join strings from different sources, check for padding first, because the pieces may decode differently once they’re concatenated. Also avoid storing decoded binary in text columns without thinking about it, since many databases and log pipelines mangle non-text bytes.

Logging deserves its own warning. A base64 field that looks harmless in a debug line can contain a full image, a password, or a session credential. Scrub those fields before the logs leave your server, and decide in advance which values are allowed to appear in plain text anywhere in your stack.

When base64 is the right tool

Base64 fits when binary data must pass through a text-only channel and the size cost is acceptable. Small icons, fonts, and configuration blobs are good examples. So are tokens and credentials that must fit inside a header or a JSON field, provided you protect them with real security measures.

It’s the wrong choice for large files that change often, because the size penalty and the caching behavior both work against you. It’s also the wrong choice for hiding information. If you find yourself using base64 to conceal a value, switch to encryption or access control. Asking whether base64 fits the job, rather than whether it’s convenient, usually produces a better design.

For large uploads, the usual alternative is to send the file as raw binary with the correct content type, or as a multipart form submission. Those approaches avoid the one-third size penalty and let servers stream the data instead of holding a huge string in memory. Base64 is still the right answer when the destination truly accepts only text, but it shouldn’t be the default for every file.

Key takeaways

  • Remember what is base64 encoding at its core: it turns every three bytes of binary data into four printable ASCII characters.
  • The standard alphabet uses plus and slash, while base64url swaps them for hyphen and underscore to stay safe in URLs.
  • Encoded output is about 33% larger than the original, so plan for that growth in JSON, HTML, and CSS.
  • Base64 is encoding, not encryption. Anyone can decode it, so never rely on it to hide secrets.

Frequently asked questions

What is base64 encoding in simple terms?

Base64 encoding is a way to write binary data using only 64 printable characters. It groups bytes into sets of three, splits them into six-bit pieces, and maps each piece to a letter, digit, plus, or slash. The result is text that survives systems built for text, such as email, JSON, and HTML.

Is base64 encryption?

No. Base64 is an encoding, and it has no secret key. Anyone who has the encoded string can decode it with a standard tool. If you need confidentiality, use proper encryption, and treat base64 only as a way to represent the output as text.

Can base64 be decrypted?

It can be decoded, which is a different operation. Decoding reverses the encoding using the public alphabet, so no password or key is required. That’s why base64 should never protect passwords, tokens, or personal data on its own.

Why does base64 end with equals signs?

Equals signs are padding. Base64 works on three-byte groups, and when the input doesn’t divide evenly, the encoder fills the final group and marks it with one or two equals signs. The decoder uses that marker to know how many bytes the last group should produce.

How much bigger does base64 make a file?

About 33% larger than the original binary, since every three bytes become four characters. Line breaks add roughly another 4%. A 300 KB file therefore becomes about 400 KB of encoded text.

What is the base64 character set?

The standard set contains A through Z, a through z, 0 through 9, plus, and slash, with equals signs used for padding. The URL-safe variant replaces plus and slash with hyphen and underscore, which keeps the output safe in URLs and filenames.

How do I base64 decode a string safely?

Confirm the alphabet, check that the length is valid, strip any data URI prefix, and remove stray whitespace if the decoder requires it. Use strict mode where the language offers it, so invalid characters cause an error instead of silent damage. Decide in advance whether the output is text or binary.

Does PHP have a built-in base64 function?

Yes. base64_encode() converts a string to base64, and base64_decode() reverses it. Passing true as the second argument to base64_decode() enables strict checking, which returns false when the input contains characters outside the alphabet.

Can I use base64 to embed an image in a web page?

Yes. A data URI combines a media type with the base64 payload, and browsers accept it in img tags and CSS. This works well for small images, but large files are usually better served as separate assets because the encoded text is bigger and harder to cache.

Is base64 the same as hex encoding?

No. Hex uses 16 symbols and represents each byte as two characters, which makes it larger than base64. Base64 uses 64 symbols and represents three bytes as four characters, which is more compact. Hex is easier to read byte by byte, while base64 is more efficient for transport.

Next steps

Once you grasp what is base64 encoding at the bit level, the rest gets simpler. Everything else is about variants, padding rules, and the places where values break in transit. Practice with a few short strings in the converter, then compare the results with what your language’s library returns. For more walkthroughs on data formats, the data format articles on the X2X Converter blog cover related conversions in more detail.

How to Convert Excel to JSON: 5 Easy Methods That Actually Work

How to convert Excel to JSON data shown on a server monitor transformation display.

To convert Excel to JSON, upload your .xlsx or .xls file to a browser-based Excel to JSON converter, let it read the first row as column headers, then copy or download the JSON file. Each spreadsheet row becomes one JSON object, and each column header becomes a key. For repeat jobs, use Python pandas or JavaScript SheetJS.

Introduction

I work with spreadsheets almost every day, and sooner or later someone always asks me the same thing: “Can you turn this Excel sheet into JSON so the developer can use it?” A product list for a website, a price sheet for an app, a contact list for an API import. The data lives in Excel, but the system that needs it only speaks JSON.

The first time I tried to convert Excel to JSON, I copied cells into a text editor and typed brackets by hand. It took an hour, and one missing comma broke the whole file. Since then I have tested every practical route, from one-click online tools to Python scripts, and I have learned which one fits which job.

In this guide I will show you five methods to convert Excel to JSON, explain how headers, arrays and nested objects work, and walk through the problems nobody warns you about: dates turning into strange numbers, ZIP codes losing their leading zeros, and empty cells breaking your app. If you just want the result right now, the free Excel to JSON converter on X2X Converter does it in your browser in a few seconds.

What Is JSON and Why Convert Excel to JSON?

JSON (JavaScript Object Notation) is a lightweight, text-based format for storing and exchanging structured data. It is the standard language of web APIs, JavaScript apps, NoSQL databases and most modern software. Excel is built for people to read and calculate; JSON is built for programs to read and move data.

Here are the core JSON terms you will see throughout this guide:

  • JSON object: a set of key-value pairs inside curly brackets, for example {“name”: “Ali”, “city”: “Lahore”}.
  • Key-value pairs: each key is a text label in double quotes, followed by a colon and a value.
  • JSON array: an ordered list of values inside square brackets, for example [1, 2, 3].
  • Array of objects: a list where every item is an object. This is the most common shape when you convert Excel to JSON, because each row becomes one object.
  • Nested JSON: an object or array placed inside another object, such as an address object inside a customer object.

If your JSON comes out as one long unreadable line, paste it into the JSON prettifier to format it with clean indentation before you share it.

People usually need to convert Excel to JSON for a few reasons: importing products or users into a web app, seeding a database, feeding data to an API, building a static website, or preparing data for an AI or automation tool. If you are a developer who hates writing one-off scripts for this, I covered the wider no-code workflow in my guide to data conversion without writing scripts.

How Excel Rows Become JSON Objects

Before you pick a method to convert Excel to JSON, it helps to see exactly what happens to your spreadsheet data. A converter reads your tabular data in a simple pattern: the first row holds the column headers, and every row under it becomes one record.

Take this small sheet:

idnamecityprice 
1Laptop StandLahore2500
2USB HubKarachi1800

When you convert Excel to JSON with headers, you get an array of objects:

[
  { “id”: 1, “name”: “Laptop Stand”, “city”: “Lahore”, “price”: 2500 },
  { “id”: 2, “name”: “USB Hub”, “city”: “Karachi”, “price”: 1800 }
]

Notice three things. The column headers became keys. Each row became one object. And the whole sheet sits inside one JSON array. That “column headers as keys, rows to objects” pattern is what most people want, and every method below produces it.

Method 1: Convert Excel to JSON Online (Fastest, No Code)

An online converter is the quickest way to convert Excel to JSON when you have a one-off file and no time to set anything up. This is the method I reach for first.

Here is how I convert Excel to JSON with the X2X Converter tool:

  1. Open the Excel to JSON tool in any modern browser.
  2. Click the upload area or drag your .xlsx or .xls file onto it.
  3. The tool reads the sheet, uses the first row as keys, and shows the JSON output.
  4. Click Copy JSON to paste it straight into your code, or Download JSON to save a .json file.

That is it. No sign-up, no installation and no fee.

Why I like this route: it is free, it works on Windows, Mac, Linux and even a phone, and it suits people who just need clean output fast. X2X Converter states that its conversions run locally in your browser, so the file is processed on your own device rather than stored on a server.

When it is not enough: if you need to convert Excel to JSON every day, run it on hundreds of files, or apply custom rules (rename keys, change data types, build deep nesting), a script will save you time in the long run. That is where methods 3 and 4 come in.

Method 2: Convert Excel to JSON Inside Excel With Office Scripts

A lot of people ask me whether they can convert Excel to JSON with Excel itself. The honest answer is no. Excel’s Save As list includes formats like .xlsx, .csv, .xml, .txt and .pdf, but there is no JSON option. Power Query can import JSON into Excel, but it does not export it.

The Microsoft-supported way to convert Excel to JSON without leaving Excel is Office Scripts, the TypeScript automation feature on the Automate tab.

  1. Select your data and press Ctrl + T to format it as an Excel table with a header row.
  2. Go to Automate > New Script.
  3. Paste a script that reads the table’s header row, loops through each data row and builds one object per row.
  4. Click Run. The JSON appears in the output pane, ready to copy.

Microsoft publishes an official “Output Excel data as JSON” sample you can paste in and adapt.

Things to know before you try it:

  • Office Scripts needs a business or education Microsoft 365 plan with OneDrive for Business. Home and personal plans are not on Microsoft’s supported list.
  • It works in Excel on the web, Excel for Windows (version 2210 or later) and Excel for Mac.
  • Microsoft’s sample reads cell text, so numbers come out as strings, for example “10” instead of 10. You can switch to reading values if you need real numbers.
  • The sample handles one table on one sheet. Multiple sheets need extra code.
  • You can connect the script to Power Automate if you want to convert Excel to JSON on a schedule.

I recommend this route for office teams already on Microsoft 365 who want to convert Excel to JSON automatically without installing anything.

Method 3: Convert Excel to JSON With Python (pandas)

Python is my favorite way to convert Excel to JSON for large files and repeatable jobs. The pandas library reads Excel files and writes JSON in two lines of code. Install it first with pip install pandas openpyxl, then run:

import pandas as pd

df = pd.read_excel(“products.xlsx”, sheet_name=0)
df.to_json(“products.json”, orient=”records”, indent=2,
          force_ascii=False, date_format=”iso”)

Here is what each setting does, and why I always set them:

  • orient=”records” gives you an array of objects, one per row. This matters because the pandas default for a table is “columns”, which groups values by column and confuses most people the first time.
  • indent=2 makes the file readable.
  • force_ascii=False keeps Urdu, Arabic and accented characters readable instead of turning them into \u codes.
  • date_format=”iso” writes dates like 2026-11-02T00:00:00.000. The older default wrote milliseconds since 1970, and pandas has deprecated it.

The pandas read_excel documentation lists every option, including usecols to pick columns, skiprows when your headers are not in row 1, and dtype to control data types. One tip from experience: old .xls files need an extra reader library (xlrd or calamine), while .xlsx files use openpyxl.

Convert all sheets at once: pass sheet_name=None. pandas then returns a dictionary of tables keyed by sheet name, and you can write each one to its own file or combine them into one JSON object.

Method 4: Convert Excel to JSON in JavaScript (SheetJS)

If you are building a web app or a Node.js script, SheetJS is the library most developers use to read spreadsheets in JavaScript. Its sheet_to_json function does the heavy lifting.

const XLSX = require(“xlsx”);
const fs = require(“fs”);

const workbook = XLSX.readFile(“products.xlsx”);
const output = {};

for (const name of workbook.SheetNames) {
  output[name] = XLSX.utils.sheet_to_json(workbook.Sheets[name], { defval: null });
}

fs.writeFileSync(“products.json”, JSON.stringify(output, null, 2));

A few details that save me debugging time when I convert Excel to JSON in Node:

  • By default, sheet_to_json uses the first row as keys and returns an array of objects.
  • Empty cells are skipped by default, so some objects end up missing keys. Setting defval: null keeps every key in every object.
  • If two columns have the same header, SheetJS renames them name, name_1, name_2 so no data is lost.
  • header: 1 returns plain arrays instead of objects, which helps when your sheet has no header row.

This method is ideal for developers who want to convert Excel to JSON inside their own product, either on a server or directly in the browser.

Method 5: Convert Excel to JSON With Google Sheets and Apps Script

Not everyone has Excel installed, but you can still convert Excel to JSON for free. I do a lot of my own work in Google Sheets, and it handles this job well.

  1. Upload your .xlsx file to Google Drive and open it with Google Sheets.
  2. Go to Extensions > Apps Script.
  3. Paste a short script that reads the data range, takes the first row as headers and maps each row to an object.
  4. Run it and copy the JSON from the execution log.

function sheetToJson() {
  const [headers, …rows] = SpreadsheetApp.getActiveSheet().getDataRange().getValues();
  const data = rows.map(r => Object.fromEntries(headers.map((h, i) => [h, r[i]])));
  Logger.log(JSON.stringify(data, null, 2));
}

This is a good free option if your team already lives in Google Workspace.

Which Method Should You Use?

MethodBest forCoding neededMultiple sheetsCost 
Online converterOne-off files, quick resultsNoneDepends on toolFree
Office ScriptsMicrosoft 365 business teamsA little TypeScriptNeeds extra codeIncluded in business plans
Python pandasLarge files, repeat jobs, data teamsBasic PythonYesFree
JavaScript SheetJSWeb apps and Node.js projectsJavaScriptYesFree
Google Apps ScriptGoogle Sheets users without ExcelA little JavaScriptYes, with a loopFree

My rule of thumb: if you need to convert Excel to JSON once, use the online tool. If you need it every week, write the script once and reuse it.

How to Convert Excel to JSON With Headers the Right Way

Headers decide your keys, so a messy header row means messy JSON when you convert Excel to JSON. Before I convert Excel to JSON with headers, I clean the first row using this checklist:

  • Keep headers unique. The JSON standard says names inside an object should be unique, and many parsers silently keep only the last value when a name repeats. Two columns both called “Phone” can quietly erase half your data.
  • Fill every header. Blank headers turn into odd keys like __EMPTY or Unnamed: 3, depending on the tool.
  • Use simple key names. Spaces are legal in JSON keys, but first_name or firstName is far easier for developers than First Name (as on ID).
  • Put headers in row 1. If your sheet has a title or a logo above the table, delete those rows or tell your tool to skip them.
  • Unmerge header cells. Merged cells usually leave blanks behind, which create missing or empty keys.

Array of Objects vs Other JSON Shapes

When you convert Excel to JSON array of objects, you get the format almost every API and JavaScript app expects. But it is not the only shape. Knowing the options helps when a developer asks for something specific.

  • Array of objects (records): [{“id”:1,”name”:”A”}, {“id”:2,”name”:”B”}]. Best for APIs and most apps.
  • Object keyed by ID: {“1”: {“name”:”A”}, “2”: {“name”:”B”}}. Handy for fast lookups, but every ID must be unique, or rows will overwrite each other.
  • Array of arrays: [[“id”,”name”],[1,”A”],[2,”B”]]. Compact, but the keys are lost.
  • Columns: {“name”: {“0″:”A”,”1″:”B”}}. This is the pandas default, and the one that surprises people.

If you are unsure how to structure the output when you convert Excel to JSON, choose array of objects. It is the safest and most widely supported JSON format.

How to Convert Excel to Nested JSON

This is the question I get most from developers, and most guides skip it. Excel is flat. Every cell sits in a row and a column. JSON can be nested, with objects inside objects. So how do you convert Excel to nested JSON? Here are the three ways I convert Excel to JSON with nesting.

Option 1: Use dot-notation headers. Name your columns like address.city and address.zip. Many converters and libraries can then build this:

{ “name”: “Ali”, “address”: { “city”: “Lahore”, “zip”: “54000” } }

A basic converter will output the literal key “address.city” instead, so check your result. In Python, you can split the header on the dot and build the inner object with a few lines of code.

Option 2: Group rows by an ID. For one-to-many data, such as one order with several items, put one item per row and repeat the order ID. Then group the rows in code so each order holds an items array.

Option 3: Use one sheet per level. Keep customers on one sheet and orders on another, linked by a customer ID. Read both sheets and join them in code. This is how I handle anything more than two levels deep, because it keeps the spreadsheet easy for non-technical people to edit.

Converting Multiple Sheets to JSON

When you convert Excel to JSON from a workbook with several tabs, it usually becomes one JSON object keyed by sheet name:

{
  “Products”: [ { “id”: 1, “name”: “Laptop Stand” } ],
  “Suppliers”: [ { “id”: 7, “name”: “Lahore Traders” } ]
}

The other option is one .json file per sheet. pandas (sheet_name=None), SheetJS (workbook.SheetNames) and Apps Script all support this. Many quick online tools only read the first sheet, so check your output if your workbook has several tabs.

Fixing Dates When You Convert Excel to JSON

If you have ever seen a date like 45597 appear in your JSON, you have met Excel’s serial number system. Excel stores every date as the number of days since a starting point. In the default 1900 system, July 5, 2011 is stored as 40729. Older Mac workbooks may use the 1904 system, where the same date is 39267, and Microsoft’s guide to date systems in Excel explains that the gap between the two is exactly 1,462 days.

Here is how I avoid date problems:

  • Ask your tool or script to output ISO 8601 text such as 2026-11-02. Every programming language can read it.
  • In pandas, set date_format=”iso”.
  • If you only receive serial numbers, convert them in code using the correct base date.
  • If the workbook came from an old Mac, check whether it uses the 1904 system before you trust any date.

Leading Zeros, Long Numbers and Data Types

Excel removes leading zeros by default, so a ZIP code like 05401 turns into 5401, and phone numbers or product codes lose their first digit. Excel also keeps only 15 digits of precision, according to the official Excel specifications and limits page, so a 16-digit card or account number gets its last digit replaced with zero.

My fixes before I convert Excel to JSON:

  • Format ID, phone, ZIP and account columns as Text before you type or paste the data.
  • In pandas, read those columns as text with dtype={“zip”: str}.
  • Keep IDs as strings in JSON. You will never do math on a phone number.

Also watch for numbers stored as text (green triangles in Excel), currency symbols like “$1,200” turning into strings, and TRUE/FALSE or Yes/No columns that should become JSON true and false.

Handling Empty Cells

When you convert Excel to JSON, empty cells can show up three ways:

  • The key is missing: {“name”: “Ali”}
  • The key is null: {“name”: “Ali”, “email”: null}
  • The key is an empty string: {“name”: “Ali”, “email”: “”}

Pick one and stay consistent, because apps check for these differently. I prefer null, since it keeps every object the same shape. One surprise with pandas: by default it treats text like NA, NULL and None as missing values. If “NA” is a real value in your data, such as the country code for Namibia, turn that behavior off with keep_default_na=False.

How to Check Your JSON Output

Every time I convert Excel to JSON, I test the file before I send it to a developer. Valid JSON follows strict rules:

  • Keys and text values must use double quotes, never single quotes.
  • No trailing comma after the last item.
  • true, false and null must be lowercase.
  • NaN and Infinity are not allowed.

A quick test is to paste the output into your browser console and run JSON.parse() on it. The MDN JSON.parse reference explains that it throws a SyntaxError for invalid JSON, including trailing commas and single quotes. For the full rules, the official JSON standard, RFC 8259 is short and surprisingly readable.

Is It Safe to Convert Excel to JSON Online?

It depends on how the tool works. Some converters upload your file to their server. Others process everything inside your browser, so the data never leaves your computer. If you convert Excel to JSON for client lists, salary sheets or anything personal, choose a tool that runs locally, or use Python on your own machine.

I explained the difference between server-side and client-side tools in detail in this guide on why browser-based file conversion is the safer choice.

Common Mistakes When You Convert Excel to JSON

These are the mistakes I see most often, including ones I made myself:

  1. Converting the wrong sheet. Most tools read the first tab by default.
  2. Leaving a title row above the headers. Your keys become “Product List 2026” and blanks.
  3. Duplicate column names. One column silently overwrites the other.
  4. Forgetting date formatting. You get serial numbers instead of dates.
  5. Losing leading zeros. ZIP codes and IDs break.
  6. Hidden rows and columns. They are still in the file and still get converted.
  7. Formulas without saved values. Some libraries read the formula text instead of the result.
  8. Not validating the output. A single stray comma can break a whole import.

Other Conversions You May Need

Data rarely arrives in just one format. If you receive an XML export from an older system, you can turn it into the same JSON structure with the XML to JSON converter and keep your whole pipeline in one format.

Key Takeaways

  • To convert Excel to JSON, the first row becomes keys and each row becomes one JSON object inside an array.
  • Excel has no built-in JSON export. Use an online tool, Office Scripts, Python, JavaScript or Google Apps Script.
  • An online converter is fastest for one-off files; scripts are best for repeat jobs and custom structures.
  • Clean your headers before you convert Excel to JSON: unique, filled, simple and in row 1.
  • Output dates as ISO 8601 text, and format IDs and ZIP codes as text to keep leading zeros.
  • Build nested JSON with dot-notation headers, grouped rows or one sheet per level.
  • Always validate your JSON before you share it.

Frequently Asked Questions

How do I convert Excel to JSON for free?

Upload your .xlsx or .xls file to a free browser-based Excel to JSON converter, check the output, then copy it or download the .json file. You can also use free code options such as Python pandas, JavaScript SheetJS or Google Apps Script if you prefer to run the conversion on your own machine.

Can Excel export JSON directly?

No. Excel has no Save As JSON option. Power Query can import JSON but not export it. Inside Excel, the supported route is Office Scripts, which needs a business or education Microsoft 365 plan. For everyone else, an online converter or a short Python script is the easiest way to convert Excel to JSON.

How do I convert Excel to JSON without code?

The easiest way to convert Excel to JSON without code is an online converter. Upload the file, let the tool read the first row as headers, and download the result. No installation, sign-up or programming is needed. Clean your header row first so the JSON keys come out tidy.

How are Excel headers turned into JSON keys?

The converter reads the first row of the sheet and uses each cell as a key name. Every row below becomes one JSON object, where each value sits under its column’s key. That is why unique, non-empty headers in row 1 are so important.

What is the difference between a JSON array and a JSON object?

A JSON object is a set of key-value pairs inside curly brackets, like one spreadsheet row. A JSON array is an ordered list inside square brackets. When you convert a sheet, you usually get an array of objects: one list holding one object per row.

How do I convert an Excel file with multiple sheets to JSON?

Use a tool or script that reads every tab. In Python, pass sheet_name=None to read_excel. In JavaScript, loop over workbook.SheetNames with SheetJS. The usual output is one JSON object keyed by sheet name, or one separate JSON file for each sheet.

Why do my Excel dates show as numbers in JSON?

Excel stores dates as serial numbers counting days from a base date, usually January 1, 1900. Some converters output that raw number. Set your tool or script to output ISO 8601 text such as 2026-11-02, or convert the serial number in code using the correct date system.

How do I keep leading zeros when converting Excel to JSON?

Format ZIP code, phone and ID columns as Text in Excel before entering the data, because Excel removes leading zeros from numbers. In pandas, read those columns as strings using the dtype option. Then the JSON keeps values like “05401” exactly as written.

Can I convert Excel to nested JSON?

Yes. Use dot-notation headers such as address.city, group related rows by a shared ID, or keep each level on its own sheet and join them in code. Simple online tools usually produce flat JSON, so complex nesting is easier with Python or JavaScript.

Is it safe to convert Excel to JSON online?

It is safe when the tool processes the file inside your browser instead of uploading it to a server. Check the tool’s privacy statement before uploading sensitive data. For confidential files, a browser-based converter or a local Python script keeps the data on your own device.

Conclusion

Learning how to convert Excel to JSON saves hours of copy-pasting and prevents the small errors that break imports. Pick the method that matches the job: a browser tool for quick one-off files, Office Scripts for Microsoft 365 teams, and Python or JavaScript for large, repeatable or nested conversions. Whatever route you take, clean the header row, fix dates and leading zeros, and validate the output before you hand it over.

When you are ready to convert Excel to JSON right now, open the free X2X Converter tool, drop in your spreadsheet and download clean JSON in seconds. No sign-up and no software to install.

How to Convert a Scanned Document to an Editable Word File

Laptop and printed paper on a desk demonstrating a successful scanned document to word conversion process.

To convert a scanned document to Word, you need OCR (optical character recognition), which reads the picture of each page and turns it into editable text. Upload the scan to an image to text tool, open the PDF in Microsoft Word, or open it with Google Docs. Then proofread, fix the formatting and save it as a .docx file.

Introduction

I have lost count of how many times someone has sent me a “Word file” that turned out to be a photo of a printed page. You click on a sentence to fix a typo and nothing happens, because there is no text there at all. There is only a picture of text, and getting that scanned document to Word in a form you can edit takes one extra step.

If that is where you are right now, the good news is that turning a scanned document to Word is a solved problem. You do not need to retype a single line. You need the right tool, a decent scan and about ten minutes of checking.

In this guide I will walk you through every method I actually use to convert a scanned document to Word: a free browser tool, Microsoft Word itself, Google Docs, Adobe Acrobat and your phone. I will also share the scan settings that make the biggest difference to accuracy, the formatting fixes that save the most time, and the mistakes I see people make again and again.

By the end, you will know exactly which scanned document to Word method fits your file, and you will have an editable Word document you can actually work with.

Why Can’t You Edit a Scanned Document in Word?

You can’t simply drag a scanned document to Word and start typing, because a scanner saves a photograph of the page, not the letters on it. Whether the file ends in .jpg, .png or .pdf, the computer only sees pixels. To change a scanned document to Word text you can type over, something has to recognize those pixels as characters first.

This is the part of the scanned document to Word process that confuses most people. A PDF can be one of two very different things:

  • A digital PDF is exported from Word, Google Docs or similar software. It already contains real text, so you can select and copy words.
  • A scanned PDF is a picture of paper wrapped in a PDF container. Try to highlight a sentence and your cursor drags a blue box across the whole page instead.

A quick test I always run: open the file and press Ctrl + F (Cmd + F on a Mac), then search for a word you can see on the page. If the search finds nothing, you are holding a scanned PDF, and you will need OCR before any scanned document to Word conversion can work.

What Is OCR Text Recognition?

OCR text recognition (optical character recognition) is software that looks at an image of text, identifies the shape of each letter and number, and outputs real characters you can edit, search and copy. Every method for turning a scanned document to Word relies on OCR somewhere in the process, even when the tool does not use that name.

Here is roughly what happens behind the scenes:

  1. Clean up: the software straightens the page, boosts contrast and removes specks.
  2. Find the text: it separates text areas from pictures, lines and margins.
  3. Read the characters: it matches each shape against the letters it knows.
  4. Rebuild the layout: it puts words back into lines, paragraphs and sometimes columns.

OCR is very good with clean, printed text in common fonts. It struggles with faint photocopies, tiny print, decorative fonts, tables and handwriting. That is why, for every scanned document to Word job, the quality of your scan matters as much as the tool you pick.

What You Need Before You Start

Before you convert a scanned document to Word, gather three things:

  • The scan itself: a PDF, JPG or PNG file. If you only have paper, scan it or photograph it in good light.
  • An OCR tool: a free online converter, Microsoft Word, Google Docs, Adobe Acrobat or a scanning app on your phone.
  • Ten minutes for proofreading: no scanned document to Word tool is perfect, so plan to read the result against the original.

How to Convert a Scanned Document to Word: 5 Methods

Below are the five scanned document to Word methods I rely on, starting with the fastest free option. Each one turns a scanned document to Word text, but they suit different files.

Method 1: Convert a Scanned Document to Word With a Free Image to Text Tool

The quickest way to get a scanned document to Word without installing anything is a browser-based OCR tool. I use the free image to text converter on X2X Converter because it works in a browser, needs no account, and has a one-click copy button for the extracted text.

If your scan is an image (JPG or PNG):

  1. Open the Image to Text tool and drop your image onto the upload box.
  2. Wait a few seconds while the OCR text recognition runs.
  3. Click Copy Text.
  4. Open a blank Word document, paste the text and save your scanned document to Word as a .docx file.

If your scan is a PDF:

Most image OCR tools want an image, not a PDF. The fix is simple: first convert PDF pages to JPG images, which gives you every page as a separate JPG in one ZIP file. Then run each page through the Image to Text tool and paste the results into Word in order. It is a two-step scanned document to Word route, but for a short scanned PDF it is often faster than fighting with desktop software.

This method also covers a lot of everyday searches like “convert text on image to word” and “change jpg to word”. A screenshot of a menu, a photo of a whiteboard or a picture of a printed letter all work the same way.

If you want the pages themselves inside a Word file, for example to keep a signed page alongside your typed text, the image to Word converter on the same site builds a .docx from one or more images in a single step. I often use both: the OCR text for editing and the page image for reference.

Best for: short scans, single pages, screenshots and photos, and anyone who does not have Word or Acrobat installed.

Method 2: Convert a Scanned Document to Word Inside Microsoft Word

If you have Word for Microsoft 365, Word 2016 or later, you can bring a scanned document to Word without extra software by opening the PDF straight in Word. Microsoft’s own guide to opening a PDF in Microsoft Word explains that Word makes a copy of the PDF, converts it into a format Word can display, and leaves the original file untouched.

  1. In Word, go to File > Open.
  2. Browse to your scanned PDF and open it.
  3. Click OK when Word says it will convert the file.
  4. Review the result and save it as a Word document.

There are two honest caveats. First, Microsoft says this works best with PDFs that are mostly text, and that book chapters or copier-style manuscripts will not format well. Second, lines and page breaks may fall in different places than the original. In my experience, a clean one-column letter makes the trip from scanned document to Word nicely, while a two-column brochure usually needs repair work.

Microsoft also covers scanning text into Word from a scanner. Its advice is to scan the page as a PDF with your scanner’s software, open that PDF in Word, and always proofread, because recognition accuracy depends on the scan quality and the clarity of the text. It also notes that handwriting is seldom recognized. If your scanner came with its own OCR software, check its settings too, since some scanners can save an editable file directly.

Best for: people who already have Word and want a simple PDF to editable Word conversion for text-heavy pages.

Method 3: Convert a Scanned Document to Word With Google Docs

Google Drive has OCR built in, and it is one of the most reliable free ways to turn a scanned document to Word. Google’s help page on converting PDF and photo files to text in Google Drive lists the steps:

  1. Upload your scanned PDF or image to Google Drive.
  2. Right-click the file and choose Open with > Google Docs.
  3. Google creates a new document with the image at the top and the recognized text below it.
  4. Delete the image, fix any errors, then go to File > Download > Microsoft Word (.docx).

Google is clear about the limits of its scanned document to Word conversion, and I find them accurate:

  • Supported files are PDFs, JPEG, PNG and GIF.
  • The file should be 2 MB or smaller.
  • Text should be at least 10 pixels high.
  • The document must be right-side up, so rotate it before uploading.
  • Common fonts such as Arial or Times New Roman work best.
  • Bold, italics, font size, font type and line breaks are likely to carry over, but lists, tables, columns, footnotes and endnotes are not.

That 2 MB limit catches people out. If your scanned PDF is larger, split it into smaller files or convert a few pages at a time.

Best for: free conversions of plain text pages, and anyone working in Google Docs anyway.

Method 4: Convert a Long Scanned Document to Word With Adobe Acrobat

If you already pay for Adobe Acrobat, it is the strongest option for long scanned PDFs. Adobe’s guide on how to recognize text in scanned documents walks you through the Scan & OCR tool, where you choose Recognize Text > In this file, then pick the page range and the document language before running it.

Once the PDF has a text layer, you can export the scanned document to Word straight from Acrobat. Two settings matter more than anything else here: the correct OCR language, and checking every page you selected. A wrong language setting is one of the most common reasons I see garbled accents and swapped characters.

Best for: long reports, multi-page contracts and scans you need to convert scanned PDF to Word with the layout as intact as possible.

Method 5: Scan to Word From Your Phone

Your phone camera is often the fastest scanner you own, and an easy way to send a scanned document to Word while you are away from your desk. Several scanning apps can capture a page, crop it, flatten the perspective and save the result as an image or PDF. Google Drive’s mobile app, for example, can scan paper into a PDF that you can then open with Google Docs on a computer.

My workflow for a phone scan to Word looks like this:

  1. Lay the page flat on a dark, plain surface near a window.
  2. Hold the phone directly above the page, not at an angle.
  3. Let the app crop and straighten the page, then save it.
  4. Send the image through any scanned document to Word method above.

Best for: receipts, letters, handouts and anything you need to convert while you are away from a desk scanner.

Which Method Should You Use?

The right scanned document to Word method depends on your file type, its length and the software you already have. Here is how the five options compare:

MethodCostWorks withBest forMain limit
Online image to text toolFreeJPG, PNG (PDF via PDF to JPG first)Single pages, screenshots, photosLayout is not rebuilt, you paste plain text
Microsoft WordIncluded with WordPDFText-heavy scanned PDFsComplex layouts break, handwriting rarely works
Google DocsFreePDF, JPEG, PNG, GIFSimple text pages2 MB file limit, tables and columns lost
Adobe AcrobatPaidPDFLong or complex documentsRequires a paid plan
Phone scanning appUsually freeCamera photosPaper you have in handLighting and angle affect accuracy

My scanned document to Word rule of thumb: for one or two pages, use a free image to text tool. For a clean scanned PDF of text, try Word or Google Docs first. For anything long, multi-column or business-critical, Acrobat is worth it.

How to Get More Accurate OCR Results

Scanned document to Word accuracy depends far more on the scan than on the software. A crisp scan gives almost any tool a fair chance, while a blurry one defeats them all. These are the settings and habits that make the biggest difference.

Scan at the right resolution. A training module from the US government’s accessibility program on converting scanned documents into accessible PDFs notes Adobe’s recommendation of 300 DPI for grayscale content and 600 DPI for color content. The documentation for Tesseract, the open-source OCR engine, also says it works best at 300 DPI or more. For an ordinary printed scanned document to Word conversion, I scan at 300 DPI grayscale.

Keep the page straight. Skewed pages are one of the biggest causes of jumbled lines, because the software struggles to follow a slanted line of text. Line up the paper against the scanner edge, or let your phone app straighten it.

Light it evenly. Shadows from your hand or phone, and glare from glossy paper, hide letters. Daylight from the side is better than an overhead lamp.

Choose the right language. If your tool lets you pick the OCR language, set it. This matters most for accented characters and documents that mix languages.

Start from the cleanest copy. A first-generation scan of the original beats a photocopy of a photocopy every time. Dark speckles and faded toner turn into stray punctuation.

Avoid heavy compression. Saving a scan as a very small, low-quality JPG blurs the edges of letters. If you can, keep the image at high quality until after OCR.

How Do You Fix Formatting After Converting a Scanned Document to Word?

Expect to tidy up the formatting after any scanned document to Word conversion, and use Word’s built-in tools to do it quickly instead of fixing lines one by one. Here is the order I work in:

  1. Clear stray formatting first. Select everything (Ctrl + A) and use Clear All Formatting, then reapply headings with Word’s Styles. This removes odd fonts and spacing that OCR sometimes invents.
  2. Fix broken lines. OCR often puts a hard line break at the end of every line. Use Find and Replace to swap the line breaks inside paragraphs for spaces, while keeping real paragraph breaks.
  3. Rebuild tables by hand. Tables rarely survive OCR intact. It is often faster to insert a fresh Word table and paste values into it than to repair a broken one.
  4. Recheck numbers. Figures, dates, prices and account references are where a single wrong character does the most damage. Compare each one against the original.
  5. Run spell check last. It catches common OCR swaps, like “rn” read as “m”, or the digit 1 read as a lowercase l.

A trick I like when checking a long scanned document to Word conversion: listen to the text. Paste the converted document into a Word to audio tool and follow along with the original page while it reads aloud. Your ears catch odd words that your eyes skip.

Common Mistakes to Avoid

These are the mistakes I see most often when people try to turn a scanned document to Word:

  • Skipping the proofread. OCR output looks finished at a glance. It rarely is, especially with names, numbers and small print.
  • Uploading a sideways or upside-down page. Many tools, including Google Drive, expect the page to be right-side up. Rotate it before you start.
  • Using a low-resolution screenshot. Zooming out on a PDF and taking a screenshot shrinks the text below what OCR can read reliably.
  • Expecting a perfect layout. Even the best tools approximate columns, headers and tables. Budget time to rebuild them.
  • Converting the whole file when you need one page. If you only need one paragraph, crop that area and convert just that part. You will get cleaner text with less clean-up.
  • Overwriting the original scan. Keep the original file. It is your reference while proofreading and your backup if something goes wrong.

Can You Convert a Handwritten Scanned Document to Word?

Sometimes, but do not count on it. Microsoft says handwriting is seldom recognized when scanning into Word, and most standard OCR tools are trained mainly on printed fonts. Neat block capitals have the best chance. Joined-up handwriting, notes in the margins and signatures usually need to be typed by hand.

If you mostly need to preserve handwritten pages rather than edit them, keep them as images. You can combine scanned images into a PDF so the handwritten pages stay together in one readable file, then type out only the parts you need to change.

Is It Safe to Convert Sensitive Documents Online?

It depends on where your scanned document to Word conversion actually happens. Some online converters upload your file to their servers, while others process it inside your browser. X2X Converter states that its tools run in the browser and that files are not uploaded, which is the setup I prefer for everyday documents.

Before you send a sensitive scanned document to Word through any online tool, think about where it goes. For legal contracts, medical records, ID documents or financial statements, I still recommend checking each tool’s privacy policy, or using offline software such as Word or Acrobat on your own computer. If your organization has rules about handling personal data, follow those first.

Key Takeaways

  • A scan is a picture of text, so you need OCR text recognition to turn a scanned document to Word text you can edit.
  • For one or two pages, a free browser-based image to text tool is the fastest scanned document to Word route. Convert PDF pages to JPG first if the tool only accepts images.
  • Word for Microsoft 365 and Word 2016 or later can open a scanned PDF directly. It works best on text-heavy pages with simple layouts.
  • Google Docs is a strong free scanned document to Word option, but files should be 2 MB or smaller, and tables, columns and footnotes usually do not carry over.
  • Adobe Acrobat handles long and complex scans best, as long as you set the correct OCR language.
  • Scan quality decides accuracy: 300 DPI grayscale, a straight page, even light and a clean original.
  • After every scanned document to Word conversion, proofread names, numbers and dates against the original, and keep the original scan as a backup.

Conclusion

Turning a scanned document to Word is no longer a retyping job. Once you understand that a scan is just a picture, the fix is clear: run it through OCR, choose the method that suits your file, and spend a few minutes checking the result.

For a quick scanned document to Word job, I start with a free browser tool. For text-heavy PDFs, Word or Google Docs usually does the trick. For long or complex files, Acrobat earns its price. Whatever you pick, a straight, well-lit, 300 DPI scan will do more for your accuracy than any setting inside the software.

Have a scanned page sitting on your desktop right now? Try the free Image to Text tool on X2X Converter, take your scanned document to Word in a few clicks, and you could be editing it in the next few minutes. It runs in your browser, there is no sign-up, and every tool on the site is free to use.

Frequently Asked Questions

1. How do I convert a scanned document to Word for free?

Upload the scan to a free image to text tool, or open it with Google Docs from Google Drive. Both use OCR to turn the image into editable text. Copy or download the result as a .docx file, then proofread it against the original before you share or print it.

2. Can Microsoft Word convert a scanned PDF to editable text?

Yes, in many cases. In Word for Microsoft 365 or Word 2016 and later, go to File, then Open, and select the scanned PDF. Word makes a converted copy you can edit. It works best on pages that are mostly text, while multi-column layouts and handwriting often come through poorly.

3. Why is my scanned PDF not editable?

A scanned PDF contains a picture of each page rather than real text. Your computer sees pixels, not letters, so there is nothing to select or type over. Running OCR text recognition adds the missing text, which is what turns the scanned document to Word content you can edit.

4. What is the best resolution for scanning documents for OCR?

For an ordinary scanned document to Word conversion, 300 DPI in grayscale is a reliable default. Adobe recommends 300 DPI for grayscale content and 600 DPI for color content. Going much higher mostly creates bigger files and slower processing. Very low resolutions make letters blur together and lower accuracy.

5. Can I convert a JPG or photo of a document into Word?

Yes. Upload the JPG or PNG to an image to text tool, copy the extracted text and paste it into Word. Google Docs also accepts JPEG, PNG and GIF images. For the best results, photograph the page straight on, in even light, with the whole page in focus.

6. Will the formatting stay the same when I convert a scanned document to Word?

Usually not exactly. Bold, italics and basic line breaks often survive, but tables, columns, footnotes and headers frequently shift or disappear. Expect to clear stray formatting, reapply heading styles and rebuild tables. Simple single-column documents keep their layout far better than brochures or forms.

7. Can OCR read handwritten documents?

Standard OCR tools are built mainly for printed text, so handwriting is seldom recognized accurately. Neat block capitals have a better chance than joined-up writing. For handwritten notes, signatures or margin comments, it is usually faster to keep the page as an image and type the important parts yourself.

8. How long does it take to convert a scanned document to Word?

The OCR itself usually takes seconds per page with an online tool, Word or Google Docs. The real time goes into proofreading and fixing formatting. A clean one-page letter might take a few minutes in total, while a long, multi-column report can take much longer to check properly.

9. Is it safe to upload confidential documents to an online converter?

It depends on the tool. Some converters upload files to their servers, while others process files inside your browser. Read the privacy policy before uploading anything sensitive. For contracts, medical or financial records, offline software on your own computer, such as Word or Acrobat, is the safer choice.

10. Can I convert a scanned document to Word on my phone?

Yes. Use a scanning app to capture the page, crop it and save it as an image or PDF. Then open it with an OCR tool in your phone browser, or upload it to Google Drive and convert it later on a computer. Good light and a straight angle matter most.

How to Extract Text From Image: 6 Free Methods That Actually Work

Overhead shot of hands scanning a document with a phone to extract text from image

To extract text from image files, upload the picture to an online OCR tool, use Live Text on iPhone, or use Google Lens on Android. The software reads the letters in the photo and turns them into editable text you can copy, search and paste. A sharp, well-lit image helps you extract text from image files with the most accurate result.

Introduction

I have lost count of how many times someone has sent me a screenshot of a document and asked me to “just type it out.” A price list from a supplier. A page from a textbook. A receipt that needed to go into a spreadsheet. When I can’t extract text from image files, retyping it by hand takes ages, and I always make at least one typo.

The good news is that you almost never need to retype anything anymore. You can extract text from image files with tools that are already on your phone or computer, or with a free browser tool in a few seconds. When I need a quick result, I use the free image to text converter on X2X Converter, because it runs in the browser and needs no account.

In this post, I’ll show you six methods that work in 2026, explain how tools extract text from images behind the scenes, and share the habits that make the difference between clean text and a mess of random characters. If you are digitizing a whole stack of paper, you may also want to turn printed notes into editable documents as part of a bigger system.

What Does It Mean to Extract Text From an Image?

To extract text from image files means turning the letters shown in a photo, screenshot or scan into real, selectable characters. Before extraction, the words are only colored pixels. After extraction, you can copy them, edit them, search them and paste them into any app.

The technology behind this is called optical character recognition, or OCR. Optical character recognition is software that detects text in an image and converts each shape it finds into a matching letter, number or symbol. You will also see it called text recognition or text extraction. They all describe the same job.

Here is a simple way I explain how we extract text from image files to clients. A photo of a menu is a picture of words. Your phone can show it, but it can’t read it. OCR is the step that reads it, so the picture becomes text you can work with.

How OCR Works, Step by Step

Most modern tools follow the same basic process when they extract text from images:

  1. Clean up the image. The tool straightens the page, adjusts contrast and removes noise so the letters stand out from the background.
  2. Find the text areas. It separates text from photos, lines and empty space, then breaks the text into lines and words.
  3. Recognize the characters. A trained model compares each shape against patterns it has learned and picks the most likely letter.
  4. Check the result. Many tools use language models and dictionaries to fix likely mistakes, such as reading “0” where “O” makes more sense.
  5. Output the text. You get plain text, a formatted document or a searchable PDF, depending on the tool.

When older OCR engines tried to extract text from images, they matched letters against fixed character templates. Newer engines use neural networks that read whole lines at once, which is why accuracy on photos and messy layouts has improved so much in the last few years.

Method 1: How to Extract Text From Image Online (Free)

The fastest way to extract text from image files on any device is a browser-based OCR tool. You upload the picture, the tool reads it, and you copy the result. There is nothing to install, and it works the same on a laptop, a tablet or a phone.

Here is the routine I follow to extract text from image files with the X2X Converter Image to Text tool:

  1. Open the tool in any modern browser.
  2. Upload your image. Drag and drop a JPG, PNG or screenshot into the upload area, or tap to pick a file from your gallery.
  3. Start the conversion. The tool runs optical character recognition on the picture.
  4. Review the output. Read through the text once. Check names, numbers and email addresses, because those are where small errors hide.
  5. Copy or save the text. Paste it into an email, a document, a spreadsheet or a notes app.

I like to extract text from image files online for one-off jobs, like pulling a quote from a screenshot or copying a list of product codes from a photo. It’s also handy on a shared or work computer where you can’t install software.

One thing to know: plain text extraction drops the original layout. If you need the columns, headings and tables to stay in place, convert image to Word instead. That gives you an editable document that keeps more of the page structure, which saves a lot of cleanup on reports and forms.

Method 2: Copy Text From Image on iPhone With Live Text

If you have an iPhone, you already have a built-in way to copy text from image files and extract text from images in your gallery. Apple calls it Live Text, and it works in the Photos app, the Camera app, Safari and screenshots.

According to Apple’s support page on Live Text on iPhone, you need an iPhone XS, iPhone XR or later running iOS 15 or later. Live Text in videos needs iOS 16 or later.

To use it:

  1. Open the Photos app and pick the photo with the text.
  2. Touch and hold a word, then drag the grab points to select what you want.
  3. Tap Copy, or tap Select All to grab every word in the photo.
  4. Paste the text into Notes, Mail, Messages or any other app.

You can also tap the Live Text button in the lower-right corner of the photo to highlight all the text at once. If you don’t see it, go to Settings > General > Language & Region and turn on Live Text.

In my experience, Live Text is the quickest way to extract text from image files for receipts, signs, Wi-Fi passwords and business cards. It struggles more with long, dense pages, where a dedicated OCR tool gives cleaner paragraphs.

Method 3: Extract Text From Image on Android With Google Lens

On Android, Google Lens is the easiest way to extract text from image files. It comes built into most Android phones through the Google app, the camera and Google Photos.

  1. Open Google Photos and select the picture, or open the Google Lens app.
  2. Tap the Lens icon, then tap Text.
  3. Select the words you need, or choose Select all.
  4. Tap Copy text and paste it wherever you need it.

To extract text from images without saving them first, Google Lens can also point your camera at a printed page and read it live, which is useful for menus, notices and handouts. I use it most for short pieces of text. For long documents, I still prefer to scan the page properly first, then run it through an OCR tool on my computer.

Method 4: Extract Text From Image on Windows

Windows 11 has text extraction built into the Snipping Tool. Take a screenshot with the Snipping Tool, click the Text actions button in the toolbar, and the tool highlights the text it finds. You can then copy all of it or select just one part, which makes it simple to extract text from images on a PC.

This is my favorite way to extract text from image captures of an error message, a video frame or a locked PDF on a Windows laptop. It’s quick, and the text never leaves your computer.

Method 5: Copy Text From Pictures in OneNote

Microsoft OneNote has had OCR built in for years to extract text from images, and it works well for scanned pages and business cards. Microsoft’s help page explains how to copy text from pictures in OneNote: you right-click the picture, choose Copy Text from Picture, and paste the result.

If you insert a multi-page printout, OneNote lets you copy text from one page or from all pages at once. Microsoft also notes that complex images can take a while to process, sometimes up to 24 to 48 hours, and that the quality of the image decides how well the text is recognized. I always skim the pasted text before I trust it.

On a Mac, Live Text also works in Photos and Preview from macOS Monterey onward, so you can extract text from image files the same way you would on an iPhone.

Method 6: Convert Image to Text With Google Docs

Google Docs is a handy free way to extract text from image files if you already use Google Drive. Upload the image to Drive, right-click it, and choose Open with > Google Docs. Docs creates a new document with the picture at the top and the recognized text below it.

When you extract text from images this way, the text comes out unformatted, and complex layouts can get scrambled. Still, for a clean page of printed text, it’s a solid choice that saves the result straight into your Drive.

How to Extract Text From Scanned Document Files and PDFs

A scanned document is just an image saved inside a PDF or image file. That’s why you can’t select the words in many scanned PDFs, even though you can see them. To extract text from scanned document files, you first need to run OCR on the page images.

Here is the workflow I use:

  1. Check if the PDF is already searchable. Try selecting a word. If you can highlight it, the text is already there and you can copy it directly.
  2. If not, turn each page into an image. You can convert PDF pages to JPG images so any OCR tool can read them.
  3. Run OCR on each page. Use an image to text converter for plain text, or an Image to Word tool if you want to keep the layout.
  4. Proofread the result. After you extract text from image pages, pay extra attention to tables, footnotes and numbers.

When you need to extract text from images in large batches of scans, a desktop or cloud OCR tool that handles multi-page files will save you time. For a few pages, the online route is usually faster than installing anything.

How to Convert Scanned Notes to Text, Including Handwriting

Printed pages are the easiest place to extract text from images. Handwriting is harder, because every person writes differently and letters often join together.

That said, modern engines can convert scanned notes to text much better than they could a few years ago. Neat, printed-style handwriting on lined paper usually comes out well. Fast cursive, faint pencil and notes squeezed into margins are where results fall apart.

When I need to extract text from image scans of handwritten notes, I follow three rules:

  • Write or photograph with dark ink on plain white or lightly lined paper.
  • Shoot from directly above in good light, with the whole page in the frame.
  • Test one page first before scanning a whole notebook.

If a tool gets more than a few words wrong on that test page, I try a different method rather than spend an hour fixing the output.

Multilingual Text Extraction: What Languages Are Supported?

Multilingual text extraction means reading text in languages other than English, and sometimes more than one language on the same page. How well tools extract text from image files in other languages varies a lot, so it’s worth checking before you start.

Microsoft’s documentation on optical character recognition in Azure AI Vision gives a useful picture of where the technology stands. It lists printed text support for English, French, German, Italian, Portuguese, Spanish, Chinese, Japanese, Korean, Russian, Arabic, Hindi and other languages that use Latin, Cyrillic, Arabic and Devanagari scripts. Handwritten text support is narrower: English, Simplified Chinese, French, German, Italian, Japanese, Korean, Portuguese and Spanish.

My practical advice: before you extract text from image files that mix two languages, or that use a script like Arabic or Urdu, test a short sample first. Some tools also let you choose the language before conversion, and picking the right one noticeably improves accuracy.

Which Method Should You Use? A Quick Comparison

The best way to extract text from image files depends on where your image is and what you need to do with the text. Here is how I choose:

MethodWorks OnBest ForKeeps LayoutCost
Online OCR toolAny browserQuick one-off jobs, any deviceNo (use Image to Word for layout)Free
Live TextiPhone, iPad, MacReceipts, signs, screenshotsNoFree, built in
Google LensAndroid, iPhoneShort text, live camera readingNoFree
Snipping ToolWindows 11Screenshots, error messagesNoFree, built in
OneNoteWindows, MacScanned pages, business cardsNoFree app
Google DocsAny browser with DriveClean printed pagesPartlyFree

If you only remember one thing from this table: use your phone’s built-in tool for small bits of text, and use a dedicated converter when the page is long or the layout matters.

Tips to Get More Accurate Results

When you extract text from images, the quality of your image decides the quality of your text. Every OCR tool I’ve used, from free phone features to paid software, gives better results with a better picture. These habits make the biggest difference:

  • Use good, even light. Daylight from a window beats a phone flash, which creates glare and harsh shadows.
  • Shoot straight on. Hold the camera parallel to the page. Angled shots bend the lines and confuse the software.
  • Fill the frame with the text. Crop out desks, hands and backgrounds before you upload.
  • Keep the resolution high. Microsoft’s documentation states a minimum text height of 12 pixels in a 1024 x 768 image, which is roughly 8-point text scanned at 150 DPI. Small text in a low-resolution photo is the most common reason I see for garbled output.
  • Avoid compressed copies. Images sent through chat apps are often shrunk, which makes it harder to extract text from images accurately. Use the original file from your camera roll or scanner.
  • Increase contrast on faded pages. A quick contrast boost in your photo editor helps on old or yellowed paper.
  • Choose the right language if the tool gives you the option.

Common Mistakes to Avoid

Most bad results when people extract text from image files come from a few avoidable mistakes:

  1. Trusting the output without reading it. OCR can swap “1” and “l” or “5” and “S.” Always check numbers, prices, dates and names.
  2. Using a screenshot of a screenshot. Each copy loses detail. Go back to the original image.
  3. Expecting perfect tables from plain text tools. Plain text drops columns. Use an Image to Word converter when you extract text from image files with tables or forms.
  4. Uploading sensitive documents without thinking. Check how a tool handles your files before uploading IDs, contracts or medical records.
  5. Photographing curved pages. Pages near a book’s spine bend the text. Press the book flat or use a scanner app that corrects the curve.

Why Searchable Text Matters

Searchable text is what you get when you extract text from image files: text that a computer can find, index and read, as opposed to words that are only part of a picture. Once you extract text from images, you can search a folder of scans for one word, paste figures into a spreadsheet and translate a page in seconds.

It also matters for accessibility. Screen readers can’t read words that only exist as pixels. The WCAG guidance on images of text from the W3C asks authors to use real text instead of pictures of text wherever possible, and it lists performing OCR on a scanned PDF as one of the techniques that help meet that goal. If you publish scanned documents on a website, adding real text makes them usable for far more people.

Options for Developers and Bulk Work

If you need to extract text from image files in bulk or build OCR into an app, look at an engine you can run yourself. The open-source Tesseract OCR engine is the best-known example. Its README states that it can recognize more than 100 languages out of the box and reads image formats including PNG, JPEG and TIFF.

Tesseract can output plain text, hOCR (HTML), PDF, TSV, ALTO and PAGE formats. It was first developed at Hewlett-Packard between 1985 and 1994, open-sourced in 2005 and developed by Google from 2006 until 2017. The project’s own notes say that better input images usually lead to better results, which matches everything I’ve seen in practice.

Tesseract can extract text from images at scale, but it has no graphical interface, so it suits developers more than everyday users. For most people who want to extract text from image files, a browser tool or a built-in phone feature is the faster path.

Is It Safe to Upload Images to an OCR Tool?

It depends on the tool. Some converters process files in your browser, while others upload them to a server. Before you extract text from image files that hold anything sensitive, read the privacy policy and check how long files are stored.

My personal rule is simple. For public text like menus, signs and printed articles, any reputable online tool is fine. For passports, bank statements, contracts and medical records, I use a built-in device feature like Live Text or the Snipping Tool, so the image stays on my own device.

Key Takeaways

  • You can extract text from image files for free with online OCR tools, iPhone Live Text, Google Lens, the Windows Snipping Tool, OneNote or Google Docs.
  • Optical character recognition (OCR), also called text recognition, is the technology that turns pixels into editable, searchable text.
  • When you extract text from images, image quality matters more than the tool. Use sharp, well-lit, straight-on photos with large enough text.
  • Plain text extraction drops the layout. Use an Image to Word converter when tables and formatting matter.
  • Handwriting and less common scripts are harder, so when you extract text from image scans of them, test one sample page first.
  • Always proofread numbers, names and dates before you use the extracted text.
  • Keep sensitive documents on your own device when you can.

Conclusion

Once you know how to extract text from image files, retyping text from a picture is one job you can stop doing today. Whether you’re on an iPhone, an Android phone, a Windows laptop or a borrowed computer, there is a free way to extract text from image files in under a minute. Start with a sharp, well-lit photo, pick the method that fits your device, and always give the result a quick proofread.

When you have a page of extracted text and the original scans to share, you can also combine images into a PDF so everything stays in one tidy file.

Ready to extract text from images yourself? Open the free Image to Text tool on X2X Converter, upload your image and copy your text in seconds.

Document Digitization: How to Turn Paper Into Searchable, Safe Digital Files

A professional scanning a document using a smartphone during the document digitization process.

Document digitization is the process of converting paper records into digital files you can search, edit, share and back up. In practice, you scan or photograph each page, run OCR so the text becomes searchable, give every file a clear name, and store it securely in the cloud with a second backup copy.

Why I Care So Much About Getting This Right

I have watched people lose a whole afternoon hunting for one tax form in a drawer full of paper. I have also watched a scanned folder become just as messy as the drawer it replaced. That second problem is the one nobody warns you about. Document digitization is not finished the moment a page turns into a picture on your phone.

In my experience, good document digitization has four parts: capture, recognition, organization and protection. Skip any one of them and you end up with a digital pile instead of a paper pile. The goal is simple: find any document in seconds, from any device, and never worry about losing it.

When I started, the step that changed everything for me was OCR. A scan on its own is only an image of a page, so I now run every important image through a tool that can extract text from image files before I file anything away. That one habit is what turns a photo of a receipt into something I can actually search.

This guide walks you through the full document digitization process the way I actually do it. You will learn what it means, why it matters, how to digitize documents step by step, which tools are worth using, and how to name, store and back up your files so they stay useful for years. I will also point out the mistakes I see most often, so you can avoid them from day one.

Whether you are clearing out a home office, running a small business, or leading a bigger digital transformation project, the same principles apply. The scale of document digitization changes. The method does not.

What Is Document Digitization?

Document digitization is the conversion of physical documents, such as letters, contracts, receipts, forms and handwritten notes, into digital files that a computer can store, search and share. The output is usually a PDF, an image file, or an editable text document.

That definition of document digitization sounds simple, but people mix up three related ideas. Knowing the difference helps you plan the right workflow.

Documents scanning vs OCR vs digitalization

TermWhat it actually doesWhat you end up with
Documents scanningCaptures the page as a picture using a document scanner or phone cameraAn image or image-only PDF
OCR (optical character recognition)Reads the letters in that picture and turns them into real textA searchable, copyable file
DigitalizationChanges how a business works using digital tools and dataNew processes, not just new files

Scanning is the first step of document digitization, not the whole job. When you scan document pages without OCR, you get a photo of words, and your computer cannot search inside it. OCR is what lets you scan text from image files and find a name or invoice number later.

Digitalization, and the wider idea of digital transformation, is the bigger picture. Document digitization feeds it. You cannot automate an approval process or analyze years of records while they sit in a filing cabinet.

What can you digitize?

Almost anything printed or written on paper is a candidate for document digitization:

  • Bills, bank statements and tax records
  • Contracts, leases and legal paperwork
  • Medical and insurance documents
  • Receipts and invoices for expenses
  • Handwritten notes, journals and recipes
  • Certificates, diplomas and family records
  • Business cards and whiteboard notes

Which output format should you choose?

For most people, PDF is the right default because it keeps pages together and opens on every device. If you photographed several pages, you can convert scanned images into a single PDF so a ten page contract stays one file instead of ten loose photos.

If you need to edit the content, for example to update an old form or reuse text from a printed report, go one step further and turn a scanned page into an editable Word document. I use PDF for records I only need to keep and Word for anything I plan to change.

Why Does Document Digitization Matter?

Document digitization matters because it makes your information findable, shareable and protected. Paper can be lost, damaged by water or fire, or simply misfiled. A well organized digital archive can be searched in seconds and copied to more than one safe place.

Here are the document digitization benefits I notice most in real life.

1. You find things in seconds

With OCR applied, you can search for a client name, an invoice number or a date and jump straight to the right page. This is the single biggest reason I recommend document digitization to anyone who handles paperwork regularly.

2. You get physical space back

Filing cabinets, boxes and folders take up room in homes and offices. Once your documents are safely digitized and backed up, you can keep only the originals you are legally or emotionally required to keep.

3. Your records survive accidents

A single copy of a paper document is fragile. A digital copy stored in the cloud plus a backup copy elsewhere can survive a flood, a fire or a lost bag. That is why I treat backup as part of document digitization, not an optional extra.

4. Sharing and remote work get easier

After document digitization, you can email a PDF, share a cloud link or attach a file to a form in a minute. No printing, no posting, no visiting the office just to pick up a copy.

5. It supports digital transformation

For businesses, document digitization is the foundation of digital transformation. Approval workflows, data extraction, accounting software and AI tools all need digital input. Paper locked in a cabinet cannot feed any of them.

6. Compliance and audits become less stressful

When records are organized with consistent names and folders, pulling documents for an audit, a tax review or an insurance claim takes far less time. Retention rules still apply, so check what your industry or local law requires before you shred originals.

The honest downsides

Document digitization is not free of effort. It takes time up front, a little discipline with naming, and some thought about privacy. Sensitive files need secure storage and careful sharing. But in my experience, the hours you invest once are repaid every single time you search instead of dig.

How to Digitize Documents: My 8 Step Process

To digitize documents well, sort the paper first, scan at the right settings, run OCR, check quality, name each file consistently, organize folders, store files securely and keep a backup. Here is how I handle each document digitization step.

Step 1: Decide what is worth digitizing

Not every page deserves a place in your archive. Before I start any document digitization job, I make three piles:

  1. Keep and digitize: records you need to reference, prove or share later.
  2. Digitize and keep the original: legal, official or sentimental items, such as deeds, wills, passports and family letters.
  3. Recycle or shred: junk mail, duplicates and outdated paperwork you do not need.

This step alone can cut a document digitization project in half. It also forces you to think about privacy early, because the shred pile is where sensitive information often hides.

Step 2: Prepare the paper

Remove staples, paper clips and sticky notes. Flatten folded pages and smooth curled corners. Group pages that belong together so a multi page document becomes one file. If anything is fragile, torn or very old, handle it gently and consider a flatbed scanner rather than a sheet feeder.

Step 3: Scan document pages at the right settings

In document digitization, settings matter more than the device. For ordinary text documents, I scan at 300 DPI, which is a common choice for clear text that OCR can read reliably. I use grayscale or black and white for plain text, and color only when color carries meaning, such as stamps, signatures, highlights or photos.

If you are digitizing historical or archival material, the U.S. federal Technical Guidelines for Digitizing Cultural Heritage Materials explain the image quality standards that libraries and archives follow. Most home and office projects do not need that level of rigor, but it is a useful reference when quality really counts.

No scanner? Your phone works well for everyday documents. For example, you can scan documents with the OneDrive app on Android, which crops the page, applies a document filter and saves it as a PDF. Microsoft notes that its Android app can combine up to 10 pages into one multi page scan.

Step 4: Run OCR to make the text searchable

This is the step most people skip, and it is the one that makes document digitization worthwhile. OCR reads the letters in your scan and turns them into text you can search, copy and edit. For quick jobs, I upload the image, extract the text, check it, and save it alongside the original scan.

OCR accuracy depends on scan quality. Straight, well lit, high contrast pages give the best results. Handwriting and faded print are harder, so always proofread important numbers like amounts, dates and account references.

Step 5: Check quality before you move on

Quality control is the quiet hero of document digitization. Open a few files at random and zoom in. Are all pages there and in order? Is the text sharp? Did OCR read the key details correctly? Catching a problem now is far easier than discovering it a year later when you need the file.

Step 6: Name every file using one convention

A consistent file naming convention is what keeps your archive usable. I cover the exact format I use further down, but the rule is simple: decide on one pattern and never break it.

Step 7: Organize folders by how you search

Build a folder structure around how you actually look for things. For a household, that might be Finance, Home, Health, Insurance, Vehicles and Personal. For a business, it might be by client, department or year. Keep it shallow: two or three levels is usually enough.

Step 8: Store securely and back up

The last stage of document digitization is protection: put the files somewhere safe and make sure there is more than one copy. Online secure document storage gives you access anywhere, while a second backup protects you if that account or device ever fails. I explain the backup rule I follow in the storage section below.

Which Document Digitization Tools Should You Use?

The best document digitization tool depends on how many pages you have. A phone is enough for occasional documents, a dedicated document scanner pays off for regular batches, and a professional scanning service makes sense for boxes of records or fragile archives.

OptionBest forMain strengthMain limitation
Phone camera and scanning appA few pages a week, receipts, on the goFree and always with youSlower for big batches, lighting varies
Flatbed scannerPhotos, books, fragile or odd sized itemsGentle and high qualityOne page at a time
Sheet fed document scanner with ADFRegular batches of loose pagesFast double sided scanningUpfront cost, not for fragile paper
Professional scanning serviceThousands of pages, archives, compliance projectsSpeed, volume and indexingCost, and your documents leave your hands
Free browser tools for OCR and conversionTurning scans into text, PDF or WordNo install, quick resultsNot a replacement for a scanner

Phone scanning

For most households, phone scanning is where document digitization starts. Modern scanning apps detect page edges, fix perspective and boost contrast. My tips: use daylight or even indoor light, place the page on a dark, plain surface, and hold the phone parallel to the paper to avoid a skewed image.

A dedicated document scanner

If document digitization is a weekly task for you, a sheet fed document scanner with an automatic document feeder (ADF) saves real time. It pulls pages through one after another and can scan both sides at once. A flatbed scanner is slower but better for photos, bound books and anything delicate.

Professional services

When a document digitization project involves filing rooms rather than folders, outsourcing can be the smarter choice. Look for providers that explain their security, chain of custody, indexing and quality checks in plain language. If your records are regulated, such as medical or financial files, ask exactly how they handle compliance.

Where free browser tools fit

Browser tools do not replace capture, but they fill the gaps around it in a document digitization workflow. I use them to pull text out of a photo, merge images into a PDF, or convert a PDF back into images when a form only accepts JPG uploads. Tools that process files locally in your browser are a sensible choice for personal documents, because your files do not need to be uploaded to a server.

OCR, File Formats, Naming and Backup: The Parts That Make It Last

Capture gets the page into your computer. These four decisions decide whether your document digitization work is still useful five years from now.

How OCR turns a scan into data

OCR software looks at the shapes in an image, recognizes them as letters and numbers, and outputs text. Once you extract text from image files, you can search the archive, copy a paragraph into an email, or paste figures into a spreadsheet. Without OCR, a scanned PDF behaves like a photo album: you can look, but you cannot search.

A practical document digitization tip: keep the original scan and the OCR text together. The image is your proof of what the paper said. The text is your way of finding it.

Choosing the right file format

  • PDF: the everyday choice for multi page documents and records you want to keep and share.
  • PDF/A: a version of PDF designed for long term archiving. The Library of Congress describes the PDF/A format for long term preservation and notes that the basic conformance level is the one typically used for files made from scanned pages.
  • JPG or PNG: good for single pages, photos and uploads to websites or forms. When a portal only accepts images, I convert PDF pages to JPG images instead of rescanning.
  • TIFF: often used by archives as a high quality master image, but files are large.
  • DOCX: only when you need to edit the content.

A file naming convention that actually works

This is where most document digitization projects quietly fail. Files named “scan_0042.pdf” or “IMG_7781.jpg” are impossible to find later. I follow the file naming best practices from the Smithsonian Libraries, which recommend names that are human readable, follow a consistent pattern, stay under 25 characters, and avoid spaces and unusual characters.

My own pattern looks like this:

YYYY-MM-DD_category_description.pdf

For example: 2026-03-14_tax_w2.pdf or 2025-11-02_car_insurance.pdf. Putting the date first, in year month day order, makes files sort correctly by date in any folder. Use hyphens or underscores instead of spaces, and keep descriptions short and specific.

Online secure document storage

Cloud storage is what makes the results of document digitization available on every device. When choosing online secure document storage, I look for:

  • Two factor authentication on the account
  • Encryption in transit and at rest
  • Version history, so an accidental overwrite can be undone
  • Clear sharing controls with expiring links
  • A provider that is transparent about where and how data is stored

Treat a sync service as storage, not as backup. If a file is deleted or encrypted by malware, sync can copy that problem to every device.

Cloud storage and backup: the 3-2-1 rule

The backup rule I trust is the one CISA recommends in its guidance on backing up business data: keep 3 copies of important files, on 2 different types of storage, with 1 copy stored off site. CISA also advises testing that you can actually restore your data, not just assuming the backup works.

The agency points to Verizon’s 2025 Data Breach Investigations Report, which found ransomware in 44% of the breaches it investigated. For document digitization, that is a clear reminder: the cloud copy, a local external drive, and one copy kept offline or off site together protect you from far more than a lost phone.

Common Document Digitization Mistakes to Avoid

The most common document digitization mistakes are skipping OCR, using random file names, keeping only one copy, and shredding originals you are required to keep. Here is the full list I watch for on every document digitization job.

  1. Scanning without OCR. You end up with thousands of images and no way to search them.
  2. No naming convention. Default names like “Scan 12” make your archive useless within a month.
  3. Too many folder levels. If you need six clicks to reach a file, you will stop using the system.
  4. Settings that are too low or too high. Blurry low resolution scans break OCR, while huge files fill storage and slow sharing.
  5. One copy only. A single cloud account or a single hard drive is not a backup plan.
  6. Shredding too soon. Some originals, such as wills, deeds, certain tax and legal documents, may need to be kept on paper. Check the rules that apply to you, and ask a professional when in doubt.
  7. Ignoring privacy. Uploading bank statements or ID documents to random online tools is a real risk. Prefer tools that process files on your device or providers you trust.
  8. Trying to do everything in one weekend. Big backlogs lead to burnout and sloppy work.

My Practical Tips for Faster Results

  • Start with new paper. Begin document digitization with everything that arrives from today onward, then work through the backlog in small batches, for example 30 minutes twice a week.
  • Batch by category. Scanning all insurance documents together makes naming and filing much faster.
  • Keep an inbox folder. New scans land there first, then get renamed and filed once a week.
  • Shrink before you share. Large phone photos can be slow to email or upload, so I resize scanned images to sensible dimensions before sending them.
  • Spot check OCR on numbers. Amounts, dates and reference numbers are where small OCR errors hurt the most.
  • Write your system down. A short note explaining your folders and file naming convention helps family members or colleagues follow the same rules.

Key Takeaways

  • Document digitization means turning paper into searchable, well organized and protected digital files, not just taking photos.
  • Scanning captures the page. OCR makes it searchable. Both are needed.
  • Scan text documents at around 300 DPI and use PDF as your default format, with PDF/A for long term archives.
  • A consistent file naming convention with the date first keeps your archive sortable and easy to search.
  • Use online secure document storage for access, and follow the 3-2-1 rule for cloud storage and backup.
  • Start with incoming paper, then clear the backlog in small, regular sessions.
  • Keep legally required originals and get professional advice for regulated records.

Frequently Asked Questions

1. What is document digitization in simple words?

Document digitization means turning paper documents into digital files. You scan or photograph each page, use OCR so the text can be searched, then name, organize and store the files safely. The result is a paperless archive you can search and share from any device.

2. What is the difference between scanning and document digitization?

Scanning only captures a picture of the page. Document digitization is the complete process: scanning, OCR, quality checks, file naming, organization, secure storage and backup. A scan without OCR and organization is just a digital photo, not a usable digital record.

3. How do I digitize documents for free?

For free document digitization, use your phone camera or a free scanning app to capture pages, then use free browser tools to extract text from the images and combine pages into a PDF. Store files in a free cloud storage plan and keep a second copy on an external drive or another account.

4. What DPI should I use to scan documents?

For everyday text documents, 300 DPI is a common and sensible choice because it keeps text sharp enough for OCR without creating huge files. Use higher settings for photos, small print or archival material where fine detail matters.

5. Is it safe to store important documents in the cloud?

It can be, if you choose a reputable provider and secure your account. Turn on two factor authentication, use a strong unique password, limit sharing, and keep a separate backup so that one compromised or deleted account does not mean losing everything.

6. Can I throw away paper documents after scanning them?

Sometimes, but not always. Many everyday papers can be shredded once document digitization and backup are complete. Originals such as wills, deeds, some tax records and certain legal documents may need to be kept on paper. Check local rules or ask a professional.

7. Can OCR read handwritten documents?

Modern OCR can read clear handwriting reasonably well, but accuracy is lower than with printed text. Neat block letters, good lighting and high contrast help a lot. Always proofread names, numbers and dates taken from handwritten notes.

8. What is the best file format for document digitization?

PDF is the best default for most documents because it keeps pages together and opens everywhere. Use PDF/A for long term archiving, JPG or PNG for single images and uploads, and DOCX only when you need to edit the text.

9. How should I name scanned files?

Use one consistent pattern that starts with the date in year month day order, followed by a category and short description, such as 2026-03-14_tax_w2.pdf. Avoid spaces and unusual characters, and keep names short so they stay readable and sort correctly.

10. How long does a document digitization project take?

It depends on volume and preparation. A small household backlog can often be finished over a few weeks of short sessions. Large office archives take longer and may justify a professional service. Sorting and removing staples first saves the most time.

Conclusion

Document digitization is one of those projects that feels bigger than it is. Once you break it into clear steps, the work becomes routine: sort, scan, run OCR, check, name, organize, store and back up. In my experience, the people who succeed are not the ones with the most expensive document scanner. They are the ones who pick a file naming convention, follow the 3-2-1 backup rule, and keep going a little each week.

If you are ready to start your own document digitization today, X2X Converter has free browser based tools that help with the steps after capture, from pulling text out of scanned images to turning photos into PDFs and editable documents. Your files are processed right in your browser, so you can build a searchable, paperless archive without installing anything.

MB to GB Conversion: How Many MB Make a GB and Why There Are Two Answers

MB to GB storage dashboard on a laptop showing 2 TB disk usage, with an SSD and SD cards

To convert MB to GB, divide the number of megabytes by 1,000 if you follow the decimal (SI) standard used by storage makers, macOS and iOS. Divide by 1,024 if you follow the binary convention used by Windows and RAM. So 5,000 MB is 5 GB in decimal, or about 4.88 GB in binary.

I get this question more than almost any other unit question: “Is a gigabyte 1000 MB or 1024 MB?” The honest answer is that both numbers are in use today, and which one is “right” depends on who is doing the counting. Your phone box, your laptop and your mobile data plan may each be using a different rule.

In this guide, I will walk you through the MB to GB conversion step by step, show you exactly where each standard is used, and explain the MB vs MiB difference that causes most of the confusion. If you work with files, storage or data bundles, this is one of those small skills that saves you real headaches. It sits right alongside the other everyday calculations I keep handy on a set of free online unit converters.

By the end, you will know how many MB make a GB in any situation, why your new 1 TB drive shows up as 931 GB, and how to do the math in your head in a few seconds.

What Are MB and GB?

A megabyte (MB) is a unit of digital information equal to one million bytes in the decimal system, or 1,048,576 bytes in the binary system. A gigabyte (GB) is one thousand times larger: one billion bytes in decimal, or 1,073,741,824 bytes in binary.

Before we convert anything, it helps to be clear about the building blocks. Every unit of digital storage starts from the same two pieces:

  • Bit (b): the smallest unit of data, a single 0 or 1.
  • Byte (B): a group of 8 bits. One byte holds roughly one text character.

From there, the prefixes stack up:

UnitSymbolDecimal value (SI)Binary value (traditional)
KilobyteKB / kB1,000 bytes1,024 bytes
MegabyteMB1,000,000 bytes1,048,576 bytes
GigabyteGB1,000,000,000 bytes1,073,741,824 bytes
TerabyteTB1,000,000,000,000 bytes1,099,511,627,776 bytes

Notice the gap between the two columns grows with every step. At the kilobyte level, the difference is only 2.4%. At the gigabyte level, it is about 7.4%. At the terabyte level, it reaches roughly 10%. That growing gap is exactly why the megabytes to a gigabyte question matters more today than it did when files were small.

To put sizes in perspective, a typical smartphone photo sits somewhere in the 2 to 5 MB range, depending on the camera and format. If you regularly resize images before sharing them, you are already managing file sizes at the MB level. A full HD movie, on the other hand, usually lands in the GB range.

Is 1 GB 1000 MB or 1024 MB?

By the official international standard, 1 GB equals 1,000 MB. In everyday computing, especially in Windows and RAM, 1 GB is still commonly treated as 1,024 MB. The 1,024 value has its own correct name: the gibibyte (GiB).

Here is how this split happened, in plain terms.

Computers work in binary, so memory chips naturally come in powers of 2. Early engineers noticed that 2 to the power of 10 (1,024) is very close to 1,000. So they borrowed the metric prefix “kilo” and used it to mean 1,024. For a couple of decades, everyone in the field understood this shortcut, and nobody minded much.

Then storage got bigger and computers went mainstream. People who knew that a kilogram is 1,000 grams and a kilometer is 1,000 meters started buying hard drives. Storage manufacturers, who never built drives in neat binary blocks, labeled their products using normal decimal math. Operating systems like Windows kept using binary math but kept the same “GB” label. Two different numbers ended up wearing the same name.

To fix this, the International Electrotechnical Commission (IEC) introduced a separate set of binary prefixes in December 1998. Under that system, a gigabyte is 10 to the power of 9 bytes, while a gibibyte (GiB) is 2 to the power of 30 bytes, which works out to 1,073,741,824 bytes. This is the root of every MB to GB disagreement you will find online.

So my practical answer is this:

  • Technically correct: 1 GB = 1,000 MB, and 1 GiB = 1,024 MiB.
  • Commonly used: many people and some software still say 1 GB = 1,024 MB, meaning GiB and MiB without saying so.

Both answers show up in real life. The skill is knowing which one the label in front of you is using.

How to Convert MB to GB (Step by Step)

To convert MB to GB, divide the megabyte value by 1,000 for decimal storage, or by 1,024 for binary storage. For example, 2,500 MB equals 2.5 GB in decimal and about 2.44 GB in binary.

Here is the process I use every time I do an MB to GB conversion by hand:

  1. Find out the context. Is the number from a storage box, a cloud plan, Windows File Explorer, a Mac, or a RAM spec? This decides the divisor.
  2. Pick your divisor. Use 1,000 for decimal (drives, USB sticks, SD cards, macOS, iOS, data plans). Use 1,024 for binary (Windows, RAM, many older apps).
  3. Divide. GB = MB ÷ divisor.
  4. Round sensibly. Two decimal places is plenty for everyday use.

The Decimal Formula (Base 10)

GB = MB ÷ 1,000

Example: You download a game that the store lists as 45,000 MB. Divide by 1,000 and you get 45 GB. This is the MB to GB math that matches what you see on drive boxes and in app stores.

The Binary Formula (Base 2)

GB (really GiB) = MB (really MiB) ÷ 1,024

Example: Windows shows a video folder at 6,144 MB. Divide by 1,024 and you get exactly 6 GB as Windows reports it.

Going the Other Way: GB to MB

Reverse the operation and multiply:

  • Decimal: MB = GB × 1,000 (so 8 GB = 8,000 MB)
  • Binary: MB = GB × 1,024 (so 8 GB = 8,192 MB)

My Quick Mental Shortcut

When I need a fast estimate for the binary result, I divide by 1,000 first and then knock off about 2.4%. For 10,000 MB, that gives 10 GB minus 0.24 GB, which lands at roughly 9.76 GB. The exact answer is 9.766 GB, so the shortcut is close enough for checking whether a file fits on a drive. For bigger numbers, people often reach for a percentage calculator to work out exactly how much of a quota they have used after converting.

MB to GB Conversion Table

This MB to GB conversion table shows common values under both standards, so you can compare the decimal (÷1,000) and binary (÷1,024) results side by side.

Megabytes (MB)GB (decimal, ÷1,000)GB (binary, ÷1,024)
100 MB0.1 GB0.098 GB
250 MB0.25 GB0.244 GB
500 MB0.5 GB0.488 GB
750 MB0.75 GB0.732 GB
1,000 MB1 GB0.977 GB
1,024 MB1.024 GB1 GB
1,500 MB1.5 GB1.465 GB
2,048 MB2.048 GB2 GB
2,500 MB2.5 GB2.441 GB
4,096 MB4.096 GB4 GB
5,000 MB5 GB4.883 GB
8,192 MB8.192 GB8 GB
10,000 MB10 GB9.766 GB
25,000 MB25 GB24.414 GB
50,000 MB50 GB48.828 GB
100,000 MB100 GB97.656 GB

A pattern worth noticing: numbers like 1,024, 2,048, 4,096 and 8,192 come out perfectly even in binary. That is a good clue. If you see a RAM or memory spec using these numbers, you can be fairly sure it is using the 1,024 rule.

What Is the Difference Between MB and MiB?

A megabyte (MB) is 1,000,000 bytes, based on powers of 10. A mebibyte (MiB) is 1,048,576 bytes, based on powers of 2. One MiB is about 4.86% larger than one MB, and the gap widens at the gigabyte and terabyte levels.

This is the cleanest way to stop the confusion. Instead of using “MB” for two different amounts, the IEC system gives each one its own name. The binary prefix definitions published by NIST list these names and values, and also point out that binary prefixes are not part of the SI metric system itself, even though their names were derived from it.

Decimal (SI)ValueBinary (IEC)Value
Kilobyte (kB)1,000 bytesKibibyte (KiB)1,024 bytes
Megabyte (MB)1,000,000 bytesMebibyte (MiB)1,048,576 bytes
Gigabyte (GB)1,000,000,000 bytesGibibyte (GiB)1,073,741,824 bytes
Terabyte (TB)10^12 bytesTebibyte (TiB)1,099,511,627,776 bytes

Useful cross-conversions I keep in mind:

  • 1 GB = about 953.67 MiB
  • 1 GiB = about 1,073.74 MB
  • 1 GiB = 1,024 MiB exactly
  • 1 GB = 1,000 MB exactly

You will see “MiB” and “GiB” mostly in Linux tools, developer software, cloud server dashboards and virtual machine settings. The Ubuntu units policy is a good example of an operating system that formally asks applications to use IEC names for base 2 values and SI names for base 10 values, so the label always matches the math.

There is even a third, odd variant. The classic “1.44 MB” floppy disk mixed both systems: 1.44 × 1,000 × 1,024 bytes. It is a fun reminder that the confusion around the megabyte goes back decades, as the megabyte definitions on Wikipedia show.

Why Does My 1 TB Drive Show Only 931 GB?

A 1 TB drive holds 1,000,000,000,000 bytes. Windows divides that by 1,073,741,824 (binary GB), which gives about 931.32. Nothing is missing. The same bytes are being measured with a bigger unit, so the number looks smaller.

This is the single most common complaint I hear, and it is the clearest real-world example of why MB and GB conversion has two answers.

Here is what different advertised sizes look like when an operating system reports them in binary:

Advertised capacity (decimal)What a binary system shows
16 GBabout 14.90 GB
32 GBabout 29.80 GB
64 GBabout 59.60 GB
128 GBabout 119.21 GB
256 GBabout 238.42 GB
500 GBabout 465.66 GB
1 TBabout 931.32 GB
2 TBabout 1,862.65 GB

On top of this unit difference, formatting and the operating system itself take up some space, so your usable free space will be a little lower still.

Apple explains this clearly in its support note on how storage capacity is measured on Apple devices. Storage makers use the decimal system, which is why packaging often states that 1 GB equals 1 billion bytes. Apple also notes that older software, such as iOS 10 and earlier and OS X Leopard and earlier, reported storage in binary. Newer Apple systems report in decimal, which is why a Mac shows numbers closer to the box.

This difference has even ended up in court. Drive makers including Western Digital and Seagate faced lawsuits over capacity labels and settled them. A later US case went in favor of the manufacturers, with the court treating the decimal definition as the preferred one for trade. You can find a summary of that history on the gigabyte page on Wikipedia.

Which Devices and Systems Use 1000 vs 1024?

Storage makers, macOS, iOS and most networking use 1,000. Windows File Explorer and RAM specs use 1,024. Linux tools vary, but well-behaved ones label binary values as MiB or GiB.

Here is my working reference:

Where you see the numberRule usedHow many MB make a GB here
Hard drive, SSD, USB, SD card packagingDecimal1,000
macOS (10.6 Snow Leopard and later)Decimal1,000
iOS (iOS 11 and later)Decimal1,000
Windows File ExplorerBinary, labeled “GB”1,024
RAM modules (for example “8 GB RAM”)Binary1,024
Internet speeds (Mbps, Gbps)Decimal, in bits1,000
Linux command-line tools (ls, du, df)Often binary by default1,024
Cloud and server dashboardsVaries, check for “GiB”Depends on label

My tip: if you ever compare a file size on Windows with the same file on a Mac, expect the Mac number to be a little higher. Neither computer is wrong. They are counting in different units.

MB vs Mb: Don’t Mix Up Bytes and Bits

A capital “B” means bytes, a lowercase “b” means bits. One byte is 8 bits, so 1 MB equals 8 Mb. Internet speeds are usually quoted in megabits per second (Mbps), while file sizes are quoted in megabytes.

This mix-up catches people out all the time, especially with internet packages and mobile data.

Say your connection runs at 100 Mbps. That is 100 megabits per second, which is only 12.5 megabytes per second. To download a 1 GB file (1,000 MB, or 8,000 megabits), it takes about 80 seconds in ideal conditions. Real-world speeds are usually lower because of network overhead and congestion.

Quick bit and byte reference:

  • 1 MB = 8 Mb
  • 1 GB = 8 Gb
  • 100 Mbps ÷ 8 = 12.5 MB per second
  • 1 Gbps ÷ 8 = 125 MB per second

The same caution applies to file encoding. When developers turn files into text with Base64 encoding, the output grows by roughly 33%. So a 3 MB image can become about 4 MB once encoded, which matters when you are working near an upload limit.

Real-World Examples of MB and GB

In practical terms, 1 GB holds roughly 200 to 500 phone photos, about an hour of standard-definition video, or a few hours of normal web browsing. Exact figures depend on file quality and compression.

These are the everyday questions where a quick MB to GB check actually helps:

Photos. If your phone saves photos at around 3 MB each, 1 GB (1,000 MB) holds about 333 photos. A 64 GB phone, after the system takes its share, still fits thousands.

Video. As a rough guide, one hour of standard-definition video at 2.2 megabits per second works out to about 1 GB. HD and 4K video use far more, often several GB per hour.

Mobile data bundles. If your monthly bundle is 6 GB and you have used 4,500 MB, you have used 4.5 GB in decimal terms, leaving about 1.5 GB. Most mobile carriers count data in decimal, though it is worth checking your provider’s terms if the numbers do not seem to add up.

Email attachments. Many email services cap attachments at around 20 to 25 MB. A 0.5 GB video file (500 MB) is far over that limit, so you would need a cloud link instead.

USB transfers. A folder showing 30.5 GB in Windows is about 32.75 GB in decimal. That will not fit on a 32 GB flash drive, even though the numbers look close. This is exactly the kind of moment where knowing how many MB to make a GB saves you a failed transfer.

Disc formats. A single-layer DVD holds about 4.7 GB in decimal, which Windows shows as roughly 4.38 GB. A single-layer Blu-ray holds about 25 GB.

Common Mistakes When Converting MB to GB

The most common mistakes are using the wrong divisor for the context, confusing megabits with megabytes, and assuming a drive is faulty when it shows less capacity than the box. Each one has a simple fix.

After years of dealing with storage questions, these are the errors I see most:

  1. Treating 1,024 as the only correct answer. Many competing guides say 1,000 is “a mistake.” It is not. It is the official SI definition and the one storage makers use.
  2. Treating 1,000 as the only correct answer. Equally risky. Your Windows PC and your RAM still use 1,024, so you need that rule to read their numbers properly.
  3. Mixing Mb and MB. A 50 Mbps plan does not download 50 MB per second. It downloads about 6.25 MB per second.
  4. Comparing numbers across systems without converting. A Mac and a Windows PC will show different sizes for the same file.
  5. Forgetting formatting overhead. Even after converting correctly, usable space is slightly lower than the raw capacity.
  6. Rounding too early. If you round each file before adding them up, small errors stack. Add first, convert once, then round.

Which Conversion Should You Use?

Use 1,000 when you are dealing with drive packaging, cloud plans, data bundles, Macs and iPhones. Use 1,024 when you are reading Windows File Explorer, RAM sizes, or anything labeled MiB or GiB.

My personal rule of thumb for MB to GB is to match the number to its source. When I am buying storage, I think in decimal because that is how it is sold. When I am checking whether files will fit on a drive that Windows is reporting, I think in binary because that is how Windows measures.

If you are writing documentation, reports or technical specs, I strongly recommend using the IEC labels (MiB, GiB) whenever you mean 1,024. It costs you one extra letter and removes all doubt for your readers.

And if you are ever unsure, run the MB to GB conversion both ways. If the file fits under both results, you are safe either way.

Pros and Cons of Each Standard

The decimal system is easier for people and is the legal standard for selling storage. The binary system fits how memory hardware is built. Each has a clear place.

Decimal (1,000)Binary (1,024)
Easy mental mathYesHarder
Matches drive packagingYesNo
Matches RAM hardwareNoYes
Official SI standardYesNo (IEC uses separate names)
Used by WindowsNoYes
Used by macOS and iOSYesOnly older versions

Using a Memory Unit Converter

A memory unit converter lets you enter any value in bits, bytes, KB, MB, GB, TB or larger units and get the converted result instantly. It removes the risk of dividing by the wrong number or misplacing a decimal point.

The MB to GB formulas above are simple, but when I am converting large numbers, chaining several units (say, KB to TB), or double-checking a spec sheet, a converter is faster and less error-prone. A good converter should:

  • Support every unit from bits up to petabytes and beyond.
  • Make clear which factor it uses (1,000 or 1,024).
  • Work instantly in the browser, without sign-ups.
  • Let you swap the “from” and “to” units with one click.

One tip: always check which convention a converter uses before you trust a result for a purchase decision. If a tool uses 1,024, its results will match what Windows and RAM specs show, and you can multiply by about 1.074 to get the decimal GB figure printed on the box.

Key Takeaways

  • There are two valid answers. 1 GB = 1,000 MB in the decimal SI standard, and 1 GiB = 1,024 MiB in the binary IEC standard.
  • The MB to GB formula is simple: divide by 1,000 (decimal) or by 1,024 (binary).
  • Context decides the divisor. Drives, macOS, iOS and data plans use 1,000. Windows and RAM use 1,024.
  • MiB and GiB are the precise binary names. One MiB is 1,048,576 bytes, about 4.86% more than one MB.
  • A 1 TB drive showing 931 GB is normal. It is the same storage measured with a bigger unit.
  • Bits are not bytes. 1 MB equals 8 Mb, which matters for internet speeds.

Conclusion

The MB to GB question has two right answers because the world never fully agreed on one. Storage makers, macOS, iOS and mobile carriers count in thousands. Windows and RAM count in 1,024s. Once you know which rule the number in front of you is using, the conversion takes seconds: divide by 1,000 or by 1,024, and you are done.

My advice is simple. Match the divisor to the source, keep bits and bytes separate, and use MiB or GiB in your own writing whenever you mean the binary value.

When you want an instant, error-free answer without doing the division yourself, try this free MB to GB converter. It handles every unit from bits up to yottabytes, uses the binary 1,024 factor that Windows and RAM specs follow, and works right in your browser with no sign-up.

Frequently Asked Questions

How many MB make 1 GB?

It depends on the standard. In the decimal system used by storage makers, macOS and iOS, 1 GB equals 1,000 MB. In the binary system used by Windows and RAM, 1 GB is treated as 1,024 MB, which is properly called a gibibyte (GiB). Both are in common use today.

How do I convert MB to GB quickly?

Divide the number of megabytes by 1,000 for decimal results, or by 1,024 for binary results. For example, 3,000 MB equals 3 GB in decimal and about 2.93 GB in binary. Pick the divisor that matches where the number came from, such as a drive box or Windows File Explorer.

Is 1 GB 1000 MB or 1024 MB?

Officially, 1 GB is 1,000 MB under the International System of Units. The value of 1,024 MB belongs to the gibibyte (GiB), a binary unit standardized by the IEC in 1998. Many people and Windows still call the 1,024 version “GB,” which is why both answers appear online.

What is the difference between MB and MiB?

A megabyte (MB) equals 1,000,000 bytes, while a mebibyte (MiB) equals 1,048,576 bytes. MB follows powers of 10, and MiB follows powers of 2. One MiB is about 4.86% larger than one MB. You will usually see MiB in Linux, developer tools and cloud dashboards.

Why does Windows show less storage than my drive box?

Drive makers measure capacity in decimal, where 1 GB is one billion bytes. Windows measures in binary, dividing by 1,073,741,824 but still labeling the result “GB.” So a 1 TB drive shows about 931 GB. No storage is missing; the same bytes are counted with a larger unit.

How many GB is 1,500 MB?

1,500 MB is exactly 1.5 GB in the decimal system. In the binary system, it is about 1.46 GB. If you are checking whether a 1,500 MB file fits on a drive that Windows reports in GB, use the binary figure to be safe.

Is a megabyte bigger than a megabit?

Yes. A megabyte is eight times bigger than a megabit because one byte contains eight bits. File sizes use megabytes (MB), while internet speeds use megabits per second (Mbps). A 100 Mbps connection transfers about 12.5 MB per second under ideal conditions.

How many megabytes to a gigabyte does my phone use?

Modern iPhones running iOS 11 or later report storage in decimal, so 1 GB equals 1,000 MB. Android phones often follow decimal reporting as well, though some apps may differ. Older iOS versions used binary math, which is why earlier iPhones showed slightly less capacity than advertised.

Does RAM use 1000 or 1024?

RAM uses the binary system, so an “8 GB” memory module holds 8 × 1,073,741,824 bytes, which is 8 GiB. Memory chips are built in powers of two, which makes the 1,024 rule a natural fit. This is one place where the traditional 1,024 definition remains standard practice.

How much is 1 GB of mobile data in MB?

Most mobile carriers count data in decimal, so 1 GB of mobile data equals 1,000 MB. Some apps on your phone may display usage in binary, which can make the numbers look slightly different. If your usage does not match your carrier’s figure, check which convention each one uses.

How Do QR Codes Work? A Simple Guide From Squares to Scan

How do QR codes work: a woman scans an event ticket QR code with her smartphone camera

A QR code is a square, two dimensional barcode that stores data in a grid of black and white squares called modules, where dark means 1 and light means 0. Your phone finds the three big corner squares, reads the grid as binary, repairs damage with built in error correction, and turns it back into text, a link, or Wi-Fi details.

Introduction

I scan QR codes almost every day. Menus, parcel labels, payment counters, Wi-Fi cards, event tickets. For years I treated them like magic stickers: point the camera, wait half a second, done.

Then I started building and testing online converter tools, and I had to understand what actually sits inside that little square. It turned out to be one of the smartest pieces of everyday engineering I have studied.

In this guide I will answer how do QR codes work properly, from the first black square to the moment a link opens on your screen. I will keep it simple, but I will not skip the parts most articles leave out: how a QR code stores data bit by bit, why a torn code still scans, and how much one square can really hold. You will also learn how to make a QR code for a link or a website, which mistakes break a code, and how to avoid QR scams.

Where You Already Use QR Codes Every Day

Before the technical side, it helps to notice how often these codes quietly work for you.

  • Shopping: Many stores print a code next to the price tag for product details or a sale. If you like to calculate discount percentage before you buy, that scan often shows the original and sale price side by side.
  • Payments: In Pakistan, India, China and many other countries, you pay at small shops by scanning with a banking or wallet app.
  • Charity: Mosques and welfare trusts now display codes so people can give quickly. If you are working out how to calculate zakat for the year, there is a good chance you will pay it through a scan.
  • Travel and events: Boarding passes and concert tickets get scanned at the gate.
  • Wi-Fi sharing: One scan connects a guest without typing a long password.

Every one of these runs on the same system. So let us start at the beginning.

What Is a QR Code?

A QR code is a two dimensional (2D) matrix barcode that stores information both horizontally and vertically, so it holds far more data than a regular barcode. QR stands for “Quick Response,” because it was designed to be read very fast.

If you have ever wondered what is a QR code compared with the striped barcode on a cereal box, here is the short version. A normal barcode stores data in one direction only, left to right. A QR code uses a grid, so it stores data in two directions at once. That single change lets it hold thousands of characters instead of about 20.

A short history

The format was created in 1994 by Denso Wave, then part of the Denso group, a major Toyota supplier in Japan. Engineer Masahiro Hara led a very small team. Factory workers tracking car parts had to scan several barcodes per box, which was slow. They needed a code that held more data, including Japanese Kanji and Kana, and could be read at high speed from any angle.

According to the official QR code history published by Denso Wave, the company kept its patent but chose not to enforce it, so anyone could use the format for free. I think that decision is the real reason these codes are everywhere today. No license fee meant every phone maker, app developer and printer could adopt it.

The format is now an international standard called ISO/IEC 18004. The latest edition of the QR code specification was published in 2024, and it defines exactly how every module, pattern and bit must be laid out.

How Do QR Codes Work? The Big Picture

QR codes work by turning information into binary (1s and 0s), adding error correction data, and drawing all those bits as dark and light squares on a grid that a camera can read from any angle.

The full journey looks like this:

  1. You give the encoder some data, like a web address.
  2. It picks the most compact way to turn that data into bits.
  3. It adds error correction bits so the code survives damage.
  4. It places the bits on a square grid in a fixed zigzag order.
  5. It applies a mask so cameras can read the pattern easily.
  6. Fixed patterns in the corners and edges help scanners find and align it.
  7. Your phone reverses the whole process and shows the original data.

The rest of this guide zooms into each step, because the clever details are what make the system so reliable.

The Anatomy of a QR Code

To really see how do QR codes work, look closely at any code. It is not random noise. Some parts are always the same, and those fixed parts make fast scanning possible.

Finder patterns (the three big squares)

The large squares in the top left, top right and bottom left corners are finder patterns. Each is a dark square inside a light ring inside a dark ring.

A line drawn through the middle of one shows dark, light, dark, light, dark in a ratio of 1:1:3:1:1. That ratio rarely appears by accident, so a camera can spot the code instantly even in a messy photo. Because the fourth corner has no finder, the scanner also knows which way up the code is. That is why you can scan one upside down or sideways.

Alignment patterns

Larger codes have one or more smaller squares, usually near the bottom right. These alignment patterns help correct distortion when the code sits on a curved bottle or is photographed at an angle. The smallest size, version 1, has none.

Timing patterns

A row and a column of alternating dark and light modules run between the finders. These timing patterns work like a ruler, telling the scanner how big each module is and where every row and column sits.

Quiet zone

The empty border is the quiet zone. The standard asks for a margin at least four modules wide. Without it, the scanner can confuse the code with nearby text. This is one of the most common reasons a printed code fails.

Format and version information

Small strips next to the finders store format information: the error correction level and the mask pattern used. It is stored twice, so it survives damage. Version 7 and above also store version information about the grid size.

The data area

Everything else holds your actual message, mixed with the repair data that lets it survive scratches and stains.

How a QR Code Stores Data, Step by Step

This is the part most guides skip, and it is the most interesting. Here is how a QR code stores data, using the text HELLO WORLD as an example.

Step 1: Choose an encoding mode

There are four main modes, and the encoder picks the most efficient one for your content.

ModeWhat it storesHow it packs data
NumericDigits 0 to 9 only3 digits in 10 bits
Alphanumeric0 to 9, A to Z (uppercase), space and $ % * + – . / :2 characters in 11 bits
ByteAny text, including lowercase, symbols and UTF-88 bits per byte
KanjiJapanese Kanji and Kana1 character in 13 bits

HELLO WORLD uses only uppercase letters and a space, so the encoder chooses alphanumeric mode. Typed in lowercase, it would switch to byte mode, which takes more space. Small detail, real effect: uppercase text can produce a slightly less dense grid.

Step 2: Build the bit stream

The encoder writes a short header first: a 4 bit mode indicator (“this is alphanumeric”) and a character count (“11 characters follow”). Then it converts the text. Each character has a value (H is 17, E is 14), and pairs are combined into one number written as 11 bits. HELLO WORLD becomes roughly 60 bits of real data.

Step 3: Pad and split into codewords

Each size has a fixed number of data slots. If the message is shorter, the encoder adds a terminator and filler bytes until every slot is used. The stream is then cut into 8 bit chunks called codewords, the bricks the rest of the process works with.

Step 4: Add error correction codewords

Next, the data runs through Reed-Solomon error correction, which creates extra codewords. They hold no new information. They hold clues that let a scanner rebuild missing or damaged data.

Step 5: Place the bits on the grid

Codewords are laid out from the bottom right corner, moving upward in a two column wide zigzag, then down, then up again, skipping the fixed patterns. Dark means 1, light means 0.

Step 6: Apply the best mask

If the data created big blocks of one color, or a shape that looks like a finder, cameras would get confused. So the encoder tests eight mask patterns, flips certain modules for each, scores the results, and keeps the cleanest one. Your phone later removes the same mask to get the original bits back.

Why a Damaged QR Code Still Scans

Ever scanned a crumpled flyer or a coffee stained label and it still worked? That is error correction, and it is the main reason this format beats older barcodes.

Reed-Solomon error correction adds backup codewords so a scanner can rebuild data even when part of the code is missing or dirty. The same family of math protects music CDs and was first developed for satellite communication. Denso Wave explains its QR code error correction levels on its official site.

When you create a code, you choose one of four levels:

LevelDamage it can recoverBest for
L (Low)About 7%Clean screens, maximum data
M (Medium)About 15%Everyday use, the common default
Q (Quartile)About 25%Outdoor signs, packaging, labels
H (High)About 30%Codes with a center logo or rough environments

There is a trade off. More backup data means less room for content or a denser grid. I use M for screens and simple links, and H whenever I place a logo in the center, because a logo physically covers modules and needs that extra safety net.

How Much Data Can a QR Code Hold?

There are 40 versions. Version 1 is a grid of 21 by 21 modules, and each version adds 4 modules per side, up to version 40 at 177 by 177.

At version 40 with level L, a single code holds up to:

Data typeMaximum capacity
Numeric digits7,089
Alphanumeric characters4,296
Bytes2,953
Kanji characters1,817

These are ceilings, not targets. A version 40 code is so dense that most phones struggle unless it is printed large. At the other end, version 1 at level L holds just 17 bytes, and only 7 at level H. That is why a long URL creates a busy, crowded pattern, and why many people shorten links first.

How Your Phone Reads a Code in Under a Second

This is the other half of how do QR codes work: the scanner side. When you point your camera at a code:

  1. Detect: The camera looks for the 1:1:3:1:1 finder ratio in each frame.
  2. Straighten: It locates all three finders, then uses the alignment pattern to correct tilt and curve.
  3. Measure: Timing patterns reveal the module size and version.
  4. Read the format: It reads the error correction level and mask.
  5. Unmask and repair: It removes the mask, then Reed-Solomon decoding fixes misread modules.
  6. Decode: It reads the mode and character count and rebuilds the text.
  7. Act: A URL gets an “open” prompt, a Wi-Fi string offers to join, contact details offer to save.

Apple added scanning to the iPhone Camera app with iOS 11 in 2017, and most modern Android phones scan through the camera or Google Lens. You no longer need a separate app.

Does it need internet?

No. Reading a code happens entirely on your device. The data is printed right there in the squares. You only need internet if the decoded content is a link you want to open. Plain text, a phone number or Wi-Fi details work fully offline.

QR Code vs Barcode

People often ask me if this is just a fancy barcode. Technically it is a type of barcode, but it is a very different tool.

FeatureTraditional barcode (1D)QR code (2D)
Data directionOneTwo
Typical capacityAbout 20 charactersUp to 7,089 digits
Error correctionLittle or noneUp to about 30% recovery
Scan angleFairly straightAny angle
Phone camera supportSometimes, with an appBuilt into most phones
Common useRetail price lookupLinks, payments, tickets, Wi-Fi

For a deeper look at related 2D formats like Micro QR and rMQR, the encyclopedia entry on the QR code is a solid starting point.

Static vs Dynamic QR Codes

This matters a lot before you create one, especially for business.

A static code stores your data directly in the squares and can never be changed. A dynamic code stores a short redirect link that points to your real destination, which you can edit later.

FeatureStaticDynamic
Where data livesInside the codeOn a server, behind a short link
Editable after printingNoYes
Scan trackingNoUsually yes
ExpiresNeverCan stop if the service ends or a plan lapses
CostUsually freeOften paid
Best forWi-Fi, text, permanent linksMenus, campaigns that change

My honest advice: if you print something permanent and do not need statistics, use static. It cannot break because a company shut down or a subscription expired.

How to Make a QR Code (Step by Step)

Learning how to make a QR code takes about a minute, and you need no design skills.

  1. Decide what it should do: open a link, show text, share Wi-Fi, or save a contact.
  2. Open a QR code generator. A free online QR code generator works perfectly for static codes.
  3. Paste your content into the box.
  4. Pick error correction. M is a good default; use H if you will add a logo.
  5. Download as PNG for screens, or SVG for print if offered.
  6. Test it with at least two different phones before printing or sharing.

How to make a QR code for a link

For a YouTube video, a Google Form or a social profile, here is how to make a QR code for a link:

  1. Copy the full URL from the address bar.
  2. Open it in a private browser window to confirm it is not tied to your login.
  3. Paste it into the QR code generator.
  4. If the link is very long, use a shorter version. Fewer characters mean a cleaner pattern.
  5. Download and test on both iPhone and Android.

How to make a QR code for a website

The steps for how to make a QR code for a website are the same, plus a few points that matter for businesses:

  • Point to the right page. A flyer for a sale should open the sale page, not your homepage.
  • Always use https, since some phones warn about non secure links.
  • Check the page on mobile. Everyone who scans lands there on a phone.
  • Choose static if the URL will never change, and dynamic if you plan to update the destination.

Printing Tips That Keep Codes Scannable

I have seen beautiful designs that simply do not scan. The rules I follow:

  • Strong contrast: dark modules on a light background. Inverted colors confuse many scanners.
  • Respect the quiet zone: a clear margin at least four modules wide.
  • Size for distance: a common rule of thumb is about one tenth of the scanning distance, so roughly 10 cm wide for scanning from 1 meter. Around 2 cm is the practical minimum for business cards.
  • Never stretch it. Resize proportionally.
  • Keep logos small and use level H.
  • Test the final print, not just the file on your screen.

Common Mistakes to Avoid

  1. Linking to a page that later disappears. A static code pointing to a deleted page is useless forever.
  2. Using a dynamic code from a free trial. When the trial ends, every printed code can die.
  3. Cramming in too much data. Tiny modules fail in poor light.
  4. Skipping the test scan. One wrong character ruins the whole print run.
  5. Bad placement, like on a moving vehicle or too high on a wall.
  6. Reusing an old image without checking it. If you find a code on your computer and cannot remember where it leads, decode it first.

How to Read a QR Code Without a Phone

Sometimes the code is already on your computer: in a PDF, an email, or a screenshot. You cannot point your phone at your own phone.

That is where a QR code to text converter helps. You upload the image and it shows the raw text or link inside. I use this for three things:

  • Checking a link before visiting it, so I can judge whether the URL looks safe.
  • Recovering Wi-Fi details. A Wi-Fi code contains text like WIFI:T:WPA;S:NetworkName;P:Password;; which reveals the network name and password.
  • Copying data into documents without retyping contact details or serial numbers.

Are QR Codes Safe?

A QR code itself cannot hack your phone, but the link inside it can lead to a fake website or a harmful download. The danger is the destination, not the squares.

Scammers use quishing, short for QR phishing. They stick fake codes over real ones on parking meters and posters, or send codes in urgent emails that lead to pages built to steal logins or card details. The US Federal Trade Commission has a clear consumer alert about scammers hiding harmful links in QR codes. Based on that advice and my own habits:

  • Read the link preview before tapping. Watch for tricks like “paypa1” instead of “paypal.”
  • Distrust codes in unexpected messages, especially urgent ones.
  • Check public codes for stickers placed on top of the original.
  • Never enter passwords or card details on a page reached through a random scan. Open the official site or app yourself.
  • Keep your phone updated.

Also, these codes are not encrypted by default. Anyone who scans one can read it, so never put private data in a public code.

Key Takeaways

  • How do QR codes work in one line: data becomes binary, gets error correction, and is drawn as modules a camera can read.
  • A QR code is a 2D matrix barcode created by Denso Wave in 1994 to track car parts.
  • It stores data as dark (1) and light (0) modules on a grid from 21 by 21 up to 177 by 177.
  • Three finder patterns let your phone find and orient it from any angle.
  • Data is encoded in numeric, alphanumeric, byte or Kanji mode and protected with Reed-Solomon error correction.
  • Levels L, M, Q and H recover roughly 7%, 15%, 25% and 30% of damage.
  • One code holds up to 7,089 digits or 2,953 bytes, but smaller is easier to scan.
  • Reading works offline; opening a link needs internet.
  • Static codes never expire. Dynamic codes are editable but depend on a service.
  • Most risk comes from fake links, so always check where a code leads.

Conclusion

So, how do QR codes work? They turn your information into binary, protect it with Reed-Solomon error correction, and draw it as squares with built in guides that any camera can find, straighten and read in a fraction of a second. What began as a way to track car parts in Japan is now how millions of people pay, order food, share Wi-Fi and open websites every day.

Now that you know what happens inside those squares, you can make better codes, avoid common mistakes, and spot the warning signs of a scam.

Have a code saved on your computer and want to see what is inside? Use our free QR Code to Text Converter to upload the image and instantly decode the text or link it holds, no phone needed.

Frequently Asked Questions

1. What does QR stand for?

QR stands for “Quick Response.” The name reflects the original goal: a code that could be read much faster than traditional barcodes in busy car factories.

2. Who invented the QR code?

Masahiro Hara and his team at Denso Wave in Japan developed it and announced it in 1994. It was first used to track automotive parts during manufacturing.

3. Do QR codes expire?

Static codes never expire because the data lives inside the pattern. Dynamic codes can stop working if the service managing the redirect shuts down or your subscription ends.

4. Can I scan a QR code without an app?

Yes. iPhones on iOS 11 or later scan with the built in Camera app, and most recent Android phones scan through the camera app or Google Lens.

5. Do QR codes need the internet?

Decoding does not need internet, because the data is printed in the squares. You only need a connection to open a web link stored inside.

6. How much data can a QR code store?

The largest version, 40 at low error correction, holds up to 7,089 digits, 4,296 alphanumeric characters, 2,953 bytes, or 1,817 Kanji characters.

7. Can a QR code be hacked?

The pattern itself cannot attack your phone. The real risk is a malicious link inside, or a fake sticker placed over a genuine code. Check the link before opening it.

8. Why is my QR code not scanning?

Common causes are low contrast, a missing quiet zone, printing too small, glare on glossy material, or too much data. Testing with two phones usually reveals the problem.

9. Can I put a logo in the middle?

Yes. Keep the logo small and use error correction level H, which recovers about 30% of the pattern. Always test the final design before printing.

10. Are QR codes free to make?

Static codes are free with most online tools and have no usage limits. Dynamic codes with editing and scan tracking usually come with a paid plan.