How to Calculate Discount Percentage: The Formula, Real Examples, and Shortcuts

Laptop showing an Excel sheet used to calculate discount percentage on product prices

Quick Answer

To calculate discount percentage, subtract the sale price from the original price, divide the difference by the original price, then multiply by 100. Example: a jacket cut from $80 to $52 saves $28, and 28 ÷ 80 × 100 = 35%. So the jacket is 35% off, whatever the sign above it says.

Why Knowing the Real Discount Matters

Last spring I stood in a shoe store holding a box with two stickers on it. The first said “Was $80.” The second, stuck right on top, said “Now $52.” The banner over the shelf promised “Up to 50% off,” and I honestly couldn’t tell whether my pair was part of the half price club.

It took me about ten seconds on my phone to work it out: 35% off. A fair deal, but a long way from half price. That small moment sums up why this skill matters. Price tags, app banners, and checkout pages are built to make savings feel bigger than they are, and the most reliable defense is being able to calculate discount percentage yourself.

Sure, a percent off calculator gives you the answer instantly, and I use one all the time. But knowing the formula lets you check deals in your head and handle cases simple tools skip, like stacked coupons or working backward to an original price.

In this guide I’ll cover the core formula you need to calculate discount percentage, how to find discount percentage from any two prices, how to calculate discount on price when you only know the percent, my favorite 10% shortcut, reverse discounts, stacked deals, sales tax, what “discount rate” means in finance, and the spreadsheet formulas I rely on. I’ll finish with the mistakes where money quietly leaks away.

What Is a Discount Percentage?

A discount percentage is the portion of an item’s original price that the seller removes, expressed as a number out of 100. If a lamp drops from $100 to $75, the seller took off $25, which is 25 out of every 100 dollars, so the discount percentage is 25%.

Think of it as “cents saved per dollar.” A 25% discount saves you 25 cents on every dollar the item used to cost.

Before we get into the math, here are the four terms you’ll see throughout this guide:

TermWhat it meansExample
Original priceThe regular, list, or “was” price before any reduction$100
Sale priceWhat you actually pay after the discount$75
Discount amountThe money taken off (original price minus sale price)$25
Discount percentageThe discount amount as a share of the original price25%

One detail trips up a lot of people: the percentage is always measured against the original price, never against the sale price. Keep that in mind and you’ll calculate discount percentage correctly every time.

How Do You Calculate Discount Percentage? (Step by Step)

You calculate discount percentage with one formula:

Discount % = (Original Price − Sale Price) ÷ Original Price × 100

Here’s how I break it into steps:

  1. Find the discount amount. Subtract the sale price from the original price.
  2. Divide by the original price. This gives you a decimal.
  3. Multiply by 100. This turns the decimal into a percentage.

Let’s run my shoe example through it:

  1. $80 − $52 = $28 saved
  2. $28 ÷ $80 = 0.35
  3. 0.35 × 100 = 35% off

If the store only tells you the amount saved, such as “You save $18 on this $60 blender,” skip step one: $18 ÷ $60 = 0.30, which is 30% off.

Whenever I calculate discount percentage, I sanity check the answer with a quick gut test. A $28 saving on an 80itemisabitmorethanaquarter(20) and well under half ($40), so a number in the 30s makes sense. If your answer lands at 3.5% or 350%, a decimal has wandered off somewhere.

How to Find Discount Percentage From Two Prices

When you know both prices, you can calculate discount percentage with the same formula every time. Here are a few examples so you can see the pattern:

ItemOriginal priceSale priceAmount savedDiscount %
T-shirt$50$40$1020%
Headphones$120$90$3025%
Office chair$249$174.30$74.7030%
Laptop$1,500$1,275$22515%
Winter coat$180$99$8145%

Look at the laptop. A $225 saving sounds bigger than the $81 off the coat, but the coat is the much deeper discount. Dollar amounts and percentages tell different stories, and that’s exactly why learning how to find discount percentage beats eyeballing the “you save” line.

The same math works outside of shopping. Banks, payment apps, and money transfer services often deliver less than you sent because of fees. If you paid $500 and the other side received $485, you lost $15 ÷ $500 = 3% along the way. A tool built to find percentage deductions between what was paid and what was received runs this exact formula with different labels.

You calculate discount percentage the same way in any currency. Rs 3,200 marked down to Rs 2,240 is a Rs 960 saving, and 960 ÷ 3,200 = 30%.

How to Calculate Discount on Price When You Know the Percent

To calculate discount on price when you already know the percent off, multiply the original price by the discount percentage (as a decimal) to get the amount saved, then subtract that from the original price.

  • Discount amount = Original price × (Discount % ÷ 100)
  • Sale price = Original price − Discount amount

Example: an $85 pair of jeans at 15% off.

  • Discount amount: $85 × 0.15 = $12.75
  • Sale price: $85 − $12.75 = $72.25

The one-step multiplier trick

Here’s the shortcut I use most. Instead of finding the discount and then subtracting, multiply the original price by the part you actually pay. At 15% off you pay 85%, so:

$85 × 0.85 = $72.25

Same answer, one step. This “what you pay” idea also makes reverse discounts and stacked deals much easier, so it’s worth getting comfortable with.

DiscountMultiply the original price by
10% off0.90
15% off0.85
20% off0.80
25% off0.75
30% off0.70
40% off0.60
50% off0.50

How to Find the 10 Percent of a Number (The Shortcut I Use Every Day)

To find 10 percent of a number, move the decimal point one place to the left. 10% of $348 is $34.80. 10% of $59 is $5.90. 10% of 1,250 is 125. No calculator needed.

Once you have 10%, almost every common discount turns into quick mental math. Using $348 as the original price:

DiscountHow to get it from 10%Amount saved
1%Move the decimal two places$3.48
5%Half of 10%$17.40
10%Move the decimal one place$34.80
15%10% plus 5%$52.20
20%10% times 2$69.60
25%20% plus 5% (or a quarter of the price)$87.00
30%10% times 3$104.40

So if that $348 tablet is 30% off, I know I’m saving about $104 and paying about $244 before I even reach the counter.

The trick handles less obvious rates too. 2.5% is simply a quarter of 10%, so 2.5% of $348 is $8.70. That’s the same rate people use when they learn how to calculate zakat on their savings, which shows how far one small shortcut can travel beyond shopping.

Why does it work? Because “percent” means “per hundred,” and 10% is one tenth of the whole. If you want a visual refresher on how percentages work, that “out of 100” idea is all the theory you need for everything in this guide.

Reverse Discount: How to Find the Original Price

To find the original price from a sale price, divide the sale price by the part you paid (1 minus the discount as a decimal). If something costs $63 after 30% off, the original price was $63 ÷ 0.70 = $90.

Original price = Sale price ÷ (1 − Discount % ÷ 100)

This is what any reverse discount calculator does behind the scenes, and it’s handy for:

  • Checking whether a “30% off” receipt really started from the price you remember
  • Working out the list price when an online store only shows the final price and a percent badge
  • Finding the pre-discount value for expense reports, refunds, or returns

The mistake almost everyone makes

The tempting move is to add the percentage back: $63 + 30% of $63 = $81.90. That’s wrong. The 30% was taken from the original $90, not from $63, so adding 30% of a smaller number can never get you back to the start. Always divide; never add back.

A quick check keeps you honest: $90 × 0.70 = $63. If your “original price” doesn’t produce the sale price when you apply the discount forward, something went wrong.

Stacked Discounts: Why 20% + 10% Isn’t 30%

When discounts stack, they apply one after another, so the total discount is always smaller than the two percentages added together. A 20% discount followed by an extra 10% off equals 28% off in total, not 30%.

Here’s the proof on a $200 item:

  1. 20% off: $200 × 0.80 = $160
  2. Extra 10% off: $160 × 0.90 = $144
  3. Total saved: $200 − $144 = $56
  4. Total discount: $56 ÷ $200 = 28%

The second discount only applies to the already reduced price, so it’s worth less. To calculate discount percentage for any stacked deal, use:

Combined discount = 1 − (1 − first discount) × (1 − second discount)

For 20% and 10%: 1 − (0.80 × 0.90) = 1 − 0.72 = 0.28, or 28%.

Clearance events push this further. “Extra 25% off items already reduced by 40%” sounds like 65% off, but 1 − (0.60 × 0.75) = 0.55, so it’s really 55% off.

The good news is that the order of two percentage discounts doesn’t change the result. 10% then 20% gives the same 28% as 20% then 10%, because multiplication works in any order.

Discounts, Coupons, and Sales Tax: Does the Order Matter?

For percentage discounts and percentage sales tax, the order doesn’t change the final price. For fixed-amount coupons mixed with percentage discounts, the order matters.

Percent off plus tax. Take a $100 item at 20% off with 8% sales tax:

  • Discount first: $100 × 0.80 × 1.08 = $86.40
  • Tax first: $100 × 1.08 × 0.80 = $86.40

Same result. In most places tax is charged on the discounted price, so you pay tax on $80, not $100. Tax treatment of coupons and rebates does vary between states and countries, so if exact cents matter for a business, check your local tax authority’s guidance or ask an accountant.

Fixed coupon plus percent off. Now use a $10 coupon and a 20% discount on the same $100 item:

  • 10offfirst,then20%:(100 − $10) × 0.80 = $72
  • 20% first, then 10off:(100 × 0.80) − $10 = $70

The second order saves an extra $2. Retailers usually decide the order at checkout, but when you’re comparing two offers, run both versions so you know which one is genuinely better.

Discount vs Markup: Why the Percentages Don’t Match

A discount and a markup of the same percentage don’t cancel each other out, because each one uses a different base. If a shop marks up an item that cost $80 by 25%, the price becomes $100. A 20% discount on that $100 brings it right back to $80.

So a 25% increase is undone by a 20% decrease, not a 25% one. This matters a lot if you sell anything. If your margin depends on a 25% markup and you run a 25% off sale, you’re selling below cost: $100 × 0.75 = $75, which is $5 under what you paid.

When I’m working in the other direction, figuring out how much a price went up rather than down, I switch to a percentage increase calculation, because the base becomes the starting value instead of the higher one.

My rule of thumb: when you calculate discount percentage, measure from the higher price; increases are measured from the lower price.

How to Calculate Discount Rate (Shopping vs Finance)

“Discount rate” means two different things depending on where you hear it. In shopping, the discount rate is simply the discount percentage. In finance, it’s the interest rate used to convert future money into today’s value.

Discount rate in retail

In a store, “discount rate” and “discount percentage” are interchangeable. You calculate discount percentage and retail discount rate with the same formula: (Original − Sale) ÷ Original × 100.

Discount rate in finance

In finance and economics, the term usually points to one of two ideas:

  • The present value rate. Businesses and investors use a discount rate in finance to bring future cash flows back to present value, based on the idea that money today is worth more than the same money later.
  • The central bank lending rate. In the United States, the Federal Reserve sets a discount rate for banks that borrow short term through its discount window. Many other central banks use the term in a similar way.

If you want to know how to calculate discount rate between a present amount and a future amount, use:

Discount rate = (Future value ÷ Present value)^(1 ÷ years) − 1

Example: an investment costs $7,500 today and pays $10,000 in 3 years.

(10,000 ÷ 7,500)^(1/3) − 1 = 1.3333^0.3333 − 1 ≈ 0.1006, or about 10.06% per year.

For a single year it’s even simpler. If $1,000 received a year from now is worth $909.09 today, the implied discount rate is 10%, because $909.09 × 1.10 ≈ $1,000.

The early payment discount most small businesses ignore

Supplier invoices often carry terms like “2/10, net 30,” which means you get 2% off if you pay within 10 days instead of 30. Two percent sounds tiny, but you earn it for paying only 20 days early.

The approximate annual rate is 2 ÷ 98 × 365 ÷ 20 ≈ 37.2%. Very few savings accounts or investments come anywhere close, which is why taking early payment discounts is often a smart use of spare cash. That said, paying early only makes sense if it doesn’t leave you short elsewhere, so if cash flow is tight, talk it through with an accountant first.

How to Calculate Discount Percentage in Excel or Google Sheets

Spreadsheets are the fastest way to calculate discount percentage for a whole price list. Put the original price in column A and the sale price in column B, then use these formulas:

What you wantFormula (row 2)
Discount percentage=(A2-B2)/A2, then format the cell as %
Sale price from a discount in C2 (for example 0.2)=A2*(1-C2)
Original price from a sale price (reverse)=B2/(1-C2)
Combined stacked discount from C2 and D2=1-(1-C2)*(1-D2)

Format the result cells as percentages and the spreadsheet handles the “multiply by 100” step for you. Microsoft’s help page on how to calculate percentages in Excel follows the same logic, including a neat example where a $15 sale price divided by 0.75 reveals a $20 original price. The formulas work the same way in Google Sheets.

A tip from experience: if you type 20 instead of 0.2 (or 20%) in the discount column, =A2*(1-C2) returns a negative number.

When a Discount Calculator Helps (and When Mental Math Is Enough)

A discount calculator earns its place when the numbers are messy, the stakes are higher, or you’re running many calculations in a row. For round numbers and quick shopping checks, mental math with the 10% trick is usually faster.

Here’s how I decide:

  • Mental math: round prices, single discounts like 10%, 20%, 25%, or 50%, and quick in-store checks
  • Percent off calculator: odd prices like $67.49, unusual rates like 17%, or whenever you want exact cents
  • Reverse discount calculator: when you know the final price and the percentage but need the original price
  • Spreadsheet: comparing many products, building a price list, or planning a business sale

Whichever discount calculator you use to calculate discount percentage, enter the original price as the base. Most errors I’ve seen with online tools come from swapping the two price fields.

If you sell online, these 4 calculators every freelancer and e-commerce seller needs handle markups, fees and net totals.

Common Mistakes When Calculating Discounts

These are the errors I see most often when people calculate discount percentage, with the fix for each one:

  1. Dividing by the sale price. $28 ÷ $52 gives about 53.8%, which is wrong. Always divide by the original price.
  2. Adding stacked discounts. 20% plus 10% is 28% off, not 30%. Multiply the parts you pay instead.
  3. Adding the percentage back to reverse a discount. Divide by (1 − discount) instead.
  4. Comparing dollar savings instead of percentages. $225 off a laptop can be a smaller deal than $81 off a coat.
  5. Rounding too early. Round only at the final step, especially on large purchases or business invoices.
  6. Ignoring shipping and fees. A 30% discount with $15 shipping can cost more than a 20% discount with free delivery. Compare the total cost to your door.
  7. Trusting the “was” price blindly. A big percentage off an inflated original price isn’t a real saving.

Is the Discount Real? How I Check a Deal

A discount is only as honest as the original price it’s based on. If the “was” price was never a real selling price, the percentage off doesn’t mean much.

In the United States, the Federal Trade Commission’s Guides Against Deceptive Pricing say a former price should be one the item was genuinely offered at for a reasonably substantial period. An inflated price set up just to advertise a dramatic markdown turns the “bargain” into a false one. Many other countries have similar consumer protection rules.

Here’s my quick checklist before I trust a discount:

  • Check the price history. Price tracking tools and browser extensions show whether the “original” price ever really existed.
  • Compare final prices across stores, not percentages. 40% off at one shop can still cost more than 15% off at another.
  • Look at the unit price. For groceries and household items, the price per kilogram, liter, or piece tells you more than any percent badge.
  • Do the math yourself. If the sign says “up to 50% off,” work out your item’s actual percentage. Mine was 35%.

Key Takeaways

  • Core formula: Discount % = (Original price − Sale price) ÷ Original price × 100.
  • Always measure a discount against the original price, never the sale price.
  • To get a sale price fast, multiply by the part you pay: 20% off means × 0.80.
  • To find 10% of any number, move the decimal one place left, then build 5%, 15%, 20%, and 30% from there.
  • Reverse a discount by dividing: Sale price ÷ (1 − discount).
  • Stacked discounts multiply, so 20% plus 10% equals 28% off.
  • Percentage discounts and sales tax give the same total in either order; fixed coupons don’t.
  • In finance, “discount rate” means the rate for valuing future money, or a central bank’s lending rate.
  • A big percentage off a fake original price is not a real saving.

Conclusion

Once you can calculate discount percentage on your own, sale signs stop doing your thinking for you. The core formula takes seconds: subtract, divide by the original price, multiply by 100. Add the “what you pay” multiplier, the 10% decimal shift, and the divide-to-reverse rule, and you can handle almost any deal, coupon stack, or invoice term that comes your way.

I still do the quick math in my head for most purchases, but when the numbers get messy or I’m comparing a long list of products, I let a tool handle the arithmetic. If you want fast, accurate answers without signing up for anything, the free online calculators at X2X Converter cover percentages, price changes, and plenty more. Next time a tag says “up to 50% off,” you’ll know your real number before you reach the checkout.

Frequently Asked Questions

1. What is the formula to calculate discount percentage?

The formula is (Original Price − Sale Price) ÷ Original Price × 100. Subtract the sale price from the original price to get the amount saved, divide that by the original price, and multiply by 100. For example, a $60 item marked down to $45 saves $15, and 15 ÷ 60 × 100 equals a 25% discount.

2. How do I find the discount percentage if I only know the amount saved?

Divide the amount saved by the original price, then multiply by 100. If a $250 phone shows “You save $50,” the discount is 50 ÷ 250 × 100 = 20%. If you only know the sale price and the savings, add them together first to rebuild the original price, then divide.

3. Is 20% off plus an extra 10% off the same as 30% off?

No. Stacked discounts apply one after another, so the second discount comes off an already reduced price. 20% off followed by 10% off equals 28% off in total. On a $100 item you pay $72, not $70. Use 1 − (0.80 × 0.90) to find the combined rate.

4. How do I find the original price after a discount?

Divide the sale price by 1 minus the discount written as a decimal. If a bag costs $63 after 30% off, the original price was $63 ÷ 0.70 = $90. Don’t add 30% back to $63, because that gives $81.90, which is wrong. This is exactly how a reverse discount calculator works.

5. How to find the 10 percent of a number quickly?

Move the decimal point one place to the left. 10% of 450 is 45, 10% of $72.50 is $7.25, and 10% of 9 is 0.9. From there, halve it for 5%, double it for 20%, or triple it for 30%. It’s the fastest way to estimate most store discounts without a calculator.

6. Should a discount be applied before or after sales tax?

For a percentage discount and a percentage tax, the final total is the same either way, because multiplication works in any order. In most places tax is charged on the discounted price, so you pay less tax too. Coupon and rebate tax rules vary by location, so check local rules for business use.

7. What is the difference between discount percentage and discount rate?

In shopping, they mean the same thing: the share of the original price that gets taken off. In finance, discount rate usually means the interest rate used to convert future money into present value, or the rate a central bank charges banks for short-term loans. The context tells you which meaning applies.

8. How do I calculate a discount percentage in Excel?

Put the original price in A2 and the sale price in B2, enter =(A2-B2)/A2, and format the cell as a percentage. To get a sale price from a discount stored in C2, use =A2*(1-C2). To reverse it and find the original price, use =B2/(1-C2). The same formulas work in Google Sheets.

9. Is a percent off calculator more accurate than doing it by hand?

Both give the same answer when the inputs are correct, because the calculator uses the same formula you would. A percent off calculator helps most with odd prices, unusual percentages, or long lists, since it removes rounding slips. Mental math is perfectly reliable for round numbers and quick in-store checks.

10. How can I tell if a sale discount is genuine?

Check whether the item actually sold at the “was” price for a meaningful period, using price history tools or old screenshots. Compare the final price across several stores rather than the percentage off. A large discount from an inflated original price can still cost more than a smaller discount somewhere else.
How to Calculate Zakat: A Complete Guide with Examples

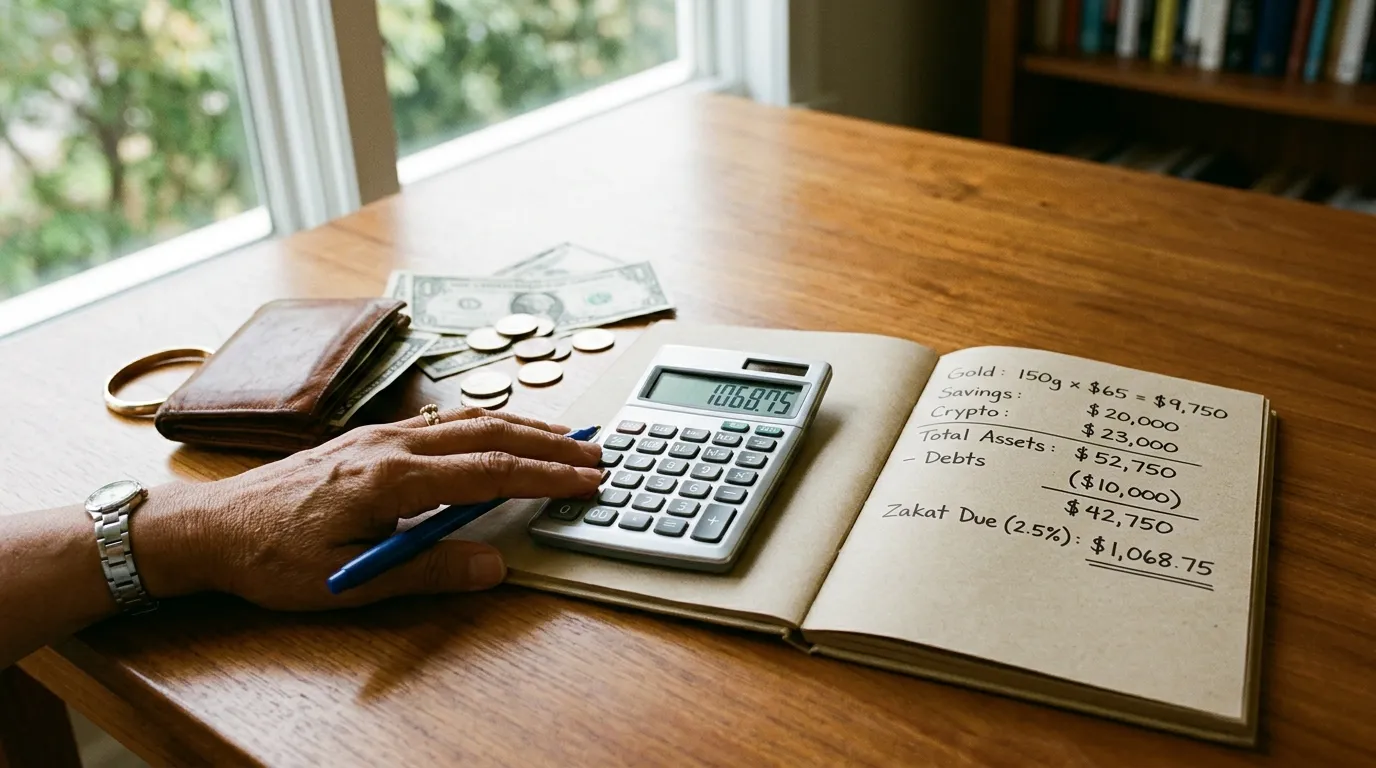
Person calculating Zakat using a calculator, pen, and notebook next to cash and coins on a wooden desk.

Quick Answer

Zakat is 2.5% of your total wealth above the nisab threshold. To calculate how to calculate zakat, you add up all your eligible assets (cash, gold, silver, savings, business inventory), subtract any debts, and if the total exceeds the nisab value, you owe 2.5% of that amount to those in need. The nisab threshold changes yearly based on gold and silver prices.

Introduction

I remember the first time I needed to figure out my zakat obligation. I sat there with a notebook, trying to understand what counted as wealth, what the nisab actually meant, and whether I was calculating things correctly. If you’re in the same spot, you’re not alone. Thousands of Muslims face this same confusion each year.

The good news? Understanding how to calculate zakat is simpler than most people think. It doesn’t require a degree in accounting, just clarity on what assets count and a straightforward calculation. In this guide, I’ll walk you through exactly what you need to know.

What Is Zakat and Why You Need to Calculate It

Zakat is one of the five pillars of Islam, and it’s essentially a wealth tax that helps those in need. Unlike charity, which is voluntary, zakat is an obligation for Muslims who meet specific wealth requirements. Think of it as a spiritual and financial responsibility rolled into one.

The Islamic principle behind zakat is simple: if you have more than you need, you’re meant to share with those who don’t. Over 1.8 billion Muslims worldwide pay zakat annually, making it one of the largest wealth redistribution mechanisms on earth.

But here’s what matters for you right now: you can’t pay zakat if you don’t know how to calculate zakat correctly. Getting this right matters for your peace of mind and your faith.

The Nisab: The Starting Point for Zakat Calculation

Before you start calculating anything, you need to know the nisab threshold. This is the minimum amount of wealth you must have before zakat becomes obligatory. If your total wealth is below the nisab, you don’t owe zakat that year.

What Is the Nisab?

The nisab is set based on the value of gold and silver. You can use either one as your measurement:

  • Gold nisab: 87.48 grams of gold
  • Silver nisab: 612.36 grams of silver

Since gold prices fluctuate daily, the nisab value in dollars changes constantly. For 2026, the approximate nisab values are around $5,250 (using gold) or $900 (using silver). Most Muslims use the gold nisab because it’s higher and more commonly referenced.

To stay current with the latest nisab value, consult trusted Islamic organizations that update these figures regularly based on precious metal prices.

Why Two Different Values?

Islamic scholars recognize that gold and silver represent wealth differently across cultures and time periods. You only need to meet one threshold to pay zakat. If your total wealth equals the gold nisab in value, you’re required to pay zakat. You don’t need to have actual gold or silver for this to apply.

How to Calculate Zakat on Your Wealth

Now let’s get to the actual calculation. This is where most people get confused, so I’m breaking it into clear, manageable steps.

Step 1: List All Your Assets

Start by writing down everything you own that counts toward zakat:

Cash and Savings:

  • Money in your checking account
  • Money in your savings account
  • Cash you’re holding at home
  • Money in money market accounts

Precious Metals:

  • Gold (jewelry, bars, coins)
  • Silver (jewelry, bars, coins)

Investments and Business:

  • Stocks and bonds
  • Cryptocurrency
  • Business inventory (goods ready to sell)
  • Rental property rental income
  • Agricultural produce (if applicable)

Other Assets:

  • Vehicles (some scholars include these)
  • Jewelry worn for personal use (scholars differ on this)

Note: Your home, car you use daily, and personal belongings don’t typically count toward zakat.

Step 2: Calculate the Current Value

For each asset, determine its current market value. If you own gold jewelry, you need to know its weight and current price per gram. If you have savings, that’s straightforward. If you own property or run a business, use reasonable market valuations.

This is where a zakat calculator comes in handy. Instead of doing this manually, these tools convert all your assets into a single currency and give you the exact amount due.

Step 3: Subtract Your Debts

This is crucial and often overlooked. Debts reduce the amount of wealth subject to zakat. Subtract:

  • Personal loans
  • Credit card debt
  • Mortgage (only the principal, not the interest portion)
  • Business liabilities

Only deduct debts you’re actively repaying. If you owe someone $5,000 and can pay it, subtract it. The idea is that your “net wealth” is what matters, not gross wealth.

Step 4: Check Against the Nisab

Add up your total assets, subtract debts, and compare this to the current nisab value. If your net wealth is below the nisab, you owe no zakat that year. If it’s above, move to the next step.

Step 5: Calculate 2.5% of Your Wealth

Zakat is exactly 2.5% of your wealth. The math is simple: take your net wealth and multiply by 0.025.

Example:

  • Total assets: $50,000
  • Debts: $10,000
  • Net wealth: $40,000
  • Nisab for 2026: approximately $5,250
  • Since $40,000 > $5,250, zakat is due
  • Zakat amount: $40,000 × 0.025 = $1,000

That’s your zakat obligation for the year.

How to Calculate Zakat on Gold

Gold is often the trickiest part of zakat calculations because its value changes constantly. Here’s how to approach it specifically.

Step 1: Determine the Weight of Your Gold

Gather all your gold items, including jewelry. You’ll need to know the total weight. If you have pieces without marked weights, you might need to take them to a jeweler for weighing. Most jewelry stores can do this free or for a small fee.

Important: Only count gold that’s 24 karats or close to it. Some jewelry is gold-plated or mixed with other metals. Pure gold counts; mixtures don’t fully count.

Step 2: Find the Current Price of Gold

Check the current gold price per gram on financial websites or precious metals sites. Gold prices are typically quoted per ounce, so convert to grams if needed (1 ounce equals approximately 31.1 grams). Staying updated with market prices ensures your calculation reflects true value.

Step 3: Calculate Your Gold’s Total Value

Multiply your gold weight (in grams) by the current price per gram.

Example:

  • Your gold: 150 grams
  • Current price: $65 per gram
  • Total value: 150 × $65 = $9,750

Now add this to your other assets when calculating how to calculate zakat on your total wealth.

Step 4: Note the Nisab Threshold

Remember, you only owe zakat on gold if your total wealth (gold plus everything else) exceeds the nisab threshold. If you own 80 grams of gold worth $5,200 but have no other assets, and the nisab is $5,250, you don’t quite reach the threshold yet.

How to Calculate Zakat on Salary and Income

One of the most common questions I hear is about salary. Here’s how income affects your zakat calculation.

Does Salary Count Toward Zakat?

Your salary absolutely counts. Any income you receive from employment, freelance work, business, or investments is part of your wealth calculation.

When Does Income Count?

This is where timing matters. For zakat purposes, you’re checking your wealth at a specific point each year, usually one lunar year after you last paid zakat (called your zakat anniversary date). So:

  • The salary you earned this year and still have: counts
  • The salary you earned and already spent: doesn’t count
  • The salary you earned but haven’t received yet: doesn’t count

Calculating Zakat on Salary: A Real Example

Let’s say your zakat anniversary is March 15th. On that date:

  • Salary saved this year: $8,000
  • Savings from previous years: $12,000
  • Outstanding debts: $5,000
  • Other assets: $0

Your net wealth: $8,000 + $12,000 – $5,000 = $15,000

If this exceeds the nisab ($5,250), you owe zakat: $15,000 × 0.025 = $375

The key point: it’s not about how much you earned, it’s about how much you have saved at your zakat date.

How Much Zakat Do I Owe? Using the Calculation Table

Let me give you a quick reference table for different wealth levels. Remember, these assume you’re above the nisab threshold.

Net WealthZakat Due (2.5%)
$5,300$132.50
$10,000$250
$20,000$500
$50,000$1,250
$100,000$2,500
$500,000$12,500

This table gives you a quick sense, but your exact calculation will depend on your specific assets and current nisab value.

Special Cases: Zakat on Property, Jewelry, and Savings

Different types of wealth have nuances worth understanding.

How to Calculate Zakat on Savings

Savings is straightforward. Every dollar in your savings account counts. If you have $25,000 saved and no other assets:

  • Check nisab: $25,000 > $5,250 ✓
  • Calculate zakat: $25,000 × 0.025 = $625

But here’s the thing: only your remaining savings count. If you spent $5,000 from your savings this year, you owed zakat on $20,000 at your anniversary date, not $25,000.

How to Calculate Zakat on Cash

Cash in hand is wealth and counts toward zakat. If you keep $3,000 in cash at home, add it to your total wealth calculation.

How to Calculate Zakat on Jewelry

Jewelry calculation depends on your scholar’s interpretation:

Worn jewelry: Many scholars say jewelry you actively wear doesn’t count. It’s considered personal adornment, not wealth meant to be used.

Unworn jewelry: Jewelry you’re holding as wealth (maybe an inheritance or investment) typically counts at full value.

If you’re unsure, talk to your local imam or Islamic scholar. Different schools of Islamic law have slightly different rules.

How to Calculate Zakat on Property

Your primary residence typically doesn’t count toward zakat. But rental properties or investment properties are more complex:

  • Rental income: The monthly rent you collect counts as income and should be included in your wealth calculation
  • Property value: Most scholars don’t count the property value itself, only the rental income
  • Land held for investment: This may or may not count depending on your school of Islamic law

For property, I recommend using a professional or consulting your local Islamic center, as rules vary.

How to Calculate Zakat on Cryptocurrency and Digital Assets

This is increasingly relevant as more people invest in crypto. Here’s how to approach it.

Is Cryptocurrency Zakat-able?

Most Islamic scholars today agree that cryptocurrency counts as wealth subject to zakat. It has value, it’s tradeable, and it functions like gold in the modern economy.

How to Calculate It

The process is the same:

  1. Determine the current market value of your cryptocurrency in your local currency
  2. Add it to your other assets
  3. Check against the nisab threshold
  4. Calculate 2.5% if you’re above the threshold

Example:

  • Bitcoin holdings worth $15,000
  • Ethereum holdings worth $8,000
  • Bank savings: $10,000
  • Total: $33,000
  • Zakat due: $33,000 × 0.025 = $825

The Timing Issue

Since cryptocurrency prices change hourly, calculate on your specific zakat anniversary date. Use the price on that exact day for accuracy.

Using a Zakat Calculator Online

I’m not going to pretend that manual calculations are always practical. That’s why tools exist. A good zakat calculator online handles the complexity for you.

When you use one, you typically enter:

  • Your gold and silver holdings
  • Cash and savings
  • Investment values
  • Business assets
  • Debts and liabilities

The calculator automatically applies the current nisab rate and gives you the exact amount due. It’s especially useful if you have multiple types of wealth or significant assets.

The advantage? No math errors, automatic nisab updates, and immediate results. If you have significant wealth or complex assets, using an online calculator saves time and reduces mistakes.

When Is Your Zakat Due? Understanding the Lunar Year

Here’s something that confuses many people: zakat is based on the Islamic lunar calendar, not the Gregorian calendar.

Your zakat becomes due one lunar year after you first reached the nisab threshold. If you reached it on Ramadan 1st last year, you owe zakat each Ramadan 1st going forward. This means your zakat date shifts earlier by roughly 11 days each Gregorian year.

To find your lunar date equivalents and plan accordingly, you can convert between the Islamic and Gregorian calendars using conversion tools available online.

Why this matters:

  • Your zakat anniversary date is personal to you
  • You don’t calculate zakat on January 1st or December 31st
  • Instead, you track the lunar date when your obligation began

Most Muslims choose to pay their zakat during Ramadan, but you can pay anytime after your zakat date passes.

Who Receives Zakat? Understanding Your Obligation

Knowing how to calculate zakat is half the battle. Knowing where it goes completes the picture.

Zakat can only go to eight specific categories of people recognized by Islamic scholars:

  1. The poor – Those who have nothing
  2. The needy – Those who have some income but still don’t meet basic needs
  3. Zakat administrators – Those managing the collection and distribution
  4. Those whose hearts are to be won – For reconciliation purposes
  5. Those in slavery or bondage – For their freedom
  6. Those in debt – To help them become debt-free
  7. Those in the path of Allah – For Islamic projects and causes
  8. Travelers – Those stranded away from home

You cannot give your zakat to relatives you’re obligated to support (parents, children, spouses) unless they fall into one of the eight categories independently.

Common Mistakes People Make When Calculating Zakat

Let me save you from the errors I’ve seen others make:

Mistake 1: Not subtracting debts. Your gross wealth isn’t what matters. Subtract everything you owe.

Mistake 2: Counting items you’re using. Your car, house, and clothes don’t count unless you’re running a car rental business or something similar.

Mistake 3: Forgetting about cryptocurrency and investments. Many people overlook digital assets. Include everything with monetary value.

Mistake 4: Using an outdated nisab value. The nisab changes with gold and silver prices. Check it fresh each year.

Mistake 5: Misunderstanding your zakat date. It’s not a calendar year. Figure out your lunar zakat anniversary and stick to it.

Mistake 6: Delaying payment. Once your zakat date passes, you’re in debt spiritually and practically until you pay.

Mistake 7: Not seeking clarification. If you’re unsure about any asset, ask an Islamic scholar rather than guessing.

Key Takeaways

Let me summarize the essentials:

  • Zakat is 2.5% of wealth above the nisab threshold (approximately $5,250 for 2026)
  • Calculate by adding all your assets, subtracting debts, and multiplying by 0.025
  • Your zakat date is based on the Islamic lunar calendar, not January 1st
  • Include savings, salary, investments, gold, silver, and cryptocurrency
  • Exclude your primary home, personal items, and items you actively use
  • Use a zakat calculator for accuracy if you have complex wealth
  • Zakat must go to one of eight specific categories of recipients
  • Don’t delay payment after your zakat date passes
  • Seek guidance from an Islamic scholar if you’re unsure about any asset

The goal of this guide is to demystify something that feels complicated but really isn’t. Once you understand the basic principle—2.5% of net wealth above a threshold—everything else flows logically from there.

Conclusion

Calculating your zakat obligation is a practical expression of your faith. It’s not meant to be a burden but a way to ensure your wealth is purifying and your community is supported. By taking the time to understand how to calculate zakat properly, you’re honoring both your financial responsibilities and your spiritual ones.

If you have significant assets or complex financial situations, consulting an Islamic financial advisor can provide personalized guidance. Getting it right is worth the effort.

Your next step? Gather your financial information, determine your zakat date if you haven’t already, and calculate what you owe using our zakat calculator. The peace of mind that comes from knowing you’ve fulfilled this obligation correctly is worth every minute of effort.

Frequently Asked Questions About Zakat Calculation

Do I have to pay zakat if I’m in debt?

You owe zakat only on wealth that exceeds your debts. If you owe $20,000 and have $22,000 in assets, you owe zakat on only $2,000 (if it’s above nisab).

What if my wealth fluctuates throughout the year?

Only the wealth you have on your zakat anniversary date matters. If you had $50,000 six months ago but have $20,000 now, use the $20,000 figure.

Do I owe zakat on inherited money?

Yes, inherited money is wealth. Once you receive it and it’s been in your possession for a lunar year, it’s subject to zakat.

Can I calculate zakat on the Islamic calendar or the Gregorian calendar?

Zakat is based on the Islamic lunar calendar, but many people track it on a Gregorian date for practical purposes. As long as you’re consistent yearly, either works.

What if I can’t afford to pay my full zakat right away?

Try to pay it as soon as possible after your zakat date. If you genuinely can’t pay immediately, do so when you’re able, but don’t delay indefinitely.

Do I owe zakat on charitable donations I’ve already given?

No. Money you’ve already spent or given away is no longer your wealth.

Should I round up when calculating zakat?

If your zakat comes to $624.87, you can round to $625. Rounding up slightly is encouraged and avoids potential shortfalls.

Can I give my zakat to an organization instead of directly to a person?

Yes, reputable Islamic organizations and charities distribute zakat on behalf of donors. Make sure the organization is transparent and trustworthy.

Does zakat apply to all types of business inventory?

Business inventory that’s actively held for sale counts. Inventory in storage waiting to be sold typically doesn’t count.

What’s the difference between zakat and sadaqah?

Zakat is obligatory (like a tax), while sadaqah is voluntary charity. Zakat has specific rates and recipients; sadaqah is whatever you choose to give.

How I Turn My Photos Into Ghibli Style Masterpieces (And How You Can Too)

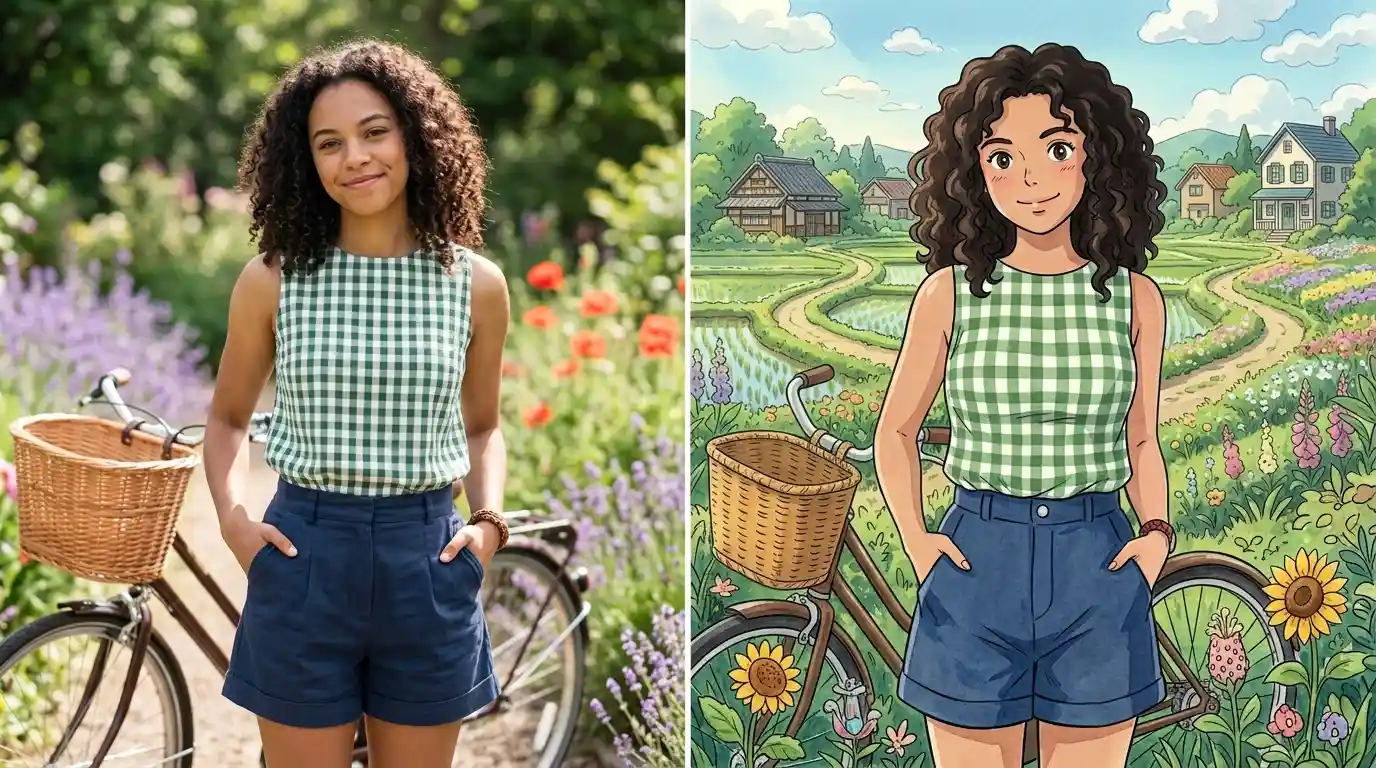
Side-by-side view of a real-world photo transformed into a painterly Ghibli style photo using AI.

I’ve spent the last few months experimenting with AI tools to transform my ordinary photos into something that looks like it belongs in a Studio Ghibli film. The results have been stunning, and honestly, it’s changed how I think about photo editing and digital art.

When I started this journey, I had no idea how many people were searching for ways to create Ghibli style images. Turns out, there’s a massive community of anime fans, artists, and creative people who want to turn their regular photos into something with that unmistakable hand-drawn, whimsical quality that Hayao Miyazaki’s films are famous for.

What Makes Ghibli Style So Special

I remember the first time I watched “Spirited Away.” The animation, the colors, the attention to detail—it all felt timeless. That’s the aesthetic everyone’s chasing when they want a Ghibli style photo. It’s not just about making something look like a cartoon. It’s about capturing that specific warmth, those soft color palettes, and that sense of wonder that makes Ghibli films feel like stepping into another world.

If you want to understand the rich history behind this visual style, the history of Studio Ghibli’s animation techniques shows how the studio evolved its distinctive approach over decades. The attention to detail and artistic philosophy shaped everything about how their films look.

The good news? You don’t need to be a professional animator to achieve this look anymore. Modern AI photo transformation technology has made it possible for anyone to take their photos and apply that beautiful Ghibli aesthetic.

The actual technical process involves something called style transfer, which is an AI technique that analyzes the visual characteristics of Ghibli films and applies them to your photos. When I first discovered this, I was skeptical. Could AI really capture the artistry and soul of hand-drawn animation? After testing it out, I can tell you it absolutely can.

Understanding Ghibli Style Image Generation

When I talk about a ghibli style image generator, I’m referring to AI tools that use neural networks trained on thousands of Ghibli film frames. These systems learn the unique characteristics of the studio’s visual style: the way light hits objects, the color grading, the linework, the texture of the animation cels, and even the emotional quality of the scenes.

The process starts with your original photo. The AI analyzes it, then applies layers of transformation. It’s not just slapping a filter on top. The generator actually repaints elements of your image, adjusts shadows and highlights to match Ghibli’s lighting style, and enhances colors in ways that feel authentic to the films.

I’ve tested this with dozens of different photos, and the results vary depending on your source material. A landscape photo of mountains? It becomes something worthy of “Princess Mononoke.” A street photo of an old building? Suddenly it looks like it’s from “Kiki’s Delivery Service.”

The Best Tools for AI Photo Transformation

Here’s what I’ve learned about image to Ghibli conversion tools: not all of them are created equal. Some produce results that look generic or overly processed. Others nail that authentic Ghibli feel while keeping your original photo recognizable.

I’ve spent time with several different platforms, and what separates the good ones from the great ones is how well they handle detail. A quality ghibli filter will preserve the important elements of your original photo while transforming the overall aesthetic. Your face in a portrait should still look like you. The architectural details in a building should still be visible. But everything should feel like it’s been painted with that beautiful, dreamy quality.

The technical backend matters here too. Some tools use older style transfer models that create blurry or unrealistic results. Better options use more recent AI models that have been specifically trained on anime and hand-drawn art styles. When I started looking for a free ghibli style AI converter without sign up, I realized that convenience and quality often come with tradeoffs.

What I really wanted was something powerful, easy to use, and accessible. That’s when I found tools that deliver exactly that: professional-quality transformations without the hassle of creating an account or paying subscription fees just to try it out.

How to Turn Photo Into Cartoon Using AI

The process of transforming your photo is simpler than you’d think. Most modern tools follow roughly the same workflow. First, you upload your image. The system analyzes it. Then it applies the transformation. Within seconds to minutes, you get your result.

I’ve learned that the quality of your input photo matters. High-resolution images work better than heavily compressed JPEGs. Good lighting in your original photo helps the AI understand what it’s working with. And composition makes a difference too. I got better results with photos that had interesting subjects and clear focal points. If you’re interested in learning more about how to apply artistic filters to photos generally, these techniques provide a good foundation for understanding what happens behind the scenes when you upload.

When I’m looking at an AI photo transformation tool, I pay attention to several things: How does it handle skin tones? Does the background look natural or does it look plasticky? Are fine details preserved or lost? Does the overall mood of the image feel enhanced or destroyed?

One thing that surprised me was how much the subject matter matters. I got incredible results transforming landscape photos, architectural shots, and nature photography. Portrait transformations require a bit more care, but when they work, they’re genuinely impressive. I’ve turned casual selfies into something that looks like official character art.

If you prefer a classic cartoon look over Ghibli, this guide covers four easy ways to turn a photo into a cartoon.

Why Ghibli Style Resonates With People

I think the reason so many people want a ghibli style photo is because there’s something deeply human about hand-drawn animation. In an era of photorealism and high-definition digital art, there’s appeal in something that looks slightly painterly, slightly imperfect, and undeniably artistic.

Studio Ghibli’s work specifically has this magical quality that transcends just the animation technique. It’s about mood, storytelling, and a particular way of looking at the world. The colors tend toward warmer tones. The lighting is often soft and forgiving. There’s a sense of discovery and wonder baked into every frame.

When you apply this aesthetic to your own photos, something interesting happens. A regular snapshot becomes something more meaningful. A street scene gets a narrative quality. A portrait becomes something that feels more intimate, more artistic, more you.

I’ve shared my transformed images with friends, and the reaction is always the same: “That’s beautiful. Where did you get this commissioned?” When I tell them it took 30 seconds with an AI tool, they’re shocked. But here’s the thing—just because it was easy doesn’t make it any less valuable as art.

Comparing Styles: Ghibli vs Other Anime Aesthetics

Not all anime styles are created equal, and I wanted to understand the differences when exploring AI art transformation options. I’ve experimented with tools that claim to offer different anime styles—everything from “Studio Ghibli” to “Attack on Titan” to generic “anime” filters.

The evolution of anime aesthetics shows how different studios developed their own visual signatures over time. Ghibli’s approach is distinctly different from other anime producers, and that’s what makes it so recognizable.

Here’s what I found: true Ghibli style is more refined and less intense than some other anime aesthetics. Where a generic anime filter might add exaggerated eyes, heavy black outlines, and dramatic shading, Ghibli style keeps things more grounded. It’s enhanced realism with an artistic touch, not cartoony transformation.

Ghibli’s style also tends to emphasize natural elements and environmental storytelling. If you’re transforming a photo of nature, the tool should enhance the organic qualities—the way light filters through leaves, the texture of water, the sense of growth and life. That’s different from an urban anime style that might emphasize architecture and technology.

I tested a ghibli style photo free converter against several paid options, and honestly, the gap has narrowed significantly. Some free tools now produce results that rival paid services. What matters more than cost is whether the tool understands what makes Ghibli actually Ghibli.

Practical Tips for Getting the Best Results

I want to share what I’ve learned through my own trial and error. If you’re serious about getting beautiful results, these tips will help.

Start with good source material. This doesn’t mean your photo needs to be professionally taken, but it should be in focus, well-lit, and clear. Blurry or overexposed photos give the AI less to work with. I got my best results with natural lighting and interesting compositions. Understanding how digital art tools handle composition and lighting can give you insights into what works best for AI transformation.

Second, consider the subject. As I mentioned, landscapes and architecture tend to produce more reliably beautiful results than portraits. But that doesn’t mean you shouldn’t try portraits—just have realistic expectations about what the transformation will look like.

Third, explore different variations if the tool allows it. Some converters let you adjust parameters like style intensity, color saturation, or artistic effect level. Playing with these settings can make a huge difference in the final result.

Fourth, don’t over-edit before uploading. Some people think they need to use traditional filters or edit their photos to look more “artistic” before applying AI transformation. Actually, the opposite is true. Feed the tool clean, unfiltered images. Let it do its thing.

Fifth, keep your original. Always preserve your source photo. Use the transformed image as something new and separate. Sometimes you’ll want the original. Sometimes you’ll prefer the transformation. Why not have both?

The Technical Side: How These Tools Actually Work

I got curious about the engineering behind all this, so I did some research. The tools that create these transformations use what’s called conditional generative adversarial networks, or cGANs. There are also transformer-based models and diffusion models that can do style transfer.

If you want to dive deeper into how this actually works, understanding neural style transfer explains the mathematical foundations and practical implementations. It’s genuinely fascinating if you’re interested in the AI side.

What that means in practical terms is the AI has been trained on images and their styles. When you upload your photo, the model doesn’t just apply a filter. It’s actually generating new pixels based on what it learned about Ghibli’s visual characteristics.

The best tools use models that have been fine-tuned specifically on Ghibli films. The AI has watched hours of footage, analyzed thousands of individual frames, learned the color palettes, understood the lighting setups, and internalized the animation techniques.

This is why using a dedicated tool outperforms general-purpose AI art generators. A general tool might know anime in broad strokes. A specialized tool knows Ghibli in intimate detail.

Processing time varies depending on the tool and your image resolution. I’ve seen transformations happen in 10 seconds and others take a couple minutes. Higher resolution usually means longer processing time but better quality results.

Real-World Applications Beyond Just Fun

I initially thought this was just a fun creative tool, but I’ve discovered legitimate applications.

Illustrators and concept artists use ghibli style transformations to explore visual ideas quickly. Instead of sketching multiple variations, they can take reference photos and generate different artistic interpretations in seconds. It’s a brainstorming tool.

Travel photographers and bloggers use these transformations to create unique visual content for their platforms. Your travel photos stand out when they have this distinctive artistic quality. I’ve seen photographers who’ve built entire aesthetics around Ghibli-style transformed images.

People in the animation or game development industry use these tools to generate mood boards and visual references. Need to show a client what a particular scene might look like with a Ghibli aesthetic? Transform a reference photo instantly.

Digital marketers have started using Ghibli-style images in their campaigns. There’s something about the aesthetic that catches attention and stands out from typical photography or standard illustration.

Finding the Right Tool for You

Now, I need to be honest about something. If you try a free tool and don’t get results you love, that doesn’t mean the aesthetic can’t work for you. It usually means that particular tool wasn’t the right fit for your image or needs.

I’ve tried tools that were:

  • Too aggressive with the stylization
  • Not aggressive enough
  • Good with landscapes but bad with portraits
  • Great with color but destructive with detail
  • Fast but lower quality
  • High quality but slow

The best approach is trying a few different options. Look for tools that let you upload a sample without commitment. Test with a few different photos. See which one consistently produces results you’re happy with.

When you find image to cartoon transformations that work, you’ll know. The image will feel right. It’ll look artistic without looking fake. It’ll enhance your original photo rather than replace it.

Understanding Search Intent Behind This Trend

I’ve been curious about why this has become such a popular search. Why do so many people want their photos to look like they’re from a Ghibli film?

Part of it is pure nostalgia and fandom. Studio Ghibli films have touched millions of people around the world. The visual style is iconic and beloved. Of course people want to apply that aesthetic to their own images.

Part of it is the desire for something more artistic than photography but more personal than illustration. A photo is documentary. A Ghibli transformation is interpretation. It’s the same scene but seen through an artistic lens.

And part of it is how accessible this has become. The barrier to entry is essentially zero. You don’t need skills, software knowledge, or investment. You upload a photo and get results. That simplicity has made the trend explosive.

I think we’re also seeing a broader cultural shift where people want to engage with AI technology in creative, personal ways. Not for scaling up business processes, but for making their personal creative work better. This trend exemplifies that perfectly.

The Ethics and Future of AI Photo Transformation

I want to address something that comes up: Is using these tools “cheating” in some artistic sense?

My take? No. These are tools, like Photoshop, like cameras, like paintbrushes. A photographer isn’t “cheating” by using a camera instead of drawing by hand. Someone using Photoshop isn’t cheating compared to hand-painting. And using AI to explore artistic styles isn’t cheating compared to doing it all manually.

The skill is in knowing what transformation to apply, knowing which source photos work best, understanding composition and lighting, and having an artistic eye for what looks good. The tool does the heavy lifting, but you direct it.

Looking forward, I expect these tools to get even better. Training models on more specific artistic styles will be possible. Real-time preview might become standard. Maybe eventually we’ll see this built into standard photo editing software like Lightroom.

The key thing I hope people remember is that these transformations should enhance your creativity, not replace it. Use them as a starting point, as inspiration, as a way to see your photos differently. They’re not substitutes for learning photography or art. They’re augmentations.

Getting Started With Your Own Transformation

Here’s my recommendation if you want to try this yourself. Start simple. Pick a photo you like. Upload it to a tool. See what happens. You might be amazed at the result.

If the first result isn’t quite right, try a different photo or a different tool. The learning curve is extremely gentle because you get instant feedback.

Once you find results you love, think about how you want to use these images. Are you creating for social media? For personal enjoyment? For your blog or website? Context matters for which tool you should use.

And if you find AI photo transformation genuinely interesting, there’s a whole ecosystem of related tools worth exploring. This is just the beginning of what’s possible with AI-assisted creative work.

The Bottom Line

I’ve spent considerable time exploring how to create Ghibli style photos, testing different tools, and seeing what works and what doesn’t. My conclusion? This is genuinely transformative technology that’s becoming more accessible every day.

The transformation from regular photo to something that looks hand-drawn and artistic is remarkable. Whether you’re doing this for fun, for creative projects, or for your professional work, the capability is there and it’s getting better.

If you’re curious about what your own photos might look like in Ghibli style, I recommend trying it. The investment is minimal—just a few seconds of your time uploading an image. The potential outcome is genuinely beautiful artwork that you’ll be proud to share.

The world of AI photo transformation is evolving quickly. Better tools are emerging. Models are getting more sophisticated. But the core magic remains the same: taking your personal photos and seeing them reimagined through the lens of art you love.

Start exploring Ghibli style transformations with your favorite photos today. You might just surprise yourself with what’s possible.

Frequently Asked Questions About Ghibli Style Photos

Do I need to be an artist to use these tools?

No. The entire point is that they’re designed for people without artistic skills or technical knowledge. If you can upload a photo and click a button, you can create these images.

Will my photo get distorted or look completely different?

The best tools preserve recognizability while changing the artistic style. Your photo should still be identifiable as the original subject, just with Ghibli aesthetic applied.

Q: What’s the difference between Ghibli style and other anime styles?

Ghibli style is typically softer, more refined, and more grounded in reality than other anime aesthetics. It emphasizes natural elements and emotional storytelling rather than exaggerated features.

Can I use these transformed images commercially?

This depends on your tool and its terms of service. Some allow commercial use, some don’t. Always check the tool’s licensing before using transformed images in business applications.

How does the quality compare between free and paid tools?

The gap has narrowed significantly. Many free tools now produce professional-quality results. What matters more than price is whether the tool is specifically trained on Ghibli films.

What file formats should I upload?

Most tools accept JPG, PNG, and sometimes WebP. Higher resolution files produce better results. I recommend uploading at least 1000 pixels on the longest dimension.

Can I transform old or low-quality photos?

It’s possible, but results may be less impressive. The AI has less detail to work with, so the transformation might look soft or lack fine details. Modern, well-lit photos produce better results.

How long does the transformation take?

Most tools complete transformations in 10 seconds to 2 minutes depending on image size and server load. Some offer priority processing for faster results.

Can I edit the transformed image afterward?

Yes. Treat transformed images like any other digital image. You can edit them further in Photoshop, Lightroom, or any standard photo editor if you want to fine-tune results.

Will I get the exact same transformation if I upload the same photo twice?

Most tools use the same model for processing, so results should be consistent. However, some tools include random elements in their processing, which might create slight variations in multiple transformations of the same image.

How to Turn Photo Into Cartoon: 4 Easy Methods That Actually Work

Photo to cartoon AI converter preview

The fastest way for how to turn photo into cartoon projects is to upload it to an AI cartoon converter, pick a style, and download the result. Most tools finish in seconds. For more control, apply the Cartoon filter in a free editor like GIMP and adjust the mask radius and percent black settings.

Introduction

You’ve got a photo you like. Maybe it’s a selfie, a pet, or a family picture, and you’d love to see it redrawn like a frame from an animated show. So you search for how to turn photo into cartoon and land on a pile of apps, converters, and tutorials that all promise the same thing in three clicks.

Here’s the catch. Two things decide whether your cartoon looks great or looks like a smudged filter: the photo you start with and the style you pick. When learning how to turn photo into cartoon, the tool matters less than most roundups suggest.

I wrote this guide to cover all of it. I’ll explain what happens behind the scenes, walk through three practical methods, and share the photo tips and mistakes that make the biggest difference. If you’re curious about ai photo transformation in general, cartoons are a friendly place to start, because you can tell right away whether the result worked.

You can follow along with a single picture. If you just want the quickest route for how to turn photo into cartoon, X2X Converter offers a free photo cartoon effect in the browser, so there’s nothing to install. Everything below applies to that tool or any other.

What Turning a Photo Into a Cartoon Means

Understanding how to turn photo into cartoon graphics means restyling a real photograph so it looks hand-drawn or animated. The usual changes are simplified colors, bold outlines, softer shading, and sometimes exaggerated features. The subject stays recognizable, but the realism drops away.

People use several words for roughly the same idea. “Cartoonize” is the common verb. You’ll also see “cartoonify,” “toonify,” and “comic effect.” They aren’t identical, and the style you choose changes the result more than the name on the button does.

Here are the styles you’ll run into most often when testing how to turn photo into cartoon options:

StyleWhat it looks likeBest for
Classic flat cartoonBold outlines, flat color patchesProfile pictures, social posts
Comic bookHeavy ink lines, halftone-style shadingPosters, party invitations
Anime or mangaLarge eyes, clean lineworkAvatars, gaming profiles
3D animated lookSmooth skin, rounded shapesPortraits, birthday cards
Sketch or line artOutlines with little or no colorColoring pages, drafts
CaricatureDeliberately exaggerated featuresGifts, humor

A caricature is its own thing. It exaggerates features on purpose, while most automatic filters keep proportions close to the original. If you want a big head and tiny body, check that the tool actually offers it.

Photo-to-Cartoon Converter vs AI Image Generation

When exploring how to turn photo into cartoon outputs, a photo-to-cartoon converter starts from your photo and restyles it, so the pose, composition, and face stay the same. Text-to-image generation starts from a written prompt and invents a brand new picture. One is a transformation. The other is creation from scratch. If you want a cartoon that still looks like you, you want the first one.

How a Photo Cartoon Effect Works

A photo cartoon effect works by simplifying the colors in a picture and strengthening its edges. Older tools do that with fixed math rules. Newer AI tools learn what cartoons look like from many examples and redraw your photo in that style.

The classic filter method

Classic filters follow a recipe. First they smooth the image so small textures like skin pores and fabric grain disappear. Then they cut the number of colors so similar shades merge into flat patches. Finally they find edges and draw them as dark lines.

That last step usually relies on edge detection. One famous example is the Sobel operator, which Irwin Sobel and Gary Feldman presented in 1968. It estimates how quickly brightness changes from one pixel to the next, and sharp changes become outlines.

The weakness is obvious once you see it. The filter treats every pixel the same way. It can’t tell a face from a wall. Shadows turn into black blobs, and a busy background becomes a tangle of lines.

The AI method

AI converters offer a modern approach to how to turn photo into cartoon transformations. Instead of following one fixed recipe, a neural network learns from examples. One well-known approach is neural style transfer, where an algorithm takes a content image and a style image and produces a third image that balances how much it keeps of each.

Another is CartoonGAN, a 2018 CVPR paper by Yang Chen, Yu-Kun Lai, and Yong-Jin Liu. It trains a generative adversarial network on photos and cartoon images, and it adds an edge-promoting loss so outlines stay clear instead of turning fuzzy.

In plain terms, the network learns that eyes, hair, and clothing are different things and styles each one on its own terms. That’s why AI results usually look cleaner than a basic filter, and why this kind of ai photo transformation keeps faces recognizable more often.

Here’s my opinion, so weigh it as one. For faces, AI wins almost every time. For landscapes, buildings, and objects, a classic filter can look just as good and gives you more control over the final look.

Turn Photo Into Cartoon in GIMP (Free Method)

To turn a photo into a cartoon online, upload a clear picture to an AI converter, choose a style, check the preview, and download the file. Most online converters return a result in seconds, and the process works in any modern browser on a phone or computer.

Here’s the routine I’d follow:

  1. Pick a clear photo. Face forward, soft light, one main subject. The next section explains why.
  2. Open an online converter. I like browser-based tools because there’s nothing to install and they run on any device. The free cartoon filter for photos at X2X Converter works this way.
  3. Upload the original file. Chat apps often shrink and compress images, and that costs detail. Use the full-size version when you can.
  4. Choose a style or effect strength if the tool offers one. Start with the default. Then change one setting at a time so you can tell what each one does.
  5. Inspect the preview at full size. Zoom in on the eyes, mouth, and hairline. Those are the spots where AI cartoons tend to slip.
  6. Download and keep the original. If the result feels off, try a different crop before you blame the tool.

A quick note on step five. A cartoon can look fine as a thumbnail and fall apart when you zoom in. If you plan to print it or use it as a banner, check it at the size you’ll actually use.

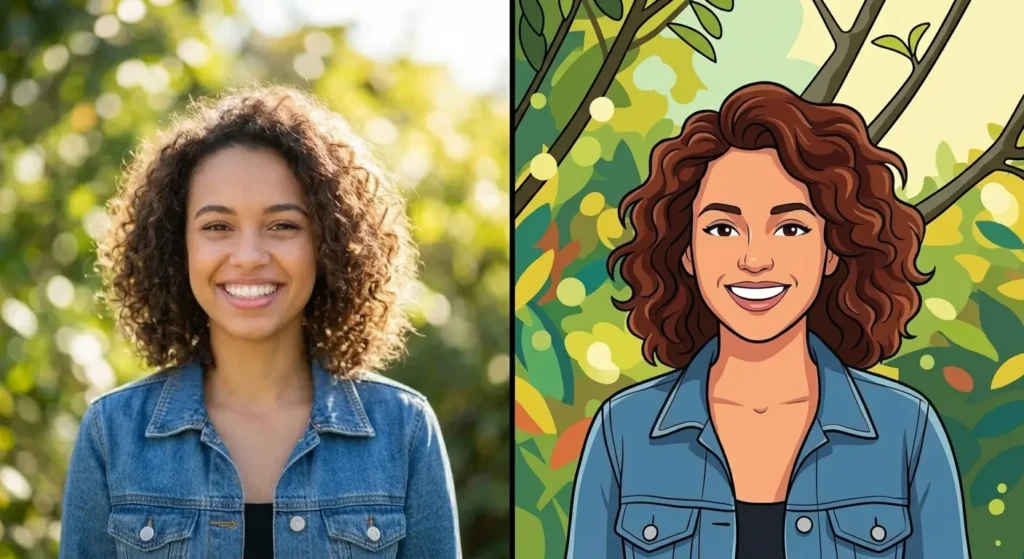
Turn photo into cartoon before and after comparison
A side-by-side comparison showing an original portrait photo transformed into a colorful cartoon style

What Makes a Good Source Photo for a Cartoon?

When researching how to turn photo into cartoon effectively, remember that the best photos are sharp, evenly lit, and front-facing, with one clear subject and a simple background. The converter can only restyle what it can see, so a clean input gives it far more to work with.

Think about what the tool has to decide. It has to find the face, separate it from the background, work out where the eyes and mouth are, and then redraw all of it. Anything that confuses that process shows up in the cartoon.

Photo problemWhat usually happensEasy fix
Harsh shadows across the faceDark patches turn into heavy black shapesShoot near a window or in open shade
Wide-angle selfie close to the lensNose and forehead look distortedHold the phone at arm’s length and zoom in slightly
Busy backgroundMessy lines and noise around the subjectCrop tighter or pick a plain wall
Glare on glassesEyes get lost or misdrawnTilt your head a little or angle the glasses
Heavy beauty filter already appliedSkin turns plasticky, details vanishUse the unfiltered original
Low-resolution or compressed copyPixelated edges, blurry featuresUse the original file from your camera roll

Two small habits help more than people expect when figuring out how to turn photo into cartoon artwork. First, take the picture in daylight if you can. Soft, even light gives the converter clean skin tones and clean outlines. Second, leave a little space around the head. Tight crops cut off hair and ears, and the tool then has to guess what’s missing.

If you’re working with a pet, the same rules apply. A well-lit face at eye level converts much better than a pet photographed from above in a dark room.

How Do I Turn a Photo Into a Cartoon in GIMP?

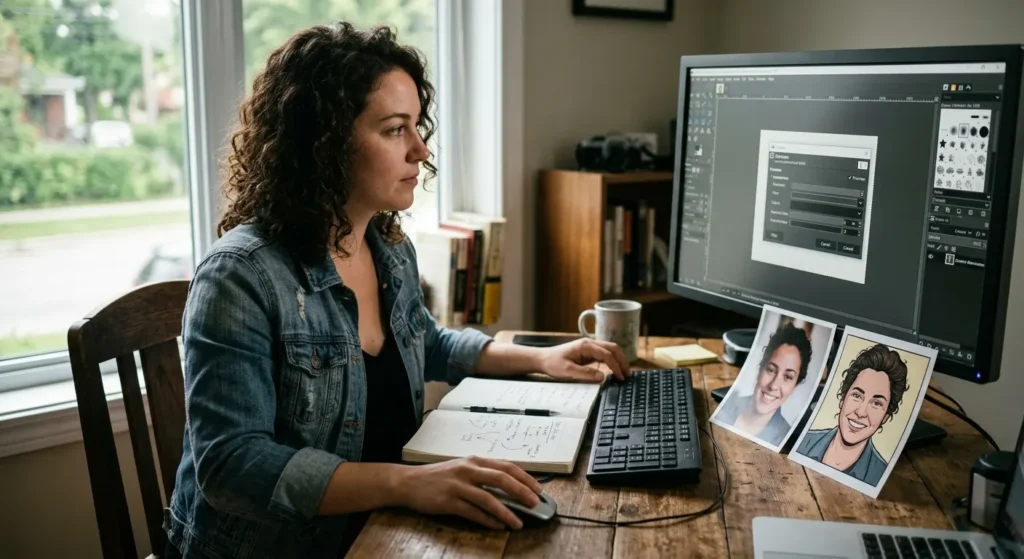
In GIMP, open your photo, choose Filters, then Artistic, then Cartoon, and adjust the mask radius and percent black settings. According to GIMP’s documentation, GIMP’s Cartoon filter makes an image look like a cartoon drawing by darkening areas that are already clearly darker than their surroundings, which creates a result close to a black felt pen sketch shaded with color.

GIMP is a free, open-source editor, so it’s a solid option when you want full control over how to turn photo into cartoon projects, or when you’d rather keep your files on your own computer.

The two settings do different jobs:

  • Mask radius controls the size of the areas the filter works with. Large values give thick black areas and much less detail. Small values give subtler pen strokes and keep more detail.
  • Percent black controls how much black gets added. Higher values make lines thicker, darker, and sharper. Lower values blend the dark areas more gently.

My starting point is a middle value for both, then I nudge one at a time. I’d also duplicate the layer before applying the filter. That way you can hide the filtered layer, compare it with the original, or lower its opacity to soften the effect.

Here’s a simple workflow:

  1. Open your photo and duplicate the layer.
  2. Go to Filters, Artistic, Cartoon.
  3. Turn on Preview and adjust the mask radius.
  4. Adjust percent black until the outlines look clean without swallowing the face.
  5. Click OK, then compare the result to the original layer.
  6. Export as PNG to keep the quality.

The trade-offs are worth knowing before you commit. GIMP is free, it works offline, and it gives you real control. On the other hand, it has a learning curve, and the Cartoon filter doesn’t know what a face is. It darkens shadows wherever it finds them, so portraits with strong side lighting can end up looking harsh.

Turn Photo Into Cartoon on Your Phone

You can open an online converter in your phone’s browser, or install a photo app that includes cartoon filters. Both take a few minutes and need no editing skills.

I lean toward the browser route for two reasons. You avoid another app asking for permissions, and you avoid the subscription prompts that many photo apps show after the first try. Free tiers on apps often add a watermark, limit resolution, or lock the better styles behind a paywall, so check what you actually get before you spend time on a photo.

A few phone-specific tips:

  • Use the rear camera when you can. It usually captures more detail than the front camera.
  • Turn off beauty modes and built-in filters before you shoot.
  • Don’t send the photo through a chat app first. Compression happens quietly and the cartoon pays for it.
  • Pick the highest quality setting if the tool lets you choose.

One more point on privacy. Before you upload a photo of someone else, ask them. That’s especially true for photos of children. Then look at how the service handles uploads, including how long it stores them.

Best Method to Turn Photo Into Cartoon

For most people, an AI converter is the best method for faces and quick results, while an editor like GIMP is better when you want hands-on control. A phone app suits quick edits on the go, and an illustrator is worth it when the cartoon is a gift, a brand asset, or a print piece.

MethodSpeedSkill neededControlCostBest for
Online AI converterSecondsNoneMediumOften free, some limitsFaces, avatars, quick results
Desktop editor (GIMP)MinutesSomeHighFreeObjects, scenes, custom looks
Phone appMinutesNoneLow to mediumFree with limits or subscriptionEdits on the go
Hiring an illustratorDaysNoneVery highPaidGifts, branding, print

If you’re still unsure, I’d try the online converter first. It costs you a minute, and the result tells you whether you need anything fancier. When a photo converts well, there’s no reason to spend an hour in an editor.

Choosing the Right Cartoon Style for Your Photo

Pick the style that fits where the cartoon will be used. A profile picture needs bold, simple shapes that survive being shrunk to a thumbnail. A print needs high resolution and clean lines. A card for a friend can be as playful as you like.

Here’s how I’d think about common situations:

For a social media avatar, choose a classic flat cartoon or an anime look. Fine detail disappears at small sizes anyway, so strong outlines and clear color blocks do the work.

For a gift or greeting card, a 3D animated look or comic style feels warmer and more personal. Pick a photo with a genuine smile, because the style amplifies expression.

For a small business or creator brand, consistency matters more than novelty. Choose one style and use it for every team photo or mascot so the set looks cohesive.

For a classroom or workshop, sketch or line art styles make good coloring sheets and are easy to print in black and white.

If cartoons aren’t quite what you had in mind, the same upload-and-convert idea works for other looks. X2X Converter, for instance, lists Image to Sketch and Image to Ghibli Style tools next to its cartoon converter. The photo tips in this guide apply to those too.

If the soft Ghibli look is what you want, follow our guide to creating Ghibli style photos from your own pictures.

Make a Cartoon Profile Picture From Your Photo

To make a cartoon profile picture, start with a front-facing, well-lit photo, convert it with a cartoon tool, then crop it square with your face centered. A good cartoon profile picture maker keeps your features recognizable, so friends and colleagues still know it’s you.

Cropping is where many avatars go wrong. Most platforms display profile pictures as a circle or rounded square, which clips the corners. Keep your face in the center and leave breathing room around the head and shoulders.

Some practical checks before you upload:

  • Shrink the image to thumbnail size and see if it still reads clearly.
  • Prefer a plain or softly colored background. It keeps attention on the face.
  • Avoid small text or fine details that turn to mush at small sizes.
  • Use the same cartoon on your main accounts so people recognize you across platforms.

There’s also a privacy angle. A cartoon avatar can feel safer than a real face, but it still carries your likeness. Anyone who knows you will recognize it, so don’t treat it as anonymous.

Creative Uses for a Cartoonized Photo

A cartoonized photo can do plenty beyond a profile picture. People use them for greeting cards, party invitations, classroom materials, newsletter headers, and social posts. They also work as simple placeholders when you don’t want to show a real face.

For a small business, a cartoon version of the founder or team can give a website a friendlier tone. The key is consistency. If you cartoonize one team member, do the whole team with the same style and similar photo framing, or the page will look uneven.

For families, a cartoon portrait makes an easy last-minute gift. Print it at a decent size and frame it. Just make sure the original photo had enough resolution to survive printing, since a small file will show its limits on paper.

Cartoon Image Download Free: What to Check First

You can get a cartoon image download free from many online converters, but check three things before you save: resolution, watermarks, and usage rights. A free download that’s tiny or stamped with a logo won’t help if you wanted it for a print or a profile banner.

Here’s what I look at each time:

  • Resolution. Zoom in on the preview. If edges look blocky, the download probably will too.
  • Watermarks. Some free tiers add one. Check whether it appears on the final file, not just the preview.
  • File format. PNG keeps quality without extra compression and supports transparent backgrounds. JPG makes smaller files, which suits web use.
  • Terms of use. See whether personal and commercial use are both allowed.

Usage rights deserve a second look, because the rules around AI-assisted images are still being worked out. The U.S. Copyright Office has published a multi-part report on copyright rules for AI-generated images. Part 2, released on January 29, 2025, covers the copyrightability of outputs created with generative AI. It says copyright depends on human authorship, that using AI as a tool doesn’t automatically rule out protection, and that prompts alone don’t give users enough control to count as authors of the output.

What does that mean for your cartoon? It depends on the details, and the Office treats these questions case by case. I’m not a lawyer. If the cartoon will go on a product, a logo, or anything you plan to sell, talk to an attorney and read the converter’s terms first.

Simple guide to turn photo into cartoon online
Give your photos a fresh, creative look.

What Should I Do When the Cartoon Looks Wrong?

When a cartoon looks wrong, change the input before you change the tool. Most bad results come from the photo, not the converter. Work through this table from the top.

What you seeLikely causeWhat to try
The face doesn’t look like youAngled face, shadows, or low resolutionUse a straight-on photo in soft light
Lines look messy or noisyBusy background or heavy textureCrop tighter or use a plain background
Colors look washed outFlat light or an already filtered photoUse the unfiltered original, add slight contrast first
Glasses or jewelry vanishSmall details lost in processingUse a higher-resolution photo and reduce glare
Edges look pixelatedSmall or compressed source fileUse the original file, not a chat copy
Hands look strangeHands are hard for many generative modelsCrop them out or choose a pose with hands out of frame

If you’ve tried a clean photo and a couple of different styles and it still looks off, switch method. Some faces and some lighting conditions simply suit one approach better than another. A face with strong side lighting might look better through GIMP’s filter, where you control the outline strength, than through an AI converter that smooths everything.

Common Mistakes When Cartooning a Photo

Most mistakes come down to rushing the input or the final check. These are the ones I’d watch for.

  1. Starting with a blurry or heavily compressed photo. The converter can’t invent detail that isn’t there, and it often invents the wrong detail.
  2. Using a photo that already has a strong filter or beauty mode. Stacking effects leads to plastic skin and strange colors.
  3. Pushing the effect to the maximum. Extreme settings flatten faces and lose the personality you wanted to keep.
  4. Choosing a style that doesn’t match the purpose. A detailed 3D look turns to mush as a tiny avatar, and a bold flat style can look too simple on a large print.
  5. Judging only the thumbnail. Always zoom in and check the eyes, teeth, hairline, and hands.
  6. Ignoring the background. A cluttered background produces noise that pulls attention away from the face.
  7. Uploading other people’s photos without asking. It’s a courtesy, and in some cases a legal and privacy concern.
  8. Assuming commercial use is automatically fine. Check the tool’s terms and the rights to the original photo.

None of these are hard to fix. They just need a minute of thought before you click convert.

Key Takeaways

  • Knowing how to turn photo into cartoon graphics effectively depends on your goal: an AI converter for speed and faces, GIMP for control.
  • Your source photo matters more than the tool. Sharp, evenly lit, front-facing photos give the best results.
  • AI converters learn to recognize faces and features, while classic filters apply the same rules to every pixel.
  • Match the style to the use. Bold and simple for avatars, high resolution for print, consistent for brands.
  • Before you download, check resolution, watermarks, file format, and usage terms.
  • Preview at full size, fix problems at the input, and change one setting at a time.
  • Ask before uploading other people’s photos, and talk to a lawyer before using AI-assisted images commercially.

Conclusion

Learning how to turn a photo into a cartoon comes down to two decisions: starting with a good photo, and choosing a style that fits what you’ll use it for. The tool is the easy part. A sharp, evenly lit, front-facing picture and a style that suits your purpose will beat a fancy app with a poor source image.

If you want to see how it works with your own picture, open X2X Converter’s free online tool and turn your photo into a cartoon. Upload a clear photo, review the result at full size, and download the version you like. If the first attempt isn’t quite right, try a different crop or a new photo before you change anything else.

Frequently Asked Questions

What is the easiest way to turn a photo into a cartoon?

The easiest way is an online AI cartoon converter. You upload a photo, choose a style, and download the result, usually within seconds. There’s nothing to install and no editing skills are needed. If you later want finer control over lines and colors, a free editor like GIMP is the natural next step.

Can I turn a photo into a cartoon for free?

Yes. Free online converters and open-source editors like GIMP both work at no cost. Some tools limit resolution, add a watermark, or cap daily uses on their free tier, so check the download settings before you start. GIMP has no such limits, but it takes more time to learn.

Does turning a photo into a cartoon lower image quality?

It can. Cartoon styles remove fine detail by design, and a small or heavily compressed source file gives a blurry or pixelated result. Start with the original, full-resolution photo and save the cartoon as a PNG when the tool allows it. That avoids extra compression.

What type of photo works best for a cartoon?

A sharp, evenly lit, front-facing photo with one clear subject and a simple background works best. Avoid harsh shadows, glare on glasses, busy patterns, and photos that already carry strong filters. Natural window light gives cleaner skin tones and outlines than a flash in a dark room.

Can I cartoonize a pet or a group photo?

Yes, though results vary. Pets usually convert well when their face is clear and well lit. Group photos are harder, because small faces lose detail and the tool has to restyle several people at once. For the best result, crop to one or two subjects and use a larger version of the picture.

Is it safe to upload my photo to an online cartoon converter?

It depends on the service. Read the privacy policy to see how long uploads are stored and whether they’re used for anything else. Avoid uploading photos of children, IDs, or sensitive documents unless you trust the service. If privacy is a priority, a local editor like GIMP keeps files on your own device.

What’s the difference between a cartoon effect and a caricature?

A cartoon effect restyles a photo with outlines, flat colors, and simplified shading while keeping proportions close to the original. A caricature deliberately exaggerates features, like a larger head or bigger smile, for humor or emphasis. Most automatic converters do the first. Caricatures usually need a dedicated tool or an artist.

Can I use my cartoon image commercially?

That depends on the tool’s terms and on the photo itself. You need the right to use the original picture, and the converter’s license must allow commercial use. Copyright rules for AI-assisted images are still developing. I’m not a lawyer, so check with one before putting a cartoon on a product or brand.

Why doesn’t my cartoon look like me?

Usually the source photo is the problem. Side angles, harsh shadows, wide-angle selfie distortion, and low resolution all make it harder for a tool to keep your features. Try a straight-on photo taken at arm’s length or farther, in soft light, and compare a couple of different styles.

Can I turn a photo into a cartoon without Photoshop?

Yes, you don’t need Photoshop. A browser-based AI converter handles it in a few clicks, and GIMP is a free desktop alternative with a built-in Cartoon filter. Phone apps are another option. Pick based on how much control you want and how much time you have.

AI Photo Transformation: Turn Any Photo Into Art in Minutes

Before and after of AI photo transformation into cartoon art styles

Have you ever looked at a photo and thought it would look stunning as a painting, a cartoon, or a dreamy anime scene? A few years ago that idea required a professional artist and a serious budget. Today, AI photo transformation makes it possible in minutes, often for free, with nothing more than a browser and an image you want to reimagine.

This guide covers everything worth knowing: what AI photo transformation actually is, how it works behind the scenes, which styles are trending right now, step-by-step walkthroughs for the most popular looks, and how to choose the right style for every kind of photo. By the end, you will know exactly how to turn photo into cartoon, sketch, or anime art without touching complicated software.

What Is AI Photo Transformation?

AI photo transformation is the process of using artificial intelligence to restyle or rework an existing image. Instead of manually editing pixels the way a traditional editor does, an AI model analyzes your photo, understands its structure, and rebuilds it in a new artistic style while keeping the original subject recognizable.

Think of it as a translation. Your photo speaks the language of reality, and the AI translates it into the language of cartoons, sketches, watercolor, anime, or oil paint. The face in the picture is still your face. The scene is still your scene. Only the visual style changes.

That is what separates AI photo transformation from ordinary editing. A filter only adjusts colors and brightness. A true AI photo transformation redraws the image from the ground up, producing results that often look hand made. The lines appear drawn rather than traced. The shading appears painted rather than applied. This difference is why transformed images get attention while filtered images blend into the feed.

There is also a speed story here. Manual digital painting of a single portrait can take a skilled artist several hours. An AI photo transformation of the same portrait takes seconds. That gap is not just convenient. It changes who gets to make art at all.

A Short History: From Film Stock to Full Transformation

To appreciate where we are, it helps to remember how far photo stylization has come.

  • The film era. Long before software, photographers chose film stocks for their color character. Portraits and landscapes each had signature looks. Style was baked into chemistry.
  • The early digital era. Editing programs brought plugins and actions that could imitate painterly strokes, but the results were mechanical. A colored pencil filter simply detected edges and painted strokes along them.
  • The deep learning era. Around the mid 2010s, style transfer networks appeared. These models could genuinely borrow the texture and color palette of a painting and apply it to a photo. It was the first time software produced stylization that felt intentional.
  • The diffusion era. Today, diffusion models trained on millions of images have made AI photo transformation mainstream. Results preserve faces, handle complex scenes, and offer many distinct styles from a single upload.

Each stage made style more accessible. The current stage has made it nearly effortless, and the pace of improvement shows no sign of slowing.

Why AI Photo Transformation Became So Popular

Three forces fueled the explosion of interest in AI photo transformation.

Speed. What once took an artist hours now takes seconds. You upload a photo, choose a style, and download the result before your coffee cools.

Accessibility. You do not need design training, a graphics tablet, or expensive software. Most AI photo transformation tools run in a browser, which means anyone with a phone or laptop can participate.

Social culture. Platforms like Instagram, X, and Pinterest reward fresh, eye-catching visuals. When people started sharing stylized versions of their portraits, the trend went viral fast. Forbes even published an explainer on why the AI-generated Studio Ghibli trend took over social media, and demand has not slowed since.

Put those three together and you get a creative shift where anyone can produce studio-grade art from a snapshot.

How AI Photo Transformation Works (Without the Jargon)

You do not need a machine learning degree to use these tools, but a basic understanding helps you get better results.

Modern AI photo transformation is powered mostly by diffusion models. These models are trained on millions of images, each paired with descriptions. During training, the AI learns patterns: how edges define a face, how light falls on skin, how cartoon lines differ from photographic detail.

The name is surprisingly literal. A diffusion model learns by taking clean images and gradually adding noise until they become pure static, then training itself to reverse the process. After enough repetition, the model can start from random noise and sculpt it into coherent pictures. When you supply your own photo, the model uses it as a guide while it reconstructs the scene in the target style.

So when you upload an image, the model does two jobs at once. First, it recognizes the content: the people, objects, background, and composition. Second, it applies the style rules it learned, producing a new image that matches both your content and the chosen aesthetic.

The quality of an AI photo transformation depends on three factors:

  • The input photo. Sharp, well-lit images with clear subjects give the model more to work with.
  • The model itself. Some models specialize in faces, others in scenery or objects. GetImg’s Ghibli Diffusion model shows how specialized training produces distinctly anime-flavored results
  • The style prompt or preset. A vague request produces a vague result. Specific direction produces art.

That is the entire magic trick. No mystery, just pattern recognition applied at a massive scale.

The Most Popular AI Photo Transformation Styles

One of the best things about AI photo transformation is the range of looks available. Here are the styles people search for most, and when to use each one.

1. Cartoon Style

The classic. Cartoon transformation converts your photo into a bold, colorful illustration with clean outlines and flat shading, similar to animated shows and comic strips. It works beautifully for profile pictures, gift cards, and social posts.

If you want to try this, the image to cartoon tool converts photos into cartoon style images in a few clicks. Upload your picture, let the AI work, and download the result. We will cover a full walkthrough later in this guide.

2. Ghibli Style

The internet’s favorite. A Ghibli style photo carries the soft, nostalgic aesthetic of Japanese animation: gentle colors, painterly skies, and a warm storybook feel. It turns an ordinary selfie into a frame that looks lifted from an animated film.

The trend became so big that news outlets tracked its origins. The Economic Times published a piece on who started the AI-generated Ghibli photo trend, and it remains one of the most requested looks in AI photo transformation today. To test it yourself, try the image to Ghibli style converter, which rebuilds your image in that signature animated look.

3. Sketch and Drawing Styles

Photo to sketch styles strip your image down to pencil lines, cross-hatching, and shading. Sketch transformation is popular for portraits, wedding keepsakes, tattoo references, and custom greeting cards. There are several sub-styles worth knowing:

  • Pencil sketch: soft graphite lines with realistic shading
  • Charcoal sketch: dramatic dark strokes, great for moody portraits
  • Line art: minimal single-weight outlines, perfect for logos and coloring books
  • Ink drawing: bold contrast with a hand-drawn feel

For any of these, the image to sketch tool offers multiple artistic sketch variations from a single upload.

4. Anime and Manga Style

A close cousin to cartoon, but with the expressive eyes, detailed hair, and cel shading typical of Japanese comics. Anime style is a strong choice for gaming avatars, Discord profiles, and fan art.

5. Painting Styles

AI photo transformation can also apply classical painterly looks: oil paint, watercolor, impressionism, and more. These work well for home decor prints, book covers, and artistic portfolio pieces.

6. 3D Character Style

This look turns subjects into rounded, glossy 3D characters with exaggerated features. It is playful, shareable, and hugely popular for family photos and pet pictures.

Style Comparison at a Glance

StyleBest ForEnergy LevelIdentity Accuracy
CartoonProfile pictures, gifts, social postsPlayful and boldHigh
GhibliPortraits, landscapes, nostalgic scenesSoft and dreamyHigh
Pencil sketchPortraits, keepsakes, tattoo artCalm and elegantVery high
AnimeAvatars, fan art, gamingExpressiveMedium to high
Oil paintingDecor prints, covers, portfoliosRich and classicMedium
3D characterFamily and pet photosFun and livelyMedium

Use this table as a starting point, then let experimentation refine your choices.

How to Turn Photo Into Cartoon: Step by Step

Here is the exact process for cartoon transformation, and the same flow applies to most styles.

  1. Pick a high-quality photo. Choose an image where your subject is sharp, well-lit, and centered. Avoid blurry pictures, heavy shadows, and cluttered backgrounds.
  2. Open the cartoon tool.Go to theimage to cartoon converter
  3. Upload your photo. Drag and drop the file or browse from your device. JPG and PNG formats are standard.
  4. Let the AI process it. The model analyzes the structure and applies cartoon rendering. This usually takes only a few seconds.
  5. Review the result. Check whether the face, pose, and expression survived the transformation.
  6. Download and share. Save the cartoon version to your device and post it anywhere you like.

If the first attempt misses the mark, try a different photo. AI photo transformation quality depends heavily on the input. Front-facing portraits with even lighting almost always win.
If you want every method in detail, including GIMP and phone apps, read our step-by-step guide to turning a photo into a cartoon.

Making a Ghibli Style Photo That Actually Looks Right

Because the Ghibli aesthetic is subtle, small choices change the outcome noticeably.

  • Choose photos with open skies or nature. The style is famous for clouds, meadows, and golden light. A park bench photo transforms better than a dim indoor selfie.
  • Keep the composition simple. One or two subjects, clean backgrounds, gentle depth. Busy frames dilute the dreamy quality.
  • Favor soft daylight. The pastel palette of a Ghibli style photo needs gentle light to look convincing.
  • Include a sense of story. A person looking away from the camera, or a quiet street at dusk, gives the transformation a narrative feel that matches the aesthetic.

Getting the Most From Photo to Sketch Styles

Sketch transformation rewards different inputs than cartoon or anime. Since sketches rely on lines and shading rather than color, your priorities shift.

  • Strong contrast helps. A subject against a lighter background reads better as a sketch.
  • Texture becomes detail. Curly hair, knit sweaters, and foliage translate into rich hatching.
  • Plain backgrounds keep focus. In pencil and line art, empty space is a design choice, not a waste.
  • Test multiple variants. The same portrait can look elegant as pencil, dramatic as charcoal, and modern as line art. Comparing them side by side is the fastest way to find your favorite.

For real before/after examples and source-photo tips, see how I turn my photos into Ghibli style art.

AI Photo Editor vs AI Image Generator From Photo

People often mix up two related concepts, so let us clear that up.

An AI photo editor modifies an existing image while staying close to reality. It removes backgrounds, erases objects, retouches skin, and adjusts lighting. The photo remains a photo. Adobe’s ecosystem is the best-known example, and their official page on AI photo editing features shows how professional tools now blend traditional editing with generative AI. TechRadar also maintains useful coverage of Photoshop’s AI editing tools if you want a professional perspective.

An AI image generator from photo goes further. It uses your photo as a reference and produces a completely new rendering in another style. Your portrait becomes a cartoon, sketch, or anime character. The output is a fresh image, not an edited one.

Both have their place. Use an editor when you want your photo to remain a photo. Use a generator when you want your photo to become art. Most AI photo transformation tools fall into the second category, and the two often work together: edit first to clean up the shot, then transform to restyle it.

Choosing the Right Style for Your Photo

Not every style suits every image. These quick guidelines help you match subject and style.

  • Portraits and selfies: cartoon, Ghibli, anime, and pencil sketch all shine. Each keeps facial identity intact while adding character.
  • Pets: cartoon and 3D character styles produce the most delightful results.
  • Landscapes and travel shots: Ghibli, watercolor, and impressionist styles add atmosphere without losing the scene.
  • Group photos: use styles that handle multiple faces well, such as cartoon or sketch. Complex group shots can confuse models that specialize in single faces.
  • Product images: line art and clean sketch styles work well for packaging concepts and design mockups.
  • Kids and family: soft Ghibli and cartoon looks create keepsake-worthy results.

A useful habit: run the same photo through two or three different styles and compare. AI photo transformation is fast enough that experimenting costs you nothing but a minute.

Tips for Getting Better Results

Follow these practices and your transformations will consistently look better.

Start with a clean photo. Crop out distractions, fix exposure if needed, and make sure your subject is in focus. Garbage in, garbage out applies fully to AI photo transformation.

Use natural lighting when shooting. Photos taken in soft daylight give the AI clearer detail to preserve, especially in faces.

Keep the subject large in the frame. Tiny, distant subjects lose detail during transformation. Fill the frame with whatever matters most.

Avoid extreme poses at first. Overhead angles, hands covering faces, and dramatic shadows can confuse models. Straight-on shots are the most reliable.

Mind the resolution. A high-resolution output deserves a high-resolution input. If you need specific dimensions afterward, the image size converter and resizer can adjust your transformed image for social platforms, app icons, or print.

Save your originals. Always keep the untouched source photo. Trends change, and you may want to try a new style on it later.

Practical Uses for AI Photo Transformation

Beyond social media fun, these tools solve real problems.

Profile pictures and avatars. A cartoon or Ghibli version of your portrait is a memorable alternative to the standard headshot, especially for gaming and creator platforms where personality matters more than polish.

Gifts and keepsakes. A pencil sketch of a wedding photo or a cartoon of a childhood picture makes a personal, affordable gift. Printed and framed, these transformations look intentional rather than digital.

Marketing and branding. Small businesses use stylized images for logos, packaging concepts, and ad creatives without hiring illustrators. A consistent style applied across product photos builds a recognizable visual identity.

Content creation. Bloggers and YouTubers use transformed images as thumbnails and illustrations, keeping a consistent look across posts. A distinctive style helps content stand out in crowded feeds.

Education and design. Teachers convert diagrams into friendly cartoon visuals, and designers build mood boards from quick style tests. Sketch and line art outputs are especially useful for worksheets and instructional material.

Creative portfolios. Photographers use AI photo transformation to show clients alternate treatments of the same shot. A single portrait rendered in five styles demonstrates range in a way one photo never could.

Documenting projects. Some creators convert a batch of transformed images into a report or portfolio document, and tools like the image to Word converter make it easy to place multiple images into a DOCX file in one go.

Common Mistakes to Avoid

Even though AI photo transformation is simple, a few habits quietly ruin results.

  • Uploading low-quality photos and blaming the tool. The model cannot invent detail that was never captured. If the source is blurry, the transformation will be blurry too.
  • Overusing transformations. A feed of fifty identical cartoon posts loses impact fast. Vary your styles and save transformations for moments that deserve them.
  • Ignoring licensing and consent. Do not transform photos of people without their permission, and check usage rights before using generated art commercially. Different tools have different terms, so read them before a client project.
  • Expecting perfection every time. AI is impressive but not flawless. Some photos simply do not translate well, and a second attempt with a different image is the fastest fix.
  • Forgetting privacy. If your photo contains sensitive information or other identifiable people, consider whether you want to upload it to any online tool. Responsible use of AI photo transformation means respecting the privacy of everyone in the picture.
  • Skipping the comparison step. Settling for the first result means missing better options. Running the same photo through two or three styles takes a minute and often reveals a stronger version.

Realistic Expectations: What AI Can and Cannot Do Yet

Honesty makes for better workflows, so here is where the technology stands today.

What it does well: preserving facial structure in portraits, applying consistent styles, handling single subjects with clear backgrounds, and producing images that look intentionally artistic rather than filtered.

Where it still struggles: hands in complex poses, very large groups, tiny text in the frame, and photos that are already heavily stylized. Extremely low-light images also remain a weak spot, because the model has little clean detail to interpret.

The good news is that failure is cheap here. A weak result costs you thirty seconds, so there is no reason not to retry with an adjusted input. This trial-and-error loop is not a flaw in the workflow, it is the workflow.

The Future of AI Photo Transformation

This space is moving quickly. Three trends are worth watching.

More control. New tools let users guide transformations with detailed prompts, reference images, and strength sliders, so you can decide how far the style goes. Subtle restyling and dramatic reinvention will both be one adjustment away.

Better identity preservation. Early models often distorted faces. Current models keep identity remarkably intact, and the gap keeps shrinking with each generation.

Style mixing. Combining styles, such as Ghibli backgrounds with sketch characters, is becoming mainstream, opening creative territory that manual art rarely explored. Expect tools to offer hybrid presets as a standard feature rather than an advanced option.

The tools will keep improving, but the core idea stays the same: AI photo transformation puts artistic skills that once required years of practice into everyone’s hands.

Conclusion: Start With One Photo

AI photo transformation has quietly become one of the most useful creative skills anyone can pick up, and unlike most skills, it takes minutes to learn. You now know how the technology works, which styles lead which trends, how to prepare photos for better results, and how to avoid the mistakes that frustrate first-time users.

The only step left is the fun one. Pick a photo you love, choose a style that matches its mood, and see what the AI makes of it. Try the cartoon look for something playful, the Ghibli style for something dreamy, or a sketch for something timeless. One upload is all it takes to see your own pictures in a completely new light.

Frequently Asked Questions

Is AI photo transformation free?

Many online tools offer free transformation of standard images. Heavy or batch processing may require a paid tier on some platforms, but for single portraits and casual use, free options cover most needs.

Do I need to install software?

Usually no. Most AI photo transformation tools run directly in a web browser on both desktop and mobile. If you need to resize the output afterward, a browser-based image resizer handles that too.

Will the transformed image still look like me?

Quality tools preserve facial identity well, especially with clear, front-facing photos. Results vary more with side profiles, heavy makeup, and low-light shots. When identity matters most, pencil sketch styles tend to be the most faithful.

Which style should a beginner try first?

Cartoon. It is forgiving, works with most photo types, and gives a satisfying result almost immediately. Ghibli and pencil sketch are strong second choices once you understand how your photos respond to transformation.

Can I use transformed images commercially?

It depends on the tool’s terms and the photo’s rights. Always check the license of both the tool you use and the source image, and get consent from anyone recognizable in the picture.

How many photos can I transform?

For casual use, transform as many as you like one at a time. If you need to organize many results into a document, converting batches into a Word file keeps everything tidy.

Why did my result look distorted?

Usually the input photo. Blurriness, extreme angles, harsh shadows, and cluttered backgrounds are the usual suspects. Retry with a cleaner shot and the same style, and the difference is often dramatic.

WhatsApp Image to PDF: Convert Photos and Screenshots Without Losing Quality

Smartphone screen displaying WhatsApp images being converted into a PDF document on a modern desk setup.

Save the picture from the chat to your phone, then turn it into a PDF with the built-in Print or Create PDF option, or with a browser-based image to PDF converter. A WhatsApp image to PDF conversion takes under a minute, and several pictures can go into a single file.

One form, six photos, and a request for a single file

A teacher sends class notes as six photos. A client sends a signed form as three. A landlord shares a lease one page at a time. WhatsApp handles all of that until someone asks you to submit a single file, and then you’re left with a camera roll full of loose pictures.

That’s the moment most people start looking for a WhatsApp image to PDF method. A PDF keeps pages in order, opens the same way on any device, and fits upload forms that reject image files. The steps resemble ordinary JPG to PDF conversion, with two extra wrinkles: WhatsApp compresses what it sends, and the photos sit inside a chat instead of a folder.

The phone-based options cost nothing, and a browser tool covers big batches. Every WhatsApp image to PDF job follows the same rhythm: save, convert, check, send.

What the conversion changes, and what it leaves alone

A WhatsApp image to PDF conversion takes one or more pictures from your chats and places each one on its own page of a PDF file. The conversion leaves the picture as it is and wraps it in a document, so any photo to PDF tool gives you a file that looks exactly as sharp, or as blurry, as the image you started with. It doesn’t add text you can search, and it can’t restore detail WhatsApp already removed. What changes is the file type, the page layout, and how easily the file can be shared, uploaded, and printed.

PDF is an open international standard, ISO 32000, and Adobe handed the PDF 1.7 specification to ISO in 2007. The standard’s stated aim is that people can exchange documents that look the same whatever software or device opens them. That’s the practical reason schools, banks, and government portals ask for PDFs.

Two file types dominate WhatsApp image to PDF work. Photos sent the normal way arrive as JPEG files, because WhatsApp re-encodes them in transit. Screenshots and files sent as documents usually keep their original format, often PNG. Both convert with the same tools.

Why a WhatsApp image to PDF file can look soft

WhatsApp shrinks pictures to save data. Send a photo in standard mode and the app resizes it and compresses it hard, so the copy your contact receives is far smaller than the original.

In one measurement test, a single 26-megapixel, 4.3 MB photo was sent through several phones and app versions. Standard mode kept roughly 1280 to 1600 pixels on the long side and 3 to 17% of the original bytes. HD mode gave a much better copy, but it was still a fresh JPEG with the camera data stripped, and the resolution cap ranged from 2560 to 5120 pixels depending on the device. Only sending the file as a document delivered it untouched.

Since the sender picks the mode, the quality of your WhatsApp image to PDF file is partly out of your hands, so ask before they send.

Sending modeWhat arrivesBest for
Standard photoSmall, heavily compressed JPEGCasual sharing
HD photoLarger re-encoded JPEG with a resolution capPhotos and most everyday documents
DocumentThe original file, unchangedScans, contracts, anything you’ll print

The document route is short. On iPhone, tap the plus button, choose Document, then Choose Photo or Video. On Android, tap the paperclip, choose Document, and pick the file. Sending the photo as a document delivers the whole file with no loss, and WhatsApp allows files up to 2 GB, so size rarely blocks it.

If people send you documents as photos often, ask them to switch the default to HD under Settings, Storage and data, Media upload quality. HD isn’t the original, but it’s a solid step up from standard.

A WhatsApp image to PDF file built from a standard-quality copy is fine for a photo of a page. Small print, signatures, and thin lines can turn soft, though. When the file matters, get the original.

How to convert WhatsApp images to PDF on a phone

Open the chat, tap the image, and save it so a copy lives in Photos, Gallery, or Files. A WhatsApp image to PDF conversion on a phone needs no extra app.

iPhone

Save the image with the share icon, choosing Save to Photos or Save to Files. Then pick one of two routes:

  1. Photos route. Open the image in Photos, tap Share, choose Print, and pinch outward on the preview with two fingers. The preview opens as a PDF. Tap Share again and choose Save to Files.
  2. Files route. Long-press the image in the Files app and choose Create PDF, which may sit under Quick Actions. For several images, tap More, choose Select, tap each image, then pick Create PDF.

The Files route suits batches, while the Photos route is the shortest WhatsApp image to PDF path for a single picture. If page order matters, rename the images 01, 02, 03 before you select them. WhatsApp converts iPhone’s HEIC photos to JPEG in transit, so the copy you save from a chat is already a JPEG.

Android

On Android, a WhatsApp image to PDF conversion runs through the same Print system that sends pages to a printer, except the destination is a file. Many Android phones save received photos to the gallery on their own. If yours doesn’t, save the image from the chat first. Open it in Google Photos or your gallery app, tap Share, then Print, and choose Save as PDF from the printer drop-down or the three-dot menu, depending on your version. Tap the PDF button, name the file, and choose a folder.

Phone makers rename menu items, so if Print is missing, look in the three-dot menu.

Building a WhatsApp image to PDF batch in a browser

An online tool is the fastest way to turn a batch of pictures into one WhatsApp image to PDF file. It works the same on iPhone, Android, Windows, and Mac because the work happens in the browser. When the phone’s own options feel clumsy for a batch, or you have more than three images, it’s the method to pick.

On a computer, open the chat in WhatsApp Web or the desktop app and download the images from the media viewer. On a phone, save them first. Then:

  1. Open any browser-based picture to PDF converter.
  2. Add all the images at once.
  3. If the tool shows thumbnails, drag them into page order. If it doesn’t, rename the files 01, 02, 03 before uploading so they load in sequence.
  4. Choose a page size and orientation if the tool offers them. A4 or Letter in portrait suits most documents.
  5. Convert, download, and scroll through every page before you send it.

Before you convert image to PDF files on an unfamiliar site, check a few things:

  • It works without an account. A site that demands your email before handing over a file adds friction to a two-minute task, which is why people search for image to PDF no signup tools in the first place.
  • It says how long uploads stay on its servers, or whether processing happens in your browser.
  • It doesn’t stamp a watermark on your pages.
  • It lets you control order and page size.

Uploading means your images travel to someone else’s server. That’s fine for a class handout and a poor choice for an ID card or a bank statement, which belong on the phone’s built-in route because it stays on your device. Page size and margins matter more when the PDF will be printed, so set them on purpose whenever you convert an image to PDF for paper.

Chat screenshots need extra care

A WhatsApp screenshot to PDF job differs from a photo job in three ways. Screenshots are PNG files, they’re often tall, and they show more than you meant to share.

Long chats. A conversation captured in several screenshots becomes several pages. Capture them oldest first and leave a little overlap so no message falls between two images. Crop out the battery icon and notifications if the PDF will leave the original chat.

Privacy. Phone numbers, profile photos, and other people’s messages all appear in the frame. Crop or cover anything the reader doesn’t need. When you cover text, use an opaque fill in your markup tool. A translucent highlighter can leave words readable.

Format. PNG is lossless, so a screenshot keeps crisp edges inside the PDF, and PNG to PDF conversion follows the same steps as JPG.

One caution. A WhatsApp image to PDF file made from screenshots is easy to produce and easy to dispute. If you need chat records for a legal dispute, an HR complaint, or a court filing, ask a lawyer or the receiving authority how evidence has to be preserved. Screenshots alone may not meet the requirements.

Sending several photos as one PDF

WhatsApp treats ten photos as ten separate files, and the recipient has to open each one. To send multiple WhatsApp photos as one PDF, merge them first and then send the PDF as a document.

Building the bundle takes five steps.

  1. Save all the images to one album or folder.
  2. Rename them 01, 02, 03 in the order the pages should appear.
  3. Build the PDF with Create PDF in Files on iPhone, or with an online converter on any device.
  4. Open the result and confirm the page count matches the image count, the order is right, and no page is sideways.
  5. In WhatsApp, tap the plus button on iPhone or the paperclip on Android, choose Document, and pick the PDF.

Because a finished WhatsApp image to PDF file travels as a document, WhatsApp delivers it without recompressing the pages. Give the file a name that means something to the recipient, like lease-agreement-signed-2026-09.pdf, not IMG-20260929-WA0004.pdf.

Keeping a WhatsApp image to PDF file small

Size problems in a WhatsApp image to PDF file come from the images, because the PDF wrapper adds very little. A PDF stores each page’s picture at whatever resolution it was given, so twenty 4 MB originals produce a file near 80 MB. Many email providers cap attachments at roughly 20 to 25 MB, and upload forms often set lower limits.

Images that reached you in standard WhatsApp quality are already small, going by the 3 to 17% figure above, so a WhatsApp image to PDF file built from them rarely causes trouble. The problem starts with originals sent as documents, or photos straight from your camera.

To compress image to PDF size, and keep a WhatsApp image to PDF file easy to email, work on the images before conversion:

  • Resize. An A4 page at 150 dpi needs about 1240 by 1754 pixels. A 4000 pixel photo carries far more detail than the page can show at reading size, so 1600 to 2000 pixels on the long side is plenty.
  • Go grayscale for text pages. Contracts and forms don’t need color.
  • Lower JPEG quality a little. Around 75 to 80% usually keeps text readable. Zoom in to check.
  • Convert once. Every recompression pass loses detail, so avoid converting, compressing, and converting again.
  • Use a PDF compressor as a last step if the file still exceeds the limit, then confirm the text is readable at 100% zoom.

A worked example: the six-page rental form

Say a landlord sends a six-page form as six standard-mode photos, and the housing office that receives it wants one PDF under 5 MB. These numbers are rough and illustrative, but they show how a WhatsApp image to PDF job like this tends to go.

Each photo arrives at around 1500 pixels on the long side and a few hundred KB, so six pages total about 2 MB. That’s already inside the limit. The signature on page six looks soft, so you ask the landlord to resend that page as a document. You resize the 4 MB original to 1800 pixels, rename the six files 01 to 06, and convert them together. The finished WhatsApp image to PDF file lands near 2.5 MB.

Total time is about five minutes, and most of it is waiting for the resend. For bigger jobs, fix the weakest page at the source, then convert everything in one pass.

Situations where a PDF beats loose photos

Students hit this first. A classmate photographs the board, posts eight pictures in a group, and the instructor wants the notes as one document. A WhatsApp image to PDF file solves that in one pass.

Small businesses meet it with invoices, delivery proofs, and signed quotes that customers send by chat. One PDF per document is easier to file and search for than a dozen loose attachments, so a WhatsApp image to PDF routine saves the bookkeeper time.

Renters and job applicants hit the same wall on portals. Some upload forms cap the number of files at one or two, so a set of five photos has to become a single WhatsApp image to PDF file first.

Families use it for school forms, medical reports, and travel papers. Medical and identity documents are the sensitive ones, and for those a WhatsApp image to PDF conversion should happen on the phone, not on a random website.

Which method fits which job

Pick the WhatsApp image to PDF method by batch size and sensitivity.

MethodBest forWorks offlineMain trade-off
iPhone Files or PrintOne image or a small batchYesPage order depends on how you select files
Android Print to PDFOne image at a timeYesMenu names differ by phone brand
Online converterBatches from any deviceNoImages leave your device, so read the privacy terms
Scanner appPaper documents you photographUsuallySome add watermarks or paywalls

Use the built-in route for any private WhatsApp image to PDF job. Use an online converter for batches of more than three images. Use the document-send trick whenever source quality matters. That combination covers nearly every WhatsApp image to PDF request you’ll run into.

Mistakes that spoil a WhatsApp image to PDF file

Converting before the download finishes. In chats with auto-download off, a blurred preview looks like an image but isn’t one. Tap it, wait for the full picture, then save.

Screenshotting the image instead of saving it. You get a lower-resolution copy with the status bar attached, and the WhatsApp image to PDF file inherits both flaws.

Wrong page order. WhatsApp shows images in the order they were sent, which may not be the order the pages should read. Check before you start the WhatsApp image to PDF conversion.

Skipping the final scroll. One rotated or missing page in a WhatsApp image to PDF file can get a whole submission rejected.

Uploading sensitive files to unknown sites. If a document carries an ID number, an account number, or medical details, keep the WhatsApp image to PDF work on your device.

For official submissions such as visa applications, court filings, or notarized paperwork, check the receiving body’s file rules first. Requirements vary, and a notary or lawyer can tell you what counts as acceptable.

Can a PDF made from photos be searched?

Not by default. A WhatsApp image to PDF file contains pictures of text, so a word search finds nothing and you can’t select the words. Screen readers can’t read those pages either.

Optical character recognition (OCR) can add a hidden text layer. Many PDF tools and some scanner apps offer it, and the accuracy depends on how sharp the image is and which language it’s in. If someone needs editable text, ask for the original digital file instead of a photo of it.

Key takeaways

  • A WhatsApp image to PDF conversion wraps the image in a document and leaves its quality and text unchanged.
  • WhatsApp compresses standard photos heavily. Ask the sender to use the Document option when quality matters.
  • For a WhatsApp image to PDF conversion on iPhone, use Files (Create PDF) or Photos (Print, then Save to Files). Android users can use Print, then Save as PDF.
  • An online picture to PDF converter is the quickest WhatsApp image to PDF route for big batches. Choose one that works without an account and states how long it keeps uploads.
  • Rename images 01, 02, 03 before starting a WhatsApp image to PDF merge, and check the page count afterward.
  • Shrink the images first if the PDF is too big, because the PDF wrapper adds very little.
  • Keep IDs, bank records, and medical documents on your device. Get professional advice before turning chat evidence or official paperwork into a WhatsApp image to PDF file.

Conclusion

A reliable WhatsApp image to PDF workflow comes down to three moves: start from the best copy of the image, convert it with a tool that suits the job, and check the result before you send it. Built-in phone tools handle single images and private files, and a browser-based converter handles batches on any device.

When a stack of photos is too much for the phone’s own tools, an image to PDF tool in the browser can merge them in one pass. Send the finished file as a document so it reaches the recipient untouched.

Frequently asked questions

How do I convert a WhatsApp image to PDF on my phone?

Save the image from the chat to your gallery, then create the PDF. On iPhone, long-press the image in Files and tap Create PDF. On Android, open it in Google Photos, choose Share, then Print, then Save as PDF. Either WhatsApp image to PDF route takes under a minute and needs no extra app.

Can I do a WhatsApp image to PDF conversion without signing up?

Yes. The Print and Create PDF options built into iPhone and Android need no account. Many online converters also work without registration, but terms differ, so check before you upload.

How do I send multiple WhatsApp photos as one PDF?

Build one WhatsApp image to PDF file first, then send it. Put the images in page order, convert them together with Files or an online converter, check the page count, and attach the PDF through the Document option in WhatsApp. Sending it as a document avoids extra compression.

Does a WhatsApp image to PDF conversion reduce quality?

Most methods place the image in the PDF without recompressing it, though some tools compress by default. The bigger loss happens earlier, because WhatsApp compresses photos sent in standard mode. No PDF tool can bring that detail back, so ask for the original as a document when quality matters.

How do I convert a WhatsApp screenshot to PDF?

Treat it like any other WhatsApp image to PDF task. Save the screenshot, then use Files or Print on your phone, or an online converter. Crop out status bars and other people’s details first. For long chats, capture screenshots oldest to newest with a little overlap so no message goes missing.

How can I compress a WhatsApp image to PDF file?

Shrink the images before converting, since the PDF adds little on its own. Resize photos to about 1600 to 2000 pixels on the long side, lower JPEG quality to around 75%, and use grayscale for text pages. If the PDF is still too big, run it through a PDF compressor and check readability.

What is the best free tool for WhatsApp image to PDF work?

It depends on the job. For a single private image, the built-in phone tools are the best WhatsApp image to PDF option. An online picture to PDF converter suits batches from any device. Pick one that works without an account, doesn’t watermark pages, and states how long it keeps your uploads.

Why is my WhatsApp image to PDF result blurry?

WhatsApp shrank it before you saved it. In the AccioPix test, standard mode kept roughly 1280 to 1600 pixels on the long side. Ask the sender to resend the image as a document, or turn on HD, then convert it again.

Can I convert JPG to PDF and PNG to PDF the same way?

Yes. A WhatsApp image to PDF job works the same for JPG and PNG. PNG suits screenshots and keeps edges crisp, while JPG suits photos and gives smaller files. Most converters accept a mixed batch and put both formats into one PDF.

Is it safe to use an online tool for WhatsApp image to PDF conversion?

It depends on the content and the site. For casual photos the risk is low. For IDs, bank statements, or medical records, use your phone’s built-in offline method. If you do upload, look for HTTPS, a stated deletion period, and a privacy policy.

How to Convert PNG to PDF Online in Seconds: Batch Processing & Optimization Tips

Laptop screen displaying a clean PNG to PDF online converter tool on a wooden office desk.

Converting PNG to PDF online is straightforward: upload your PNG image to a converter tool, adjust settings if needed (compression, sizing), and download your PDF. Most free online converters complete the process in under a minute without requiring software installation. The best converters preserve image quality, support batch uploads, and don’t store your files permanently.

Introduction

PNG files are excellent for graphics, screenshots, and images with transparency, but PDFs remain the gold standard for sharing, printing, and archiving documents. Converting PNG to PDF online addresses a common need across professionals, students, and everyday users who want to combine images, create document archives, or prepare files for printing.

Whether you’re digitizing scanned documents, compiling multiple screenshots into a single report, or preparing images for client delivery, knowing how to efficiently convert PNG to PDF makes your workflow smoother. Unlike desktop software that requires installation, online converters offer instant access from any device with a browser.

This comprehensive guide walks through the best approaches, tools, and strategies for converting PNG files to PDF format online, including solutions for single images, batch conversions, and specialized scenarios like resizing and compression. Whether you need a simple one-click solution or professional-grade features, quality online converters are readily available to meet your specific needs.

Understanding PNG vs. PDF: When and Why You Need Conversion

PNG (Portable Network Graphics) and PDF (Portable Document Format) serve different purposes, which is why conversion matters.

PNG files store images with support for transparency, making them ideal for web graphics and digital content. They compress well while maintaining quality, particularly for images with solid colors or simple graphics. However, PDFs excel at creating a fixed layout that displays identically across devices, systems, and printers.

The primary reasons to convert PNG to PDF include:

Document archiving: PDFs create a professional, permanent format for records and official documents. If you’re storing screenshots, scans, or image-based records long-term, PDF provides better longevity and universal compatibility.

Printing requirements: Many printers and professional print services expect PDF files because they preserve exact layout, margins, and color calibration. Converting PNG to PDF ensures your printed output matches your expectations.

File consolidation: When you have multiple PNG images that belong together, converting them to a single PDF creates an organized, easily shareable document. A sales presentation with ten product photos becomes one professional PDF instead of ten separate files.

Compliance and standards: Certain industries and organizations mandate PDF submission. Legal documents, formal reports, and official filings typically require PDFs rather than image files.

Security and protection: PDFs offer password protection and permission settings that PNGs don’t provide, making them better for sensitive or confidential information. Furthermore, choosing a privacy-first tool ensures your data remains secure, which is why converting files locally in your browser is the safest approach for sensitive documents.

How to Convert PNG to PDF Online: Step-by-Step Process

The basic process remains consistent across most online tools, though specific steps vary slightly.

Step 1: Choose Your Converter Start by selecting a converter that matches your needs. For single images, simple converters work fine. For batch operations or professional requirements, choose tools with more features. Quality converters are available online, many offering free basic services alongside premium options.

Step 2: Upload Your PNG File Click the upload area and select your PNG file from your device. Most converters accept drag-and-drop uploads, making the process faster. Some tools also support uploads from cloud storage like Google Drive or Dropbox. If you are uploading media received through messaging platforms rather than standard gallery uploads, consulting a guide on how to convert WhatsApp images to PDF can help you avoid chat compression issues before converting.

Step 3: Configure Conversion Settings Depending on your needs, you might adjust:

  • Orientation: Choose portrait or landscape based on your image dimensions
  • Compression: Select quality level if you want to reduce file size
  • Margins: Add white space around the image if needed
  • Scaling: Decide whether the image fills the page or maintains its original proportions

Step 4: Download Your PDF Once conversion completes (typically within seconds), download the resulting PDF to your device. Most converters don’t save copies on their servers, so your file remains private.

Upload your PNG files to the free image to PDF converter, set the page order, and download one combined PDF.

Best PNG to PDF Converters Available Online

Several quality options exist for converting PNG to PDF online. Here’s what to expect from leading solutions:

Free PNG to PDF Tools Free converters handle basic conversions without cost or account creation. The best free PNG to PDF options maintain reasonable quality, process files quickly, and don’t impose restrictive file size limits. Look for tools that don’t display watermarks on converted PDFs. Many users find that free online conversion tools satisfy their needs completely, eliminating the necessity for paid subscriptions.

Paid or Premium Converters Premium tools add features like batch conversion (processing multiple images simultaneously), advanced compression algorithms, priority processing, and API access for automation. If you convert frequently or work with large volumes of images, premium services often provide better value through subscription models.

Specialized Solutions Some converters focus on specific use cases. Image to PDF converters handle various formats simultaneously. JPG to PDF tools optimize specifically for JPEG compression. Multi-image converters excel at combining multiple files into single PDFs while maintaining quality.

Converting Multiple PNG Files to a Single PDF

One powerful use case involves combining multiple PNG images into one PDF document. This approach works well for:

  • Creating photo albums or portfolios
  • Compiling screenshot-based tutorials or guides
  • Combining product images for catalogs
  • Organizing scanned document pages

The process differs slightly from single conversions:

First, upload multiple PNG files to your converter (most support batch uploads). Some converters let you drag five, ten, or even fifty images simultaneously. Arrange the images in your desired order, as this determines the PDF page sequence.

Configure settings for all images at once. You might compress all images to a consistent quality level or resize them to standard dimensions. Some converters offer automatic page-break handling, spreading images across pages naturally.

Download your consolidated PDF. A collection of fifty PNG screenshots now exists as a single organized document, making sharing, emailing, and printing straightforward.

Read our detailed guide on converting multiple PNG files to single PDF for advanced techniques and troubleshooting.

Resize and Compress: Optimizing Your PDFs

File size and dimensions significantly affect usability. Large PDFs load slowly, consume storage space, and complicate email transmission. Optimizing during conversion prevents these issues.

Compression strategies:

  • Lossless compression: Reduces file size while preserving all original image data. PNG already uses lossless compression, so additional gains are minimal but possible. This approach works best when maintaining absolute quality is critical, such as archival documents or professional portfolios.
  • Lossy compression: Removes some image data imperceptibly to most viewers, creating significantly smaller files. Lossy compression works well for photographs but may reduce quality in graphics with sharp lines or text-heavy images. Most people won’t notice quality loss at moderate compression levels.
  • Smart compression: Advanced tools automatically select compression levels based on image content and your specified quality target. These intelligent algorithms analyze your specific images and apply optimal settings without manual intervention. Research on file compression methods shows that compression efficiency varies significantly based on image type and content characteristics.

Resizing approaches:

  • Fit to page: Automatically scales images to standard page dimensions, creating consistent document layouts. This prevents empty white space or images bleeding off pages.
  • Maintain aspect ratio: Ensures images don’t appear stretched or distorted during scaling. This is particularly important for photographs and visual content where proportions matter aesthetically.
  • Custom dimensions: Allows specifying exact pixel or inch measurements. Useful when you need the PDF to match specific printing requirements or digital platform specifications.

Practical optimization example: Most modern converters handle resizing intelligently. If your PNG is 4000×3000 pixels and you’re converting to PDF for screen viewing, resizing to 1920×1440 reduces file size dramatically (often by 70-80%) while maintaining adequate clarity for most purposes. For email distribution, you might resize to 1280×960 to ensure files stay under typical email attachment limits while remaining readable on most screens. Professional printing typically requires maintaining original dimensions or even upscaling for sufficient DPI.

The key is matching your compression and sizing decisions to how you’ll actually use the PDF. Screen-only documents tolerate more aggressive compression than printed materials. Archive documents benefit from minimal compression to preserve detail for future viewing on newer display technology.

JPG to PDF Conversion: Handling Alternative Image Formats

While your primary need is converting PNG files, the ability to handle JPG to PDF conversion in the same workflow adds convenience. Most comprehensive converters support both formats simultaneously.

JPG files differ from PNG primarily in compression approach. JPG uses lossy compression, making it smaller than PNG for photographs but unsuitable for graphics requiring perfect clarity. When converting JPG to PDF, the same principles apply: configure quality, compression, and sizing before downloading.

Many users benefit from JPG to PDF conversion tools that handle both formats interchangeably, allowing you to consolidate a folder of mixed PNG and JPG images into a single PDF without needing separate converters.

Advanced Features: Beyond Basic Conversion

Modern converters increasingly offer sophisticated capabilities that extend far beyond basic PNG to PDF online conversion:

Batch Processing: Upload dozens of images at once, apply identical settings to all, and download multiple PDFs or a consolidated document. Batch processing saves time when handling large volumes. Some advanced converters process 50+ images simultaneously, completing in the time it takes to process just one or two images individually. This feature alone justifies choosing a robust converter when you handle regular conversion tasks.

Cloud Integration: Connect to Google Drive, Dropbox, or OneDrive to select source files directly from cloud storage and save converted PDFs back to cloud accounts. This eliminates downloading and uploading, streamlining workflows for teams using cloud-based collaboration. Many modern converters support seamless integration with popular cloud platforms, making PNG to PDF conversion part of your existing file management system rather than a separate process.

API Access: Developers and organizations can automate conversions through APIs, integrating PNG to PDF conversion into custom applications or workflows. This enables batch processing at scale, automated document generation, and integration with larger business systems. Companies handling thousands of daily conversions benefit significantly from API access, which removes manual steps and reduces human error.

OCR Capability: Some converters can recognize text within image files (optical character recognition), making the text selectable and searchable in the resulting PDF. This transforms scanned documents into functional PDFs where you can search for specific words, copy text, and modify content. OCR works particularly well on clean scans but performs adequately on lower-quality images.

Watermarking and Security: Add visible watermarks to converted PDFs or apply password protection to restrict access. Useful for protecting sensitive or draft documents. Watermarks serve as visual indicators of document status (Draft, Confidential, Copyright). Password protection prevents unauthorized distribution while allowing you to control permissions: viewing, printing, copying, or editing restrictions.

Practical Use Cases for Converting PNG to PDF Online

Understanding real-world applications clarifies why this conversion matters:

Professional Portfolios: Designers, photographers, and artists often convert PNG portfolio pieces to PDF, creating a polished, printable showcase. Galleries and clients prefer PDFs because they display consistently and control presentation better than web galleries. For photographers specifically, combining multiple PNG images into a single portfolio PDF creates a professional presentation that’s easily shared via email or stored as a portfolio document.

Educational Content: Teachers and instructors convert screenshot-based tutorials, annotated diagrams, and visual explanations into PDFs for distribution. Students receive organized, printable materials that function as references. A programming instructor converting dozens of annotated code screenshots and explanation graphics into a single comprehensive guide creates valuable study material.

Business Documentation: Companies convert branded graphics, charts, and infographics into PDFs for reports, presentations, and client deliverables. This standardizes appearance across platforms and ensures professional presentation. Converting quarterly performance charts, department visualizations, and company graphics into PDF reports ensures consistent formatting whether clients view them on desktop, tablet, or mobile devices.

Archival and Compliance: Organizations digitizing historical records, contracts, or official documents convert PNG scans into PDFs for permanent storage and regulatory compliance. PDFs provide better long-term format stability than image files. Many regulatory frameworks require specific document formats for compliance, and PDF remains the most universally accepted and legally recognized format for official records.

Ecommerce and Marketing: Product photographers create PDF catalogs by converting multiple product images to a single PDF. Customers receive downloadable catalogs that feel more professional than browsing individual images. An online retailer with a hundred product images can create an organized, browsable PDF catalog that customers appreciate and share more readily than collections of individual product photos. Many marketers also use PDF conversion as part of their content strategy, turning visual content into shareable documents that improve distribution and engagement.

Technical Considerations: Understanding File Formats and Compatibility

Before converting PNG to PDF online, understanding the technical foundation helps you make better decisions about settings and tools.

PNG technical specifications: PNG files use a lossless compression algorithm that preserves every pixel of data. This makes PNGs ideal for images requiring perfect clarity: logos, icons, screenshots, and graphics with sharp edges. According to the PNG specification documentation the format supports transparency through an alpha channel, allowing images to display with transparent areas rather than always requiring a solid background. Color depth options range from 1-bit grayscale to 48-bit true color, providing flexibility for different image types.

PDF technical specifications: PDF creates a fixed-layout document format designed for consistent appearance across devices. According to ISO PDF standards, the format preserves exact positioning, fonts, colors, and images exactly as designed. This “what you see is what you get” approach works across operating systems, making PDFs ideal for documents where appearance and layout matter critically.

Compatibility considerations: PNG to PDF online conversion creates universally compatible files. PDFs work on Windows, Mac, Linux, iOS, and Android without special software beyond free PDF readers. PNG images, while universally supported, lack the document capabilities that PDFs provide. When your content needs to function as a cohesive document rather than individual images, PDF conversion adds significant value.

Color space and profile preservation: Modern converters preserve color profiles during PNG to PDF conversion, maintaining colors accurately across different viewing platforms. This matters particularly for professional work like photography, design, or branding where color accuracy affects the final output. When preparing images for conversion, understanding how different file formats handle color is essential. Ensure your converter supports ICC color profile preservation if precise colors are critical.

Resolution and DPI considerations: PNG files store images with pixel dimensions but no specific DPI (dots per inch) setting. When converting PNG to PDF, converters assume a screen resolution (typically 72-96 DPI) unless you specify otherwise. For print-intended PDFs, specify 300 DPI to ensure sufficient resolution for high-quality printing. The difference between 72 DPI (screen quality) and 300 DPI (print quality) is immediately visible when printed, so this setting matters significantly if your PDF will be printed.

Best Practices for Converting PNG to PDF Online Successfully

Converting PNG to PDF online requires attention to several best practices to ensure optimal results:

File preparation: Before converting, examine your PNG files for any issues. Ensure images are properly cropped, contain no accidental artifacts, and display correctly. If combining multiple images into one PDF, arrange them logically and consider consistent sizing or aspect ratios for professional appearance.

Metadata consideration: Some converters allow embedding metadata (title, author, subject, keywords) into the resulting PDF. Adding accurate metadata makes your PDFs more discoverable and professional, particularly for business or archival documents. This is worth doing when the PDF will be widely distributed or stored long-term.

Testing before final conversion: For important projects, test conversion with one or two images first to ensure your selected settings produce the desired output. Download the test PDF, open it on multiple devices, and verify quality, sizing, and appearance match your expectations before converting all images.

Security review: Before sharing converted PDFs containing sensitive information, verify your converter’s privacy practices. Reputable converters delete uploaded files immediately after conversion and use secure connections (HTTPS). According to data security standards, proper file handling requires both encryption during transmission and immediate deletion after processing. Avoid converting sensitive information on converters with unclear privacy policies.

Backup retention: Keep original PNG files even after successful conversion. PDFs are excellent for distribution and archival, but original files provide flexibility if you need to reconvert with different settings or edit the original images.

Comparing Image to PDF Solutions

While PNG to PDF conversion represents one approach, understanding alternatives helps you select the best method for your specific situation. For instance, if you need to combine multiple image formats and learn advanced techniques, explore our complete guide on converting images to PDF professionally.

Different scenarios benefit from different solutions. Single-image conversions work well with basic online tools. Multi-image compilations benefit from batch converters. Professional workflows requiring automation, custom branding, or advanced security features might warrant dedicated PDF creation software or enterprise solutions.

Cloud-based converters offer accessibility and require no installation but depend on internet connectivity. Desktop software provides offline capability and sometimes more advanced features but requires installation and may cost money. Online tools balance convenience with functionality, making them ideal for most users.

Key Takeaways

  1. Speed matters: Online conversion takes seconds, making it practical for frequent conversions without software installation or learning curves.
  2. Quality preservation: Modern converters maintain image quality during conversion, particularly when you select appropriate quality settings.
  3. Flexibility in sizing: Resize and compress images during conversion to optimize for your specific use case, whether that’s email transmission, digital viewing, or high-quality printing.
  4. Batch capabilities: Converting multiple PNG files to a single PDF consolidates content and simplifies sharing and storage.
  5. Security considerations: Choose converters with clear privacy policies and automatic file deletion to protect sensitive information.
  6. Format versatility: Quality converters handle PNG, JPG, and often additional formats in the same workflow, eliminating format-specific tool switching.
  7. Mobile accessibility: Browser-based converters work on smartphones and tablets, enabling conversions from any device.
  8. No installation required: Online tools eliminate software downloads, system compatibility issues, and version management headaches.

Conclusion

Converting PNG to PDF online transforms how you manage image files, combine materials into cohesive documents, and prepare content for sharing and printing. Whether handling single images or consolidating dozens of files, online converters provide instant, reliable solutions without software installation or technical complexity.

The best approach depends on your specific needs. For occasional conversions, free tools work perfectly. For regular high-volume work, premium converters with batch processing and advanced features provide better efficiency. Regardless of which tool you choose, understanding the process, optimization options, and available features ensures successful conversions that meet your professional or personal requirements.

Converting PNG to PDF online is a straightforward process that takes just seconds with modern tools. The result is a professional, universally compatible document suitable for digital sharing, printing, archiving, or distribution. Understanding the process, optimization options, and available features ensures successful conversions that meet your specific needs.

Common Questions About PNG to PDF Online Conversion

Can I convert PNG to PDF without losing quality? 

Yes, PNG to PDF conversion preserves image quality when you select high-quality settings. Since PNGs already use lossless compression, conversion adds minimal quality loss if you avoid aggressive recompression.

Is converting PNG to PDF online safe for sensitive documents? 

Reputable converters don’t store uploaded files permanently and use secure transmission (HTTPS encryption). However, for highly sensitive information, consider desktop software or keeping files completely offline. Review the converter’s privacy policy before uploading confidential material. Secure file handling should involve both encryption during transmission and immediate deletion after processing.

How large can PNG files be for online conversion? 

Most free converters handle files up to 25-50MB, while premium services accept larger uploads. File size limits depend on your internet connection speed and the converter’s infrastructure rather than technical limitations.

Can I add multiple PNG images to one PDF online? 

Yes, batch conversion tools let you upload multiple images and arrange them into a single PDF. This is faster and more convenient than converting images individually.

What’s the difference between free and paid PNG to PDF converters? 

Free tools handle basic conversions reliably. Paid converters typically offer batch processing, advanced compression, cloud integration, OCR, and priority support. For occasional conversions, free tools suffice; frequent users benefit from premium features.

Does converting to PDF reduce file size? 

Not necessarily. The file size depends on compression settings and image content. Aggressive compression reduces PDF size but may impact image quality. PDFs sometimes actually become larger than PNG files if quality settings are high. PDF compression efficiency depends heavily on image content. Photographs compress better with aggressive lossy settings, while graphics and text benefit more from lossless compression.

How do I convert PNG to PDF on my phone? 

Most online converters work on mobile browsers without requiring apps. Upload your PNG, configure settings, and download the PDF to your device. Mobile compatibility varies by converter, so test on your device first.

Can I password-protect a PDF after converting from PNG? 

Some converters include password protection features. If yours doesn’t, you can use a separate PDF tool to add password protection after conversion.

What if my PDF doesn’t look right after conversion? 

Try adjusting orientation settings, image scaling, or compression levels. Preview before downloading when possible. If the converter offers multiple compression options, experiment with different settings to find the right balance.

Should I use lossless or lossy compression for PNG to PDF? 

Lossless compression preserves all original data but provides smaller file size reductions. Lossy compression creates smaller files but may reduce image quality. For text-heavy images or graphics, use lossless. For photographs, lossy often works well.

JPG to PDF Converter: Turn Any Photo Into a Clean, Professional Document

JPG to PDF converter tool converting images into a PDF document

You have a photo, a scan, or a folder of screenshots, and the person waiting on the other end wants a PDF. This is the exact moment a jpg to pdf converter stops being a random tool you scroll past and becomes something you genuinely need. It happens without warning. A job portal asks for documents in PDF. A landlord wants proof of payment. A university rejects image uploads. An insurance adjuster wants one organized file, not fourteen attachments.

The good news is you do not need heavy desktop software or a paid subscription for any of this. The free image to PDF converter on X2X Converter runs in your browser, keeps your files on your own device, and takes about a minute from start to finish. And if you want a deeper walkthrough with extra workflows, my guide to converting images to PDF like a pro picks up where this article ends.

By the time you finish reading, you will know why PDF beats JPG for anything official, how a jpg to pdf converter works under the hood, how to merge JPG files into one tidy document, how to scan to PDF using nothing but your phone camera, and the small mistakes that quietly ruin file quality.

Why convert a JPG into a PDF at all?

It feels backwards at first. A JPG opens on almost any device, so why bother changing the format? The answer comes down to trust and presentation.

An image file tells the viewer nothing about its intent. Is this one page out of ten? Is it a draft or the final version? Did someone crop the edges? A PDF answers every one of those questions. When you run an image through a jpg to pdf converter, you are not just swapping a file extension. You are packaging a picture inside a document format that people treat as finished, official, and complete.

There is a practical side too. Banks, government portals, HR systems, and schools usually accept PDF uploads only. Email attachments arrive cleaner because everything travels together. Printing behaves predictably because the page size is locked. If you have ever sent three loose photos and watched them open sideways on someone’s phone, you already understand why one PDF is the better experience.

A jpg to pdf converter fixes all of that in a single pass. And once the habit sticks, you stop sending raw images for anything that matters.

What a PDF actually is, and why it holds up

PDF stands for Portable Document Format. Adobe created it in the early 1990s with one clear goal: a document should look identical on every machine, every printer, and every screen, forever. You can read the full story on the Adobe page about the PDF format. That promise still holds up decades later. Fonts, spacing, margins, and page order stay exactly as you set them, no matter who opens the file.

A JPG is a different animal. It is a compressed image format built to make photographs small and easy to share. It has no concept of pages, no readable document metadata, and no guarantee of how a viewer displays it. That is perfectly fine for holiday snaps. It falls apart the moment something official is on the line.

So when people ask how to convert jpg to pdf, what they usually want is reliability. They want a file that opens the same way everywhere, prints without surprises, and presents like a document rather than a photo. The Portable Document Format delivers exactly that, which is why it has remained the standard for contracts, forms, and records since before most of us owned a smartphone.

How a jpg to pdf converter actually works

You do not need to understand the engineering to use the tool well, but a quick look behind the curtain helps you pick the right settings later.

When you drop an image into a jpg to pdf converter, the tool wraps your picture inside a PDF container. It sets a page size, places the image on that page, applies the compression you choose, and writes out a fresh file. Your original photo is never altered or destroyed. The converter reads it, builds a document around it, and hands you the result.

Two things happen during that process. First, the tool decides how much to compress the image, which affects both final file size and sharpness. Second, it locks the layout, meaning the page will always look the same when opened later. This is also why the quality of your PDF can never exceed the quality of the source image. A converter packages pictures, it does not upgrade them. Keep that in mind when you are photographing documents, because it shapes everything you do before the conversion step.

How to convert JPG to PDF, step by step

Here is the exact workflow, start to finish. It takes under a minute once you have done it once.

  1. Open the converter.Go to theX2X image to PDF toolin any modern browser. Desktop, tablet, or phone, the experience is the same
  2. Add your files. Drag your JPG files onto the page or tap upload and pick them from your device. Select as many as you need.
  3. Check the order. The first image becomes page one. If you are scanning a ten page contract, this is where you make sure page three does not sit before page two.
  4. Convert. Press the convert button. A normal batch finishes in seconds.
  5. Download and rename. Save the file and give it a sensible name like Rental-Agreement-Oct.pdf instead of download48.pdf. Future you will send thanks.

That is the entire process. No watermark stamped across your receipt, no email address demanded at the download step, no paywall appearing halfway through. If you have ever wondered how to convert jpg to pdf without installing anything, this is the answer. It is a document converter that lives entirely in your browser and asks for nothing in return.

Merge JPG files into one single document

This is the feature people love most, and it deserves its own section.

Say you photographed all twelve pages of a medical report at the clinic. You do not want twelve separate files. You want one. A jpg to pdf converter with merge support turns your whole batch into a single continuous document, where each photo becomes one page in the order you choose.

A few habits make merges cleaner:

  • Shoot or scan under even light. Shadows across a page will look just as bad inside the final PDF.
  • Keep orientation consistent. If page one is portrait and the rest are landscape, your reader will rotate their screen. Fix orientation before converting.
  • Rename files first. Naming them 01, 02, 03 before uploading guarantees the order survives any tool.
  • Keep backgrounds uniform. Mixed table colors inside one PDF look accidental.

You can also merge JPG files visually before the conversion. If two screenshots belong side by side on one page, the free Image Merger tool combines them into a single image first, and you then pass that single image to the converter. It is a great trick for before and after comparisons, receipts you want grouped, and product photos that belong together.

And the reverse trip exists too. If someone sends you a PDF and you only need one image from it, the PDF to JPG converter pulls pages back out as picture files in seconds. Between the two tools you can move in whichever direction the task demands.

Scan to PDF using just your phone

Plenty of people never touch a laptop anymore, and a browser based jpg to pdf converter works beautifully on mobile.

On Android: open Chrome, visit the converter, tap upload, and your gallery opens. Select the images, confirm the order, convert, and the PDF lands in your Downloads folder.

On iPhone: Safari handles the same flow. One small tip: iOS sometimes saves downloads to the Files app rather than Photos, so if your PDF seems to vanish, check Files first.

The real magic is the scan to PDF workflow. Photograph a paper document, ideally against a dark surface so the edges stay clean, then run that photo through the converter. Suddenly you have a scanner replacement that lives in your pocket. If you regularly save web graphics or screenshots alongside photos, you can also check out our guide on how to convert PNG to PDF online to handle transparent images just as easily. Students digitizing notes, freelancers archiving receipts, and anyone handling paperwork on the go can skip the print shop entirely.

If your scanned pages later need to be edited or searched, that is the next step in the chain. The post on turning printed notes into editable, searchable documents explains how OCR fits into the picture once your PDF exists.

Keep your PDFs sharp: quality tips that matter

A jpg to pdf converter can only work with what you hand it. These habits keep every document crisp.

Start with decent resolution. A photo that is 200 pixels wide will look terrible stretched across a full page. Aim for at least 1000 pixels on the longest side for documents, more for photos you care about.

Beware of chat compression. Messaging apps heavily crush images before they arrive. If you frequently receive document photos via messaging apps, reading a quick guide on how to convert WhatsApp images to PDF will help you preserve maximum clarity during conversion. When quality matters most, take the file straight from the original camera or scanner rather than pulling it from a generic chat thread.

Match image size to page size. A tiny image blown up to full width goes soft. A huge image squeezed into a small page bloats the file. Sensible inputs give sensible outputs.

Watch the attachment limit. Gmail, for example, caps attachments at 25 MB, and many corporate servers allow even less. If your merged PDF is enormous, convert in smaller batches or trim photo resolution first.

Avoid repeated re-saving. Every extra save of a JPG shaves a little quality off. Go from original image to final PDF in one pass instead of cycling back and forth.

Real situations where a jpg to pdf converter earns its keep

Some scenarios show the value better than any explanation:

  • Students submitting assignments, lab records, and project work as a single PDF.
  • Freelancers and small businesses bundling invoices and expense proof for the accountant.
  • Job seekers combining certificates, transcripts, and ID scans into one application file.
  • Insurance claims where adjusters ask for photo evidence as one organized document.
  • Landlords and tenants exchanging signed agreements and payment proof.
  • Ecommerce sellers compiling product photos into a single catalog to send to a partner.

Notice the pattern. Every case involves someone on the receiving end who needs to open, read, print, or file something without friction. A photo to PDF converter removes that friction in seconds, which is why the demand for it never slows down.

What to look for in a good converter

Not every tool deserves your files. Before trusting any jpg to pdf converter, check five things.

No watermark. This is the dealbreaker. A watermark makes an official document look amateur, and some tools charge you to remove it.

No login or email demanded. If a converter wants your email before letting you download, that email is the product. The best tools ask for nothing.

Local, private processing. Some converters upload your images to a server. For scans of passports, contracts, and medical records, that is a real privacy concern. Browser based tools process files on your own device, which is why browser based file conversion is the safest way to convert files. Nothing leaves your machine.

No hidden limits. The tool should let you convert and merge plenty of images without a paywall appearing halfway through the job.

Works everywhere. The same flow should hold up on Windows, Mac, Android, and iPhone.

Score any tool you find against those five points. If it fails on watermarks or logins, walk away, no matter how polished the interface looks.

Common mistakes people make (and their fixes)

Mistake 1: Converting a blurry photo. The output PDF will be exactly as blurry. Fix it by re-shooting in better light before you convert.

Mistake 2: Ignoring page order. Batches upload in whatever order the browser sorts them. Always double check before converting, especially for multi page contracts.

Mistake 3: Sending the raw JPG because it feels faster. Thirty seconds of conversion saves the recipient several minutes of downloading files one by one.

Mistake 4: Using a screenshot of a document. Screenshots capture at screen resolution, which is often too low for printing. Photograph or scan the original instead.

Mistake 5: Trusting the first search result blindly. Some converters resize, watermark, or store your files. Stick with a tool that processes locally.

Wrapping up

A jpg to pdf converter is one of those rare tools that sounds trivial until the day you desperately need it. Then it becomes the bridge between the photos on your phone and the official document someone is waiting to receive.

You now know the full picture: why the Portable Document Format is the trusted choice for anything that matters, how to convert jpg to pdf in five simple steps, how to merge JPG files into one clean file, how to turn your phone camera into a scanner, and how to avoid the quality traps that catch most people.

The next time a portal, an office, or a client says PDF only, you will not be searching in a panic. Just head to the X2X Converter image to PDF tool, drop in your files, and send a document that looks like you knew what you were doing. Because now, you do.

Frequently Asked Questions

Is a jpg to pdf converter free to use?

Yes. The X2X Converter image to PDF tool is completely free with no page limits, no watermarks, and no account required. You convert as many images as you need without paying anything.

Does a jpg to pdf converter reduce image quality?

No, the conversion itself does not touch your original photos. The tool reads your images and wraps them inside a new PDF. The sharpness of your final document depends on the resolution of the images you upload, so start with clear, well lit photos.

Can I merge JPG files into one PDF?

Yes. Add all your images at once, arrange them in the right order, and convert. Each photo becomes one page of a single continuous document, which is perfect for scanned contracts, receipts, and assignments.

Will my files stay private when I convert them?

With browser based tools like this one, yes. Your images are processed on your own device and never uploaded to a server, which makes it safe for passports, medical records, and contracts.

Can I convert jpg to pdf on my phone?

Fully. The tool works in Chrome on Android and Safari on iPhone. Photograph a paper document, run it through the converter, and you have a scan to PDF workflow with no scanner needed.

Do I need to install software or create an account?

Neither. The converter runs in your browser, asks for no email address, and places no watermark on your download. If you can open a tab, you can convert.

What is the difference between a JPG and a PDF?

A JPG is a compressed image with no concept of pages or fixed layout. A PDF, or Portable Document Format, locks the layout so the file looks identical on every screen and printer. That is why official documents are shared as PDF.

Can I turn a PDF back into images later?

Yes. The reverse trip is easy. The PDF to JPG tool on the same site extracts any page back into an image file in seconds.

Convert Image to PDF Like a Pro: The Only Guide You’ll Ever Need

Image to PDF converter online easy guide

Introduction

Every day, tens of thousands of people sit with a folder of JPGs and a simple problem: they need one clean PDF instead of a pile of separate images. Maybe you are sending a scanned contract to a client, uploading photo proof to insurance, submitting a design mood board, or emailing a medical report. Whatever the reason, the need is the same. You want a reliable image to pdf converter online that is fast, free, respectful of your files, and easy enough to use on any device. I have tested more of these tools than I care to count, and the good news is that the best one is often the simplest one. In this guide, I walk you through everything you need to know to convert images to PDF like a professional, whether you work on a laptop, an iPhone, or an Android phone.

Let me start by being honest about the two big mistakes people make.The first is downloading heavy desktop software just to combine a few images. The second is trusting a random tool that slaps a watermark on every page or asks for your email before it lets you download. Neither is necessary. A good image to pdf converter should work in your browser, keep your images private, and give you a clean PDF in seconds.

Why Convert Images to a PDF at All?

Before we get into the how, let me cover the why. A PDF is a fixed-layout document that looks the same on every screen and every printer. This is a huge advantage over images, which can stretch, distort, or look different depending on where they are opened. Here are the situations where converting images to PDF genuinely helps.

  • Sending multiple images as one file. Emailing ten separate JPGs is messy and some systems reject them. One PDF is one clean attachment.
  • Preserving order and layout. When you combine images into a PDF, you control the order. A storyboard, a set of slides, or a photo sequence keeps its intended flow.
  • Printing reliably. PDF is the universal print format. A scanned document or a batch of receipts prints consistently from a PDF.
  • Protecting or sharing formally. Contracts, signatures, certificates, and forms are almost always exchanged as PDF, not as loose images.
  • Keeping quality consistent. A PDF can embed high-resolution images so your scanned pages and photos stay sharp.

In short, PDF is the standard for anything that needs to look intentional and professional. That is why mastering a reliable image to pdf converter online pays off in almost every corner of work and life.

What to Look for in an Image to PDF Converter

Not every tool is worth your time. Over the years I have narrowed the essentials down to five things you should check before you trust a converter with your files.

1. Free with no hidden limits. A converter should do the job without a paywall appearing halfway through. Look for a tool that lets you combine multiple images into a single PDF at no cost.

2. No watermark. This is the dealbreaker for most people. A watermark makes your document look amateur and often forces you to upgrade to remove it. Choose an image to pdf converter no watermark option so the result is clean and professional.

3. No login or account required. Privacy matters. The best tools process your images in your own browser and never ask you to sign up. An image to pdf converter without login means your files stay yours and you are out the door in seconds.

4. Private, on-device processing. Some converters upload your images to a server, which you may not want for scans of sensitive documents. Tools that run in your browser keep everything local. This is a real advantage for privacy-conscious users.

5. Works everywhere. The same logic should hold whether you are on a desktop, an iPhone, or an Android device.

When I review a converter, I score it on these five points. If a tool fails on watermark or login, I do not recommend it, no matter how fancy the interface is. This is exactly the standard I used when evaluating the tools covered in this guide.

The Fastest Way: Convert Image to PDF Online Free

If you have a laptop or desktop and you want the quickest result, a browser-based tool is the way to go. No installs, no accounts, no watermarks. No installs, no accounts, no watermarks. If you are specifically looking for a detailed tutorial on handling PNG formats, check out this guide on how to convert PNG to PDF online. Here is the step-by-step workflow I use, using the X2X Converter Image to PDF tool as the example.

Step 1: Open the image to pdf converter online tool.

Head to the Image to PDF page on X2X Converter. There is nothing to download, so you can start immediately.

Step 2: Upload your images.

Click the upload area or drag and drop your images straight in. The tool accepts multiple files at once, which is the whole point. You can add JPG, PNG, and most common image formats in a single batch. If most of your files are specifically JPGs, our dedicated JPG to PDF converter walks through the exact same no-watermark, no-login workflow, tailored just for that format.

Uploading images in image to PDF converter online
Drag and drop or browse images to start converting to PDF

Step 3: Check the preview and order.

Before converting, the tool shows thumbnails of everything you uploaded. This is your chance to confirm the files are correct and in the right order. If you need to, rearrange so the sequence makes sense for your document.

Step 4: Convert to PDF.

Hit the Convert button. Because processing happens in your browser, the conversion is quick and your images do not need to be uploaded to an external server.

Step 5: Download and share.

Your finished PDF downloads right away. Save it, email it, or print it. The whole flow, from upload to download, typically takes well under a minute for a normal batch of images.

This is the definition of a stress-free workflow. No signup screen, no watermark to fight, no desktop install. If you want to convert image to pdf online free with the least friction possible, this is the route I recommend most often.

Convert Image to PDF Without a Watermark (and Without an Account)

Let me spend a little more time on the two features people search for most: no watermark and no login. I have seen too many users get to the download step and discover their free tool stamped a branding mark on every single page or refused to finish unless they created an account.

Here is what happens with a watermarked converter. You combine five photos, hit convert, and the tool places a small logo and a web address on the corner of each page. Now you have to either live with it, crop it out (which ruins the layout), or pay to remove it. None of those are good options.

The fix is simple. Use an image to pdf converter no watermark from the start. X2X Converter’s tool falls into this camp, and it also works as an image to pdf converter without login. You upload, convert, and download. There is no account wall and no branding on your output. For anyone handling scans, contracts, or client deliverables, that is the only acceptable standard.

Privacy is the second quiet benefit. Because the conversion runs client-side in your browser, your photos and scans are not uploaded to a third-party server. In fact, using a local file converter ensures your files never touch an external database. If you are converting sensitive documents, that local processing is a meaningful advantage you should not overlook.

Convert Image to PDF on iPhone

You do not always have a laptop nearby, and often your images live on your phone anyway. If you use an iPhone, you already have a built-in way to convert images to PDF, and I want to show you two options.

Image to PDF converter online for iPhone files
Select multiple images in the mobile Files app and tap Compile to PDF

The built-in iPhone method (no extra app needed). Apple includes a native way to turn photos into a PDF using the Files app or the Share sheet.

  1. Open the Photos app and select the images you want to combine.
  2. Tap the Share button, then choose Print.
  3. On the print preview screen, pinch the thumbnails outward with two fingers. This zooms the preview into a full-page PDF view.
  4. Tap the Share icon again and select Save to Files.
  5. Your images are now saved as a single PDF in the Files app, ready to send or print.

This trick is free, requires no installs, and works surprisingly well. It is my default when I only have an iPhone on hand. If you need more control over order or want to convert image to pdf on iphone with a consistent workflow, you can also open the X2X Converter tool in Safari and use the same drag-and-drop approach, then save the result to Files.

Tips for better iPhone PDFs.

  • Use the native Print-and-save method for quick, basic PDFs.
  • For higher control, use a browser-based converter so you can reorder images before saving.
  • Keep your photos oriented correctly before converting to avoid upside-down pages.

Convert Image to PDF on Android

Android offers similar flexibility, though the built-in path is a little less obvious than on iOS. Here are the practical ways I handle it.

Method 1: Use the share sheet with Google Drive. Google Drive is preinstalled on most Android devices and can create PDFs.

  1. Open an image in Google Photos or your file manager.
  2. Share it to Google Drive and upload it (repeat for each image you want to include).
  3. In Google Drive, select all the images, open the menu, and choose Print or Export as PDF.
  4. Save the combined PDF back to your device or Drive.

Method 2: Use a browser-based converter. Open the X2X Converter Image to PDF tool in Chrome on your Android phone. Select multiple images from your gallery and convert them in one go. Because the tool runs in the browser, the experience on Android is almost identical to desktop, which is handy if you need to combine many photos quickly.

Method 3: Dedicated mobile apps. If you convert images to PDF constantly, a dedicated image to pdf converter app can be worth installing. I talk about the trade-offs in the app section below.

My advice for Android users: start with the browser tool for speed and no installs, and reach for Google Drive when you want a native, offline-ish workflow.

Image to PDF Converter App vs. Online Tool

A common question is whether to use an image to pdf converter app or just an online tool. Both get the job done, but they suit different situations. Let me lay out the honest trade-offs.

FactorOnline converterMobile app
Install neededNoYes
Works offlineUsually noOften yes
Storage impactNoneUses device space
Privacy modelDepends on toolApp-dependent
Cross-deviceAny browserOne device/store
Updates & maintenanceAutomaticRequires app updates
Watermark riskVaries by toolVaries by app

When I prefer an online converter. I use a browser-based image to pdf converter online when speed and zero installs matter, when I am on a borrowed or shared computer, or when I want the exact same workflow across desktop, iPhone, and Android. It is also the better choice when I want my images processed locally without uploading to an app’s servers.

When an app makes sense. I reach for an installed image to pdf converter app when I work offline a lot, for example on a plane, or when I convert documents daily and want a one-tap shortcut on my home screen. Apps can also keep a history of recent conversions, which some people find convenient.

The honest recommendation is that most people do not need a dedicated app. A good online converter covers 90% of use cases with less clutter and better privacy. Add an app only if you find yourself converting regularly in places without an internet connection.

Pro Tips for Clean, Professional PDFs

Getting a usable PDF is easy. Getting a great PDF takes a little craft. These are the habits I have picked up that make the difference.

  • Order your images before converting. The order you upload is the order you get. Arrange scans and photos so the sequence reads correctly.
  • Make scanned text workable: If you are dealing with physical paperwork, learn how to turn printed notes into editable documents so you can search and copy text easily.
  • Use the right image quality. For documents, export your scans at a sensible resolution. Very large images create huge PDFs, while very low resolution looks blurry when printed.
  • Straighten and rotate first. Nothing looks more amateur than a sideways page. Rotate images inside the converter or before you upload them.
  • Name your final file well. A clear filename like 2026-Q3-invoices.pdf beats Untitled-5.pdf every time.
  • Keep it to one document when it makes sense. Combine related images into a single PDF and you will email one attachment instead of ten. Use a tool that lets you convert image to pdf online free without penalizing you for multiple files.
  • Test print one page. If the PDF is for print, check a single page first to confirm orientation and margins.

Common Problems and How to Fix Them

Even with a good tool, you can hit a snag. Here are the issues I see most often and how I solve them.

My PDF pages are sideways. Rotate the source images before converting, or use a converter that lets you rotate each thumbnail. This is almost always an orientation problem, not a tool problem.

The PDF is too large to email. Reduce the resolution of the source images first, or convert fewer, higher-value pages. Some online tools let you compress output, but the simplest fix is smaller source files.

My images are out of order. Reorder your uploads. The final PDF follows the selection order, so confirm the sequence in the preview before converting.

The tool asks for a login or adds a watermark. Switch to an image to pdf converter without login and an image to pdf converter no watermark. You should never have to create an account or accept branding just to combine your own images.

I cannot find the downloaded file. Check your Downloads folder or the browser’s download bar. On mobile, the PDF usually lands in Files (iPhone) or Downloads (Android).

Security and Privacy: What You Should Know

Let me be direct about privacy, because it is the most underrated part of choosing a converter. When you upload an image to a random website, you do not always know where it goes or how long it is stored. That matters a lot when your images are scanned IDs, medical records, contracts, or anything personal.

The safest option is a converter that processes files in your own browser, a model called client-side conversion. With this approach, your images are never transmitted to a server for processing, so there is no copy for a third party to store, sell, or leak. This is the model the X2X Converter Image to PDF tool uses, and it is one of the main reasons I recommend it for sensitive documents.

A few practical rules I follow:

  • Prefer tools with explicit privacy policies.
  • Choose client-side converters for sensitive files.
  • Never convert financial or identity documents on an unfamiliar site.
  • Clear your browser history if you convert something sensitive on a shared computer.

X2X Converter: The Whole-Browser Toolkit

One of the reasons the X2X Image to PDF tool fits so naturally into a workflow is that it lives inside a broader toolkit. When your images become a PDF, you often need the next step too. That next step might be extracting text from a scanned document, resizing images before conversion, or turning a PDF back into JPGs. For files received through social media apps, handling formatted compressed media can sometimes be tricky—learn more about managing these files in this guide on converting WhatsApp images to PDF.X2X Converter covers these with related tools, which makes the whole document process smoother.

  • Image to PDF  is the star of this post and the direct link you should bookmark.
  • Image to Text (OCR) pulls text out of scanned or photographed documents when you need an editable version.
  • Image Size Converter shrinks or resizes images before you combine them.
  • PDF to JPG goes the other direction when you need individual images back out of a PDF.
  • Image Merger is useful when you want to combine images into a single picture rather than a document.

Keeping these in one place avoids the messy habit of collecting bookmarks across ten different sites. You convert, and then you keep working in the same window.

Final Thoughts

Converting images to PDF does not need to be complicated, and it definitely should not cost you a watermark or an email address. Whether you are on a desktop, an iPhone, or an Android phone, the goal is the same: get a clean, professional, shareable PDF as quickly as possible.

My recommendation is simple. Start with a free, browser-based image to pdf converter online that runs in your browser, works without a watermark, and never asks you to log in. That combination covers the vast majority of real-world needs with the best privacy. From there, learn the native options on your phone so you are covered even without an internet connection.

Bookmark the X2X Converter Image to PDF page, remember the iPhone print-to-PDF trick, and keep the Android share-sheet approach in your back pocket. With these in your toolkit, you will never stress about a folder full of images again. You will convert them like a pro, every time.

Frequently Asked Questions

Is there a free image to PDF converter with no watermark?

Yes. X2X Converter’s Image to PDF tool lets you convert images to PDF online free with no watermark on your output. Browser-based tools like this one are the easiest way to avoid watermarks without paying.

Can I convert multiple images to one PDF?

Yes. The tool accepts multiple image uploads and combines them into a single PDF document, which you can then order and download as one file.

Do I need to create an account to convert images to PDF?

No. X2X Converter works as an image to pdf converter without login. You upload, convert, and download without signing up.

How do I convert image to PDF on iPhone?

Use the built-in method: select images in Photos, tap Share, choose Print, pinch the preview outward to expand it into a PDF view, then save to Files. You can also use a browser-based converter in Safari for more control.

How do I convert images to PDF on Android?

Share the images to Google Drive and export them as a PDF, or open a browser-based image to pdf converter on your Android device and upload multiple images from your gallery.

Is an image to PDF converter app better than an online tool?

It depends. Apps are useful offline and for frequent one-tap conversion. Online converters are better for no-install speed, cross-device use, and privacy, especially when processing happens in your browser.

Are my images private when I convert them online?

When using the X2X Converter tool, processing happens client-side in your browser, so your images are not uploaded to a server. Always check a tool’s privacy model before uploading sensitive documents.