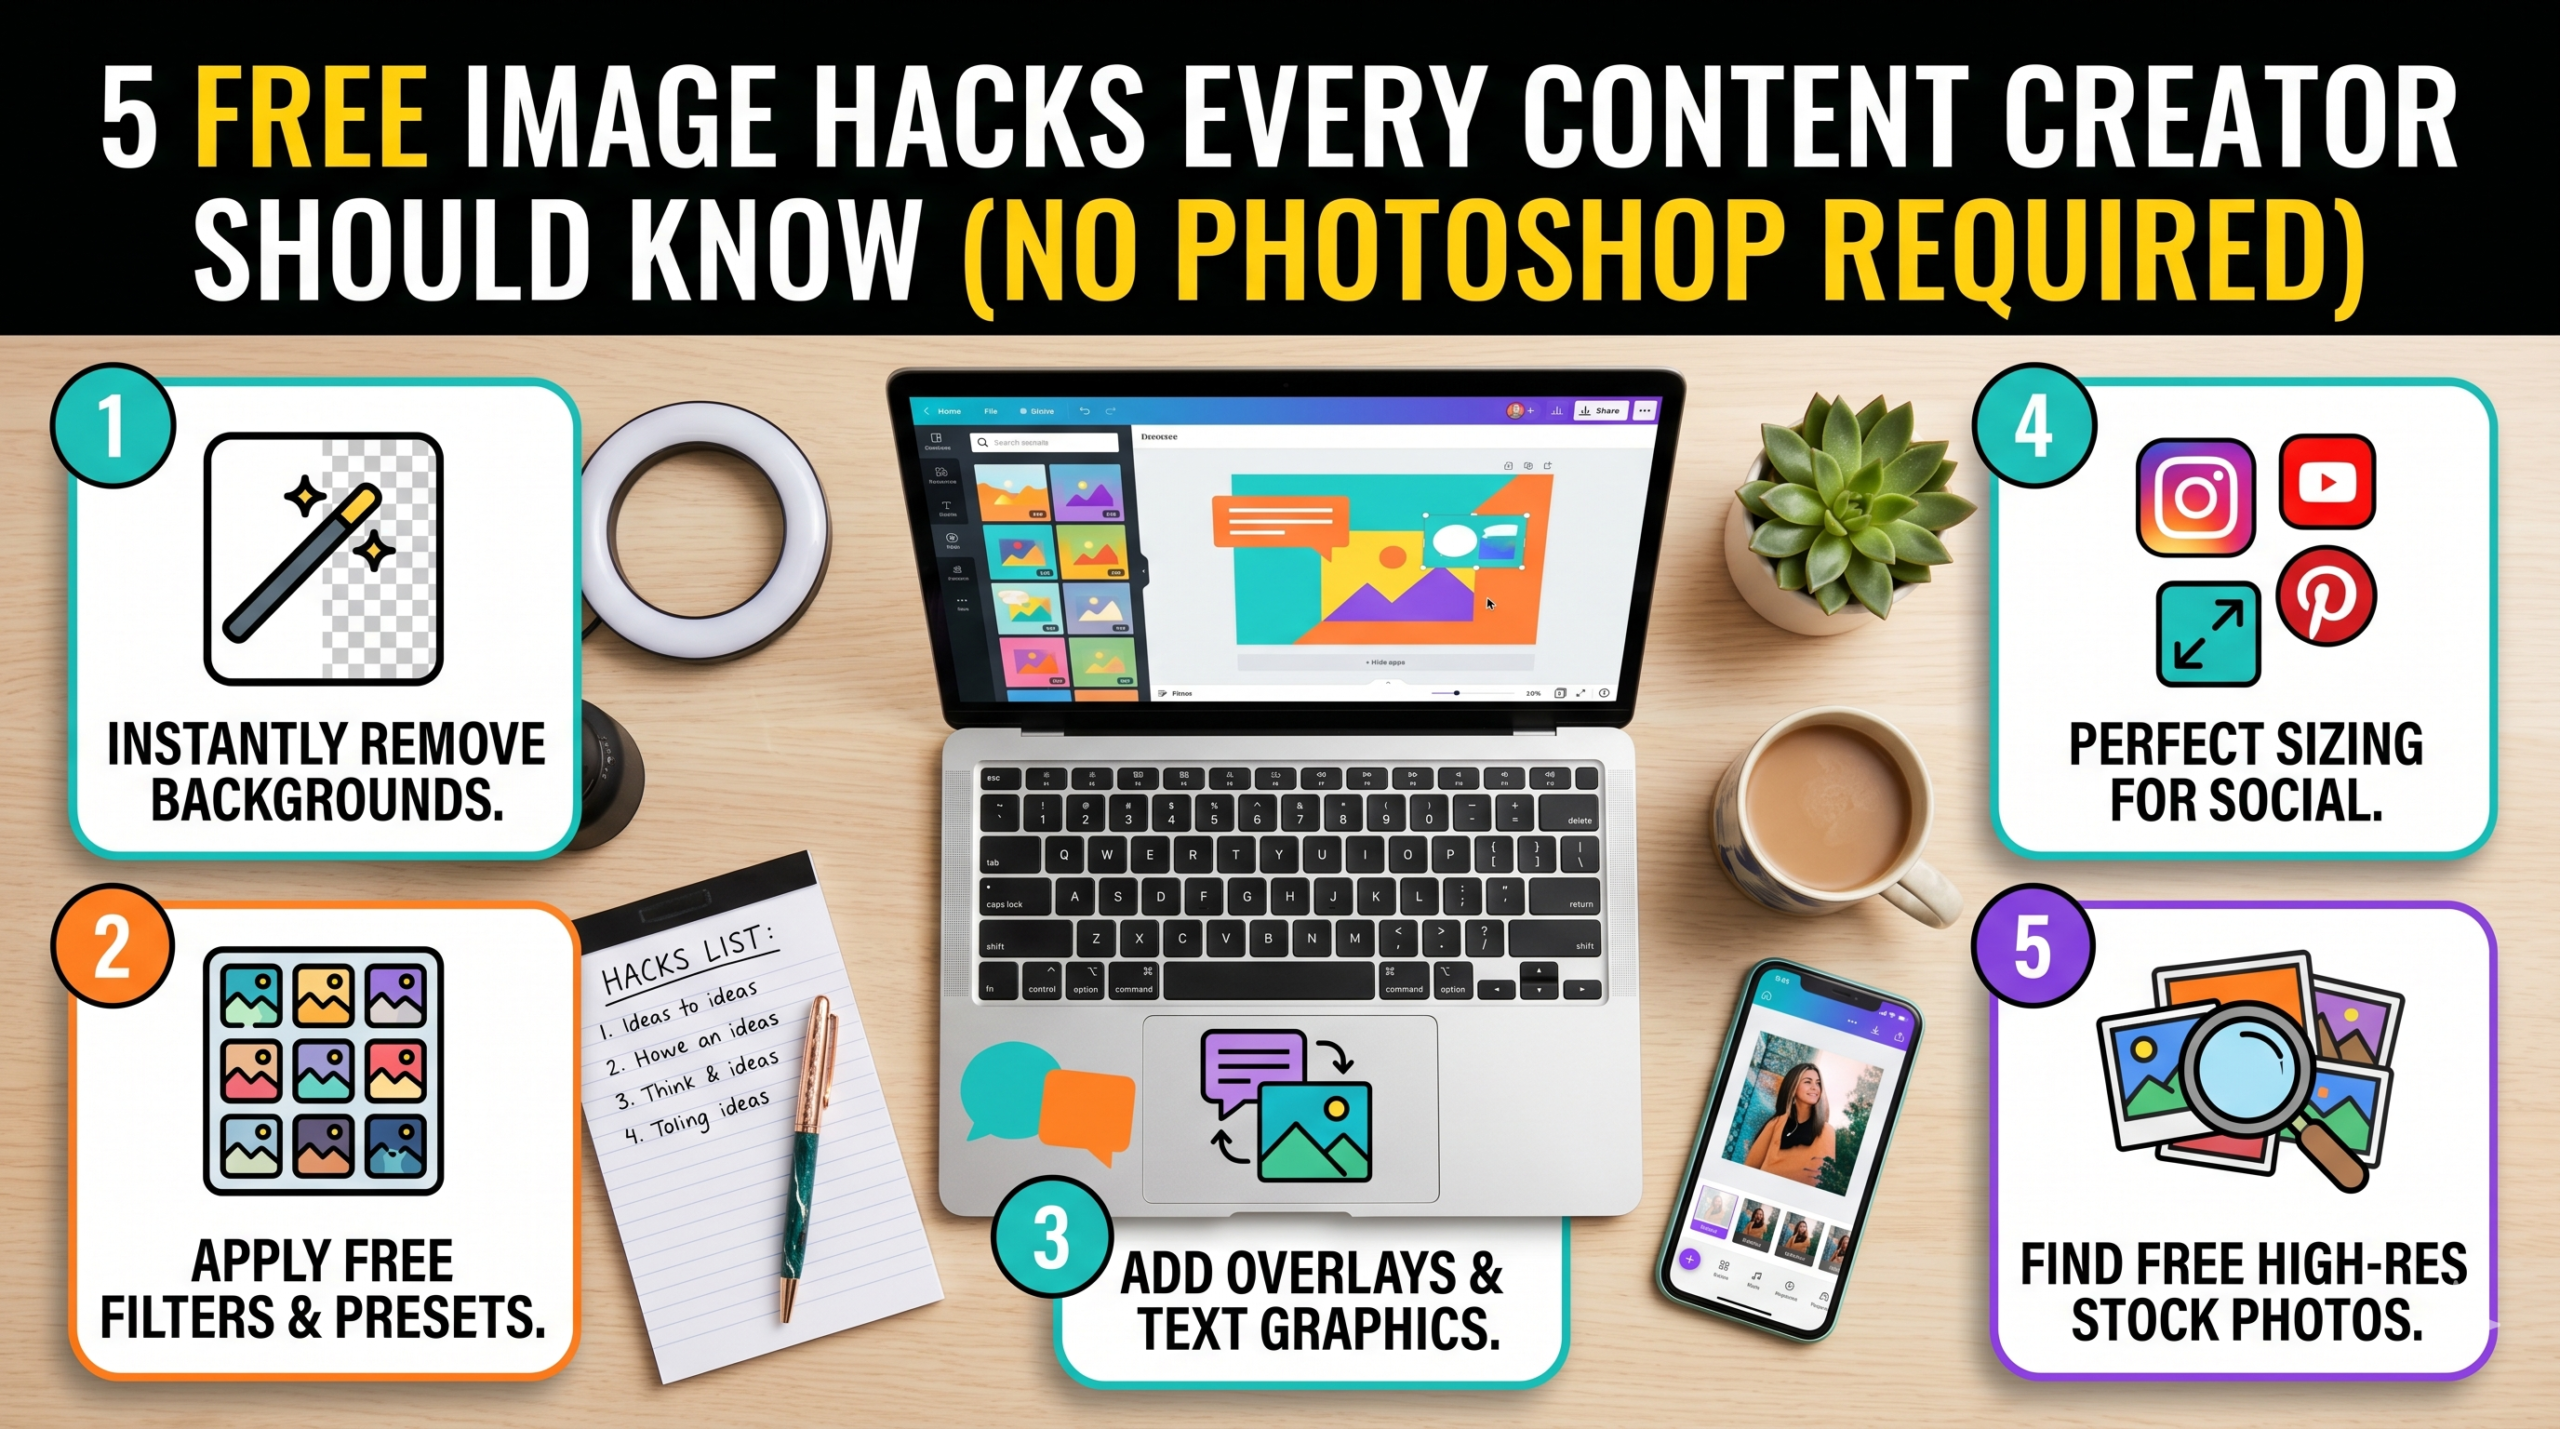
High-quality visual assets do not require expensive software subscriptions or advanced design degrees. Content creators can achieve professional results using free, browser-based tools to download reference graphics, stylize profile pictures, and edit private information in seconds. To streamline these tasks, X2X provides a suite of accessible utilities, including the YouTube Thumbnail Extractor, Image to Ghibli converter, Image Blur tool, and Color Extractor, to improve visual content immediately.
Professional content creation often demands heavy financial investments in desktop software, but the reality is much simpler for most digital needs. This post details how to execute five practical visual improvements completely free of charge. By managing thousands of daily image processing requests, X2X has gained direct visibility into the specific workflows that save digital creators the most time and money.
Studying successful videos helps creators understand exactly what makes viewers click. The YouTube Thumbnail Extractor allows users to paste a video URL and download the highest quality version of that thumbnail instantly. This process helps you build a personal swipe file of high-performing layouts, typography, and color schemes. Many creators also use this method to grab high-resolution thumbnails for reaction videos, video essays, or review content.
Analyzing a downloaded thumbnail allows you to study the placement of text and the sizing of the subject’s face in detail. You can see exactly how top creators use high contrast to make their graphics pop against the platform’s dark background. Since trying to recreate a layout from memory often results in poor proportions, downloading the actual file provides a perfect reference template to place directly inside your editing timeline.
Bonus Tip: Group your downloaded reference thumbnails into folders based on emotion or topic. This organization makes finding inspiration much faster during the design phase of your own video production.
Standing out in crowded social media feeds requires a unique visual identity. The Image to Ghibli and Cartoon converters turn standard photos into stylized animated artwork. This works exceptionally well for YouTube profile pictures, podcast cover art, and community tab posts where a stylized graphic grabs attention much faster than a standard headshot. According to research published by HubSpot, 50 percent of marketers use video in their strategy, followed closely by images at 47 percent. Utilizing a cartoon or anime style gives a channel a distinct, recognizable personality that cuts through digital noise.
Many creators also prefer to maintain a level of privacy online. Using a cartoon version of your face allows you to build a personal brand without exposing your exact likeness to millions of viewers. The process requires just one step: upload a clear photograph, wait a few seconds for the artificial intelligence to process the request, and download the converted asset directly to your computer.
Recording screen capture tutorials often expose private data unintentionally. The Image Blur tool lets creators obscure this sensitive information directly in the browser. Users simply upload the screenshot, select the target area, and apply the blur effect. This prevents privacy leaks without the need to open heavy desktop applications for one quick edit.
Practical applications for this tool occur daily. A tech channel might need to blur an API key during a coding tutorial, while a daily vlogger might want to blur a license plate in the background of street footage. Similarly, a product reviewer might need to obscure their home address on a shipping label during an unboxing video. Fixing these issues in the browser saves significant editing time and keeps the creative workflow moving forward.
Consistent colors make a brand highly recognizable across different platforms. When you find a photograph or graphic with an appealing color scheme, the Color Extractor pulls the exact hex codes from that image. You can then copy these codes into your video editing software, text titles, or website builder.
Guessing colors using a standard color wheel often results in mismatched graphics that look unprofessional. Sticking to two or three primary hex codes instead trains the audience to recognize your content immediately while they are scrolling.
Bonus Tip: Extract colors from your physical recording space or set. Use those exact hex codes for your digital text graphics to create a highly cohesive look between your physical background and your digital overlays.
5. Combine Tools for Maximum Impact
Creating a smooth workflow requires knowing how to use different utilities together for a finished product. A gaming creator, for example, might design a new channel banner by first extracting a popular competitor’s thumbnail to study the layout. Next, they could use the Color Extractor to grab the exact neon colors used in that graphic. Finally, they can upload a photo of themselves to the Image to Cartoon tool and apply those exact neon colors to the text surrounding their newly stylized avatar.
To understand why browser-based utilities offer a strong alternative to traditional software, review the comparison below. Want a hand-drawn look instead? Try the free image to sketch tool.
Feature
Desktop Editing Software
Browser-Based Free Tools
Financial Cost
High monthly subscription
Completely free
Speed to Edit
Slow loading times
Instant processing
System Load
Requires heavy RAM usage
Runs on any standard device
Learning Curve
Takes months to master
Takes minutes to understand
Installation
Requires large hard drive space
Requires no installation
Practical Considerations for Your Editing Workflow
Review these factors before changing your visual editing routine. First, check your internet connection speed, as browser tools require a stable connection to upload and process files quickly. Second, assess the exact requirements of your current project. If you are producing massive graphics for printed billboards or magazines, you still need traditional desktop software. However, for standard digital content like YouTube videos, podcast covers, and social media posts, browser utilities handle the vast majority of daily editing requirements perfectly.
Industry Standards for Free Image Editing
Creators often ask if free tools are safe for commercial use. The output generated by these tools is completely safe for monetized YouTube channels and sponsored brand deals. Another common concern relates to image quality. While many free applications compress files heavily to save server space, these browser tools process the file and return it in high resolution. This ensures your final uploads remain crisp and professional on high-definition smartphone screens and monitors.
Frequently Asked Questions
Do I need to register an account to use these tools?
No registration is necessary. Users can access the website, upload their files, and download the results immediately without creating an account or managing a password.
Do browser-based tools work on mobile devices?
Yes, these utilities function entirely within modern smartphone browsers. You can extract thumbnails or blur images directly from your mobile phone while editing content on the go.
Will my uploaded photos remain private?
The system handles uploaded files securely and does not store them permanently. The files exist only long enough to apply your requested edit and generate the final download.
Are there limits on how many images I can process?
These tools do not restrict the volume of daily processing. You can extract multiple colors or convert dozens of photos into cartoon styles in a single editing session.
Can I process bulk images at once?
Currently, the system processes files individually to ensure the highest quality output for each edit. You simply upload one image, process it, download the file, and move directly to the next graphic.
Conclusion
Creating engaging graphics does not require a massive software budget or years of design training. By utilizing free browser tools, creators can extract design inspiration, build custom color palettes, blur private information, and stylize their brand identity in seconds. Evaluate your current post-production workflow and test these utilities to see how much time and money you can save. Focusing financial resources on content strategy rather than expensive software subscriptions helps build channel growth over the long term. Review your specific content needs to determine which of these free options fits best into your daily uploading routine.
Ready to Upgrade Your Visuals?
Stop paying for heavy software applications when you only need quick visual edits. Start utilizing free resources today from X2X to extract video thumbnails, build precise color palettes, and create custom cartoon graphics directly in your browser. These tools are built expressly for the fast-paced demands of modern digital creators.
Formatting messy data manually or writing custom Python scripts for one-off conversions wastes valuable development hours. Using dedicated online formatting tools solves this problem immediately. A reliable conversion utility turns hours of script-writing and debugging into a five-second copy-paste task. You get instantly usable data formats without compiling code or maintaining local environments.
Developers spend entirely too much time wrangling data formats instead of building core features. This guide serves as a bookmarkable reference for handling messy data efficiently. Decades of collective experience managing server migrations, handling API integrations, and executing database overhauls prove that relying on instant formatting utilities prevents unnecessary bottlenecks. Modern software engineering demands speed. Spending a whole afternoon writing a parser for a single legacy file simply does not make sense, especially when considering the hidden operational costs these manual tasks incur.
The Real Cost of Manual Data Wrangling
Writing a quick script to convert an XML file to JSON sounds fast in theory. In practice, handling edge cases, debugging encoding errors, mapping dependencies, and testing the output takes time away from actual engineering. Every minute spent formatting a string is a minute lost on building product features.
Operational and background tasks consume the vast majority of working hours. Adding custom script maintenance to this already heavy workload creates unnecessary friction. Data from an Atlassian survey featured in Shift Mag reveals that 69% of developers lose eight hours or more per week to role inefficiencies and technical debt. Utilizing pre-built conversion utilities directly reclaims this lost time.
Bonus Tip: Keep a dedicated folder of bookmarks for your most used formatting tools. Group them by category, such as “Frontend Formats” or “Server Configs,” to reduce search time during high-pressure deployments.
Moving Legacy Client Data into Web-Friendly Formats
Client handoffs frequently involve outdated or proprietary formats. Marketing teams provide Excel spreadsheets full of customer data, and legacy desktop applications export deep XML files. Web applications, however, run on JSON. Bridging this gap manually causes major delays.
Writing a parser to map rows and columns from a `.csv` or `.xlsx` file into a nested JSON object requires complex logic. You must write rules for handling empty cells, unexpected special characters, date formatting discrepancies, and mixed data types. Online conversion tools handle this logic automatically in the background.
Pasting a block of XML or uploading an Excel sheet into a converter generates a perfectly formatted JSON object instantly. This output goes directly into your database seeding files or frontend state management tools. You bypass the entire process of writing regular expressions to strip out unwanted XML tags.
Making Raw API Data Readable
While legacy files present static formatting hurdles, working with dynamic third-party APIs often means staring at a massive, unformatted wall of text. Finding the exact key-value pair you need to reference in your frontend code becomes a frustrating exercise. Webhooks and REST API payloads usually arrive minified to save bandwidth, making human readability impossible.
A JSON Prettifier takes minified data and structures it with proper indentation, color coding, and line breaks. This makes debugging API responses straightforward. You can easily spot missing commas or incorrectly nested objects.
Taking it a step further, a JSON to HTML Table converter automatically maps nested objects into a visual grid. If you need to quickly display user records or product catalogs on an internal admin dashboard, this tool generates the exact HTML tags needed. You skip the process of writing map functions in React or loops in PHP just to visualize the data. The converter outputs the raw HTML, allowing you to paste it directly into your template file.
Quick Fixes for Common Server and Deployment Tasks
Backend development and deployment operations come with their own set of formatting headaches. Managing environment variables, configuring secure connections, and handling authorization headers require precise string formatting. A single typo or incorrect file extension will break a production build.
Basic authentication headers, certain types of image data, and secure tokens require Base64 encoding. Trying to encode strings in a terminal can lead to unexpected line breaks or invisible encoding errors. A dedicated Base64 Converter provides immediate encoding and decoding for quick verification.
Similarly, configuring web servers often requires specific certificate formats. An Nginx server might require a `.pem` file, but the certificate authority provided a `.crt` or `.pfx`. An SSL Certificate Converter switches these formats on the fly, preventing deployment delays and connection errors. For instance, a dedicated platform like X2X Converter serves as a highly effective utility for executing these precise modifications securely. You avoid reading through pages of OpenSSL documentation just to change a file extension.
Scripting vs Online Conversion Tools Comparison
Understanding when to write a script versus when to use an online utility helps streamline your workflow.
Feature / Method
Custom Python/Node Scripts
Online Conversion Tools
Setup Time
High (Requires local environment setup)
Low (Instant web browser access)
Maintenance
Requires ongoing dependency updates
Handled automatically by the platform
Execution Speed
Fast once written and debugged
Instant via simple copy-paste
Best Used For
Automated, recurring daily data syncs
One-off conversions and rapid debugging
Error Handling
Manual debugging and logging required
Built-in validation and syntax checking
Things to Consider Before Making a Decision
Before integrating online conversion tools into your daily workflow, evaluate your specific project requirements.
Data Sensitivity: Assess whether the data contains personally identifiable information. Highly sensitive medical or financial records might require local processing to comply with strict regulatory standards.
Conversion Frequency: Determine how often you perform the exact same conversion. If a client uploads an XML file every hour, an automated backend script makes the most sense. If you handle one massive database migration per month, a web utility operates faster.
File Size Limits: Review the size of your datasets. Massive enterprise database dumps might exceed the processing limits of browser-based tools, requiring bulk processing software.
Team Accessibility: Evaluate if junior developers or non-technical team members need to format data. Web-based tools offer an intuitive interface that requires zero technical training.
Bonus Tip: Always validate your JSON output after a conversion. Even the best converters rely on the quality of the input data. Running the final output through a JSON validator ensures no syntax errors break your application.
Common Questions
Are online data converters safe for production data?
Most reputable converters process data directly within your browser using JavaScript. The data never leaves your local machine, making it completely safe for standard production use. Always check the tool’s privacy policy for specific data handling practices.
Why use a converter instead of built-in IDE extensions?
IDE extensions slow down your code editor and often lack advanced configuration options. Web-based tools run independently, keeping your local development environment lightweight, fast, and free of unnecessary bloatware.
Can these tools handle nested arrays in JSON files?
Yes. High-quality JSON to HTML Table converters and prettifiers automatically detect nested arrays and objects. They format these elements logically, often creating sub-tables or indented blocks for clear readability.
Does converting XML to JSON cause data loss?
Converting between these formats rarely causes data loss, but attributes in XML require specific handling. Good converters allow you to define how XML attributes translate into JSON keys, ensuring total data fidelity.
Why do I need a specific converter for Base64?
While you can encode strings in a terminal, web-based Base64 converters handle specific character encodings properly. They prevent invisible carriage returns or formatting anomalies from corrupting the final encoded string.
Final Thoughts on Data Formatting
Relying on manual processes for standard formatting tasks slows down development cycles. Integrating dedicated utilities for switching between Excel, XML, JSON, and Base64 allows you to focus on building features rather than wrestling with syntax. Evaluate your current workflow and identify where manual formatting creates bottlenecks. Adopting the right combination of fast, browser-based tools directly improves engineering efficiency. Stop writing single-use code for problems that already have instant solutions. Evaluate your project timelines and integrate formatting shortcuts to hit your next deployment deadline faster.
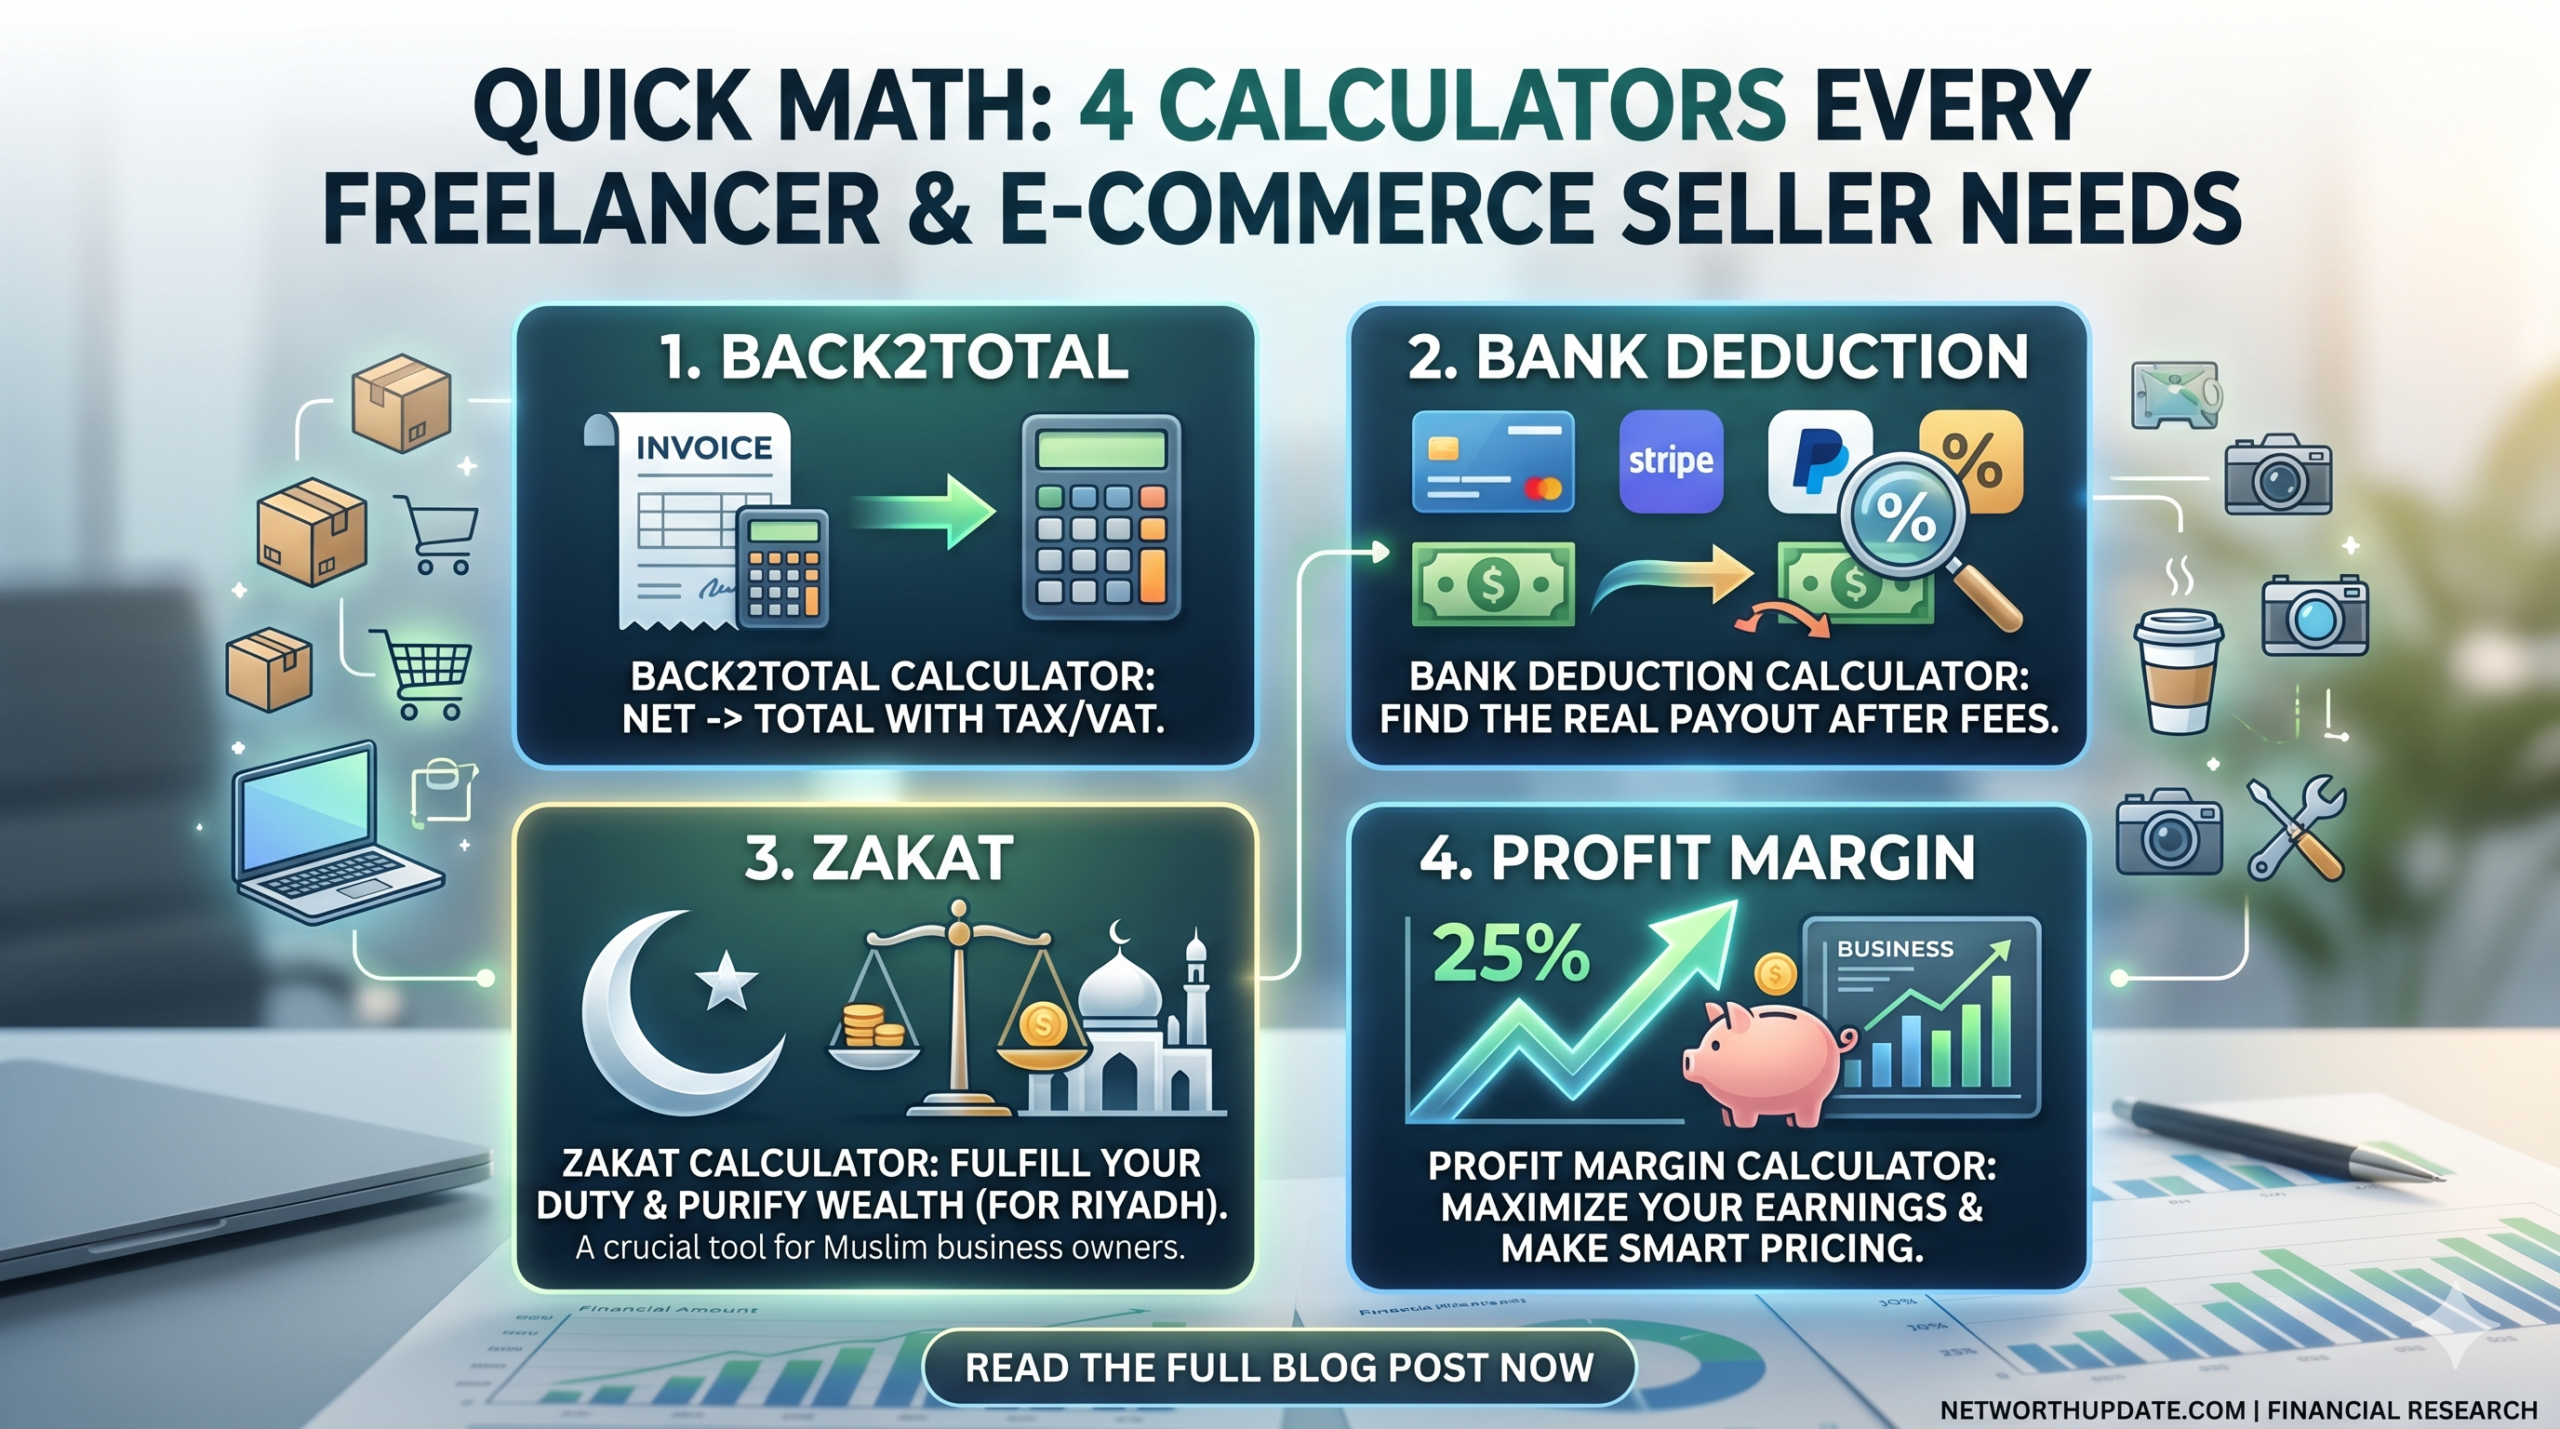
Quick Math: 4 Calculators Every Freelancer & E-commerce Seller Needs
The four calculators for freelancers and ecommerce sellers that protect profit the most are a Back2Total (gross from net) calculator, a bank deduction calculator, a percentage increase calculator for markups and price changes, and a Zakat calculator. Together they cover pricing, payment fees, profit and yearly obligations, so you keep the money you actually earn.
Introduction
The first time I billed an international client, I quoted $1,000, felt great about it, and then watched $950 and change land in my account. Part of it went to the platform. Part went to the bank. I hadn’t planned for either, so the loss came straight out of my pocket.
That’s the moment I started using calculators for freelancers instead of doing the math in my head. Most money mistakes in a small online business aren’t big. They’re small percentages that repeat on every invoice and every order until they add up to a real number.
In this post, I’ll walk you through the four calculators for freelancers and ecommerce sellers I use most, with worked examples you can copy. When you need to set a price from the amount you want to take home, start with the Back2Total calculator. When a client pays by wire or through a processor, the bank deduction calculator shows what will actually reach you. And when you raise rates or set a markup, the percentage increase calculator keeps your math honest.
All of these calculators for freelancers are free, run in the browser and need no sign-up. You don’t need a spreadsheet, a formula you half remember, or an accountant on speed dial for everyday pricing.
Why Calculation Errors Cost Freelancers and Sellers Real Money
Without calculators for freelancers, calculation errors cost money because fees, discounts and markups are percentages, and percentages compound across every sale. A 2% slip on one invoice is pocket change. The same slip on every invoice for a year is a lost month of income.
Here are the mistakes I see most often when people skip calculators for freelancers and do the math by hand:
Adding a fee on top instead of grossing up. If a platform takes 20%, adding 20% to your price does not cover it. I’ll show the exact math below.
Forgetting fixed fees. Card processors often charge a percentage plus a fixed amount per transaction. The fixed part hurts most on small orders.
Confusing markup with margin. A 50% markup is not a 50% margin. Sellers who mix these up often price items at a thinner profit than they think.
Ignoring wire and conversion fees. International payments can carry fees on both the sending and receiving side.
Guessing at yearly obligations. Taxes and Zakat are based on totals, so small errors at the start of the year turn into big surprises at the end.
The good news is that every one of these mistakes has a simple fix. Calculators for freelancers and ecommerce sellers turn each of these formulas into a single box you fill in, so you get the same right answer every time.
Calculator 1: Back2Total for Pricing From Your Take-Home Amount
The Back2Total calculator works backward from the amount you want to receive and tells you the total you need to charge after a percentage fee. Of all the calculators for freelancers I use, this is the one I open most, because every marketplace and payment processor takes its cut from the top.
Why adding the fee percentage doesn’t work
Say you want to take home $1,000 and your freelance platform keeps 20%.
Most people add 20% to $1,000 and charge $1,200. But the platform takes 20% of $1,200, which is $240. You receive $960, not $1,000. You are $40 short on a single job.
The correct formula divides your target by what’s left after the fee:
Gross price = Target amount ÷ (1 − fee rate)
So $1,000 ÷ 0.80 = $1,250. The platform keeps $250 (20% of $1,250), and you receive exactly $1,000. Back2Total does this division for you, which is why I treat it as the first of the calculators for freelancers anyone should bookmark.
Worked example with a card processor fee
Card processors usually charge a percentage plus a fixed fee, which is where calculators for freelancers earn their keep. According to NerdWallet’s breakdown of Stripe processing fees, the standard online card rate is 2.9% plus $0.30 per transaction, and international cards cost 4.4% plus $0.30.
To receive $500 from a domestic card payment, the formula adds the fixed fee first:
For an international card at 4.4% plus $0.30, the same target needs ($500 + $0.30) ÷ 0.956 = $523.33. That’s an extra $8 on one payment just because of the card type. Calculators for freelancers make that difference visible before you send the invoice, not after.
When I use Back2Total and other calculators for freelancers
Setting hourly or project rates on marketplaces that keep a percentage.
Quoting a client who will pay by card through an invoicing tool.
Pricing a digital product sold through a platform with a revenue share.
Checking whether a “small” fee increase from a platform changes my rates.
Tip: Decide your required take-home amount first, then let the calculator set the price. Starting from a round price and hoping the remainder covers your costs is how margins disappear.
Calculator 2: Bank Deduction for Fees on Incoming Payments
A bank deduction calculator, one of the simplest calculators for freelancers, shows how much of a payment you will actually receive after a percentage or fixed fee is taken out. It’s one of the calculators for freelancers that matters most when clients pay from abroad or through a third-party processor.
What banks charge for wires
NerdWallet’s survey of wire transfer fees banks charge lists median fees of $15 for incoming domestic wires, $25 for outgoing domestic wires, $15 for incoming international wires and $45 for outgoing international wires. The exact amount depends on your bank and whether the transfer is in a foreign currency.
Those numbers look small until you run them through calculators for freelancers. If you invoice four international clients a month and each payment loses $15 on arrival, that’s $60 a month and $720 a year. On top of that, currency conversion can take another slice when the money changes currency.
Worked example
Say a client sends $800 by international wire and your bank charges $15 to receive it. You get $785, which is a 1.875% deduction.
Now add a 1% currency conversion spread on the $800. That’s another $8. You end up with $777, almost 3% less than the invoice. The bank deduction tool turns that into a clear number before you agree on terms, which is exactly why calculators for freelancers belong in your invoicing routine.
How I use the result
Pass fees to the client when the contract allows it. I state in my contract that the client covers sending fees and that the invoice amount must arrive in full.
Bundle small invoices. One monthly payment carries one flat fee instead of four.
Compare payment methods. I run the same invoice through the bank deduction calculator for a wire, a card payment and a payment app, then pick the cheapest one that the client is comfortable with.
Convert currencies first. When I quote in a client’s currency, I check the rate with a currency converter so the invoice matches what I need in my own currency.
Calculators for freelancers like this one don’t lower fees on their own. They show you where the money goes, so you can make a better choice before the payment is sent.
Calculator 3: Percentage Increase for Markups, Margins and Price Changes
A percentage increase calculator shows how much a number has grown in percentage terms, which makes it the right tool for markups, rate increases and price changes. For sellers, it’s one of the most useful calculators for freelancers and ecommerce sellers because pricing is mostly percentage math.
Markup vs margin, explained simply
Markup is the percentage you add to your cost. Margin is the percentage of the selling price that is profit. Shopify’s guide to markup vs margin uses a simple example: a rug that costs $50 to make and sells for $80. The profit is $30.
Markup = $30 ÷ $50 = 60%
Margin = $30 ÷ $80 = 37.5%
Same rug, same profit, two very different percentages. If you think you’re running a 60% margin when it’s really a 60% markup, every discount you offer eats more profit than you expected.
Working backward from a target margin
If you want a 40% margin on a product that costs $30, the formula is:
Price = Cost ÷ (1 − target margin)
$30 ÷ 0.60 = $50. Your profit is $20, which is 40% of $50. The markup on that same product is 66.7%, and the percentage increase calculator confirms it: going from $30 to $50 is a 66.7% increase. I use calculators for freelancers like this one to check both numbers, because suppliers and marketplaces often talk in different terms.
Raising your rates
Freelancers use this same tool, one of my favorite calculators for freelancers, for rate changes. If you move your hourly rate from $40 to $46, that’s a 15% increase. Telling a client “15%” sounds very different from “$6 more an hour,” and it’s worth knowing both before the conversation.
The discount trap
Discounts and increases are not symmetrical. If you drop a $100 price by 20% for a sale, it becomes $80. To get back to $100 afterward, you need a 25% increase, not 20%. Sellers who forget this slowly lower their prices sale after sale. Running the numbers through calculators for freelancers before and after a promotion stops that drift.
When I use it
Setting retail prices from supplier costs.
Planning a sale and checking what margin is left at each discount level.
Comparing month-over-month sales or order values.
Explaining a rate increase to existing clients.
Calculator 4: Zakat for Business Owners
A Zakat calculator, the last of my four calculators for freelancers, adds up your zakatable wealth, checks it against the nisab threshold and works out the amount due. For Muslim freelancers and sellers, it’s one of the calculators for freelancers that saves the most stress at the end of the year, because business assets are easy to miss.
How Zakat is calculated with calculators for freelancers
According to Islamic Relief USA’s Zakat calculator guide, Zakat is due at 2.5% of the wealth you hold above the nisab. The nisab equals the value of 85 grams of gold, and its money value changes every day with the gold price. Islamic Relief USA also lists business merchandise and profits among zakatable assets, along with shares and other investments.
For an online business, the assets people most often overlook are:
Inventory held for sale, valued at what you could sell it for.
Money owed to you by clients or marketplaces that you expect to receive.
Balances in payment accounts such as processor or marketplace wallets.
Business cash in a separate account.
Worked example
Say a seller has $4,000 in business cash, $6,000 of inventory and $2,000 of payments due from a marketplace. Many scholars allow short-term debts that are due now to be subtracted, so with $1,000 owed to a supplier, the zakatable total is $11,000.
If $11,000 is above the nisab on the day you calculate, the Zakat due is $11,000 × 2.5% = $275.
The Zakat calculator on X2X Converter lets you enter each type of asset separately, which makes the total easier to check. Rules on specific assets and debts differ between schools of thought, so if your situation is complex, ask a qualified scholar to confirm what counts.
Which Calculator Do You Need? A Quick Comparison
The right one of these calculators for freelancers depends on the problem in front of you. Here is how I match the four calculators for freelancers and ecommerce sellers to everyday tasks:
Calculator
What It Does
Best For
Example Input
Example Result
Back2Total
Works out the gross price from the net amount you want
Platform fees, card fees, revenue shares
Want $1,000, fee 20%
Charge $1,250
Bank Deduction
Shows what arrives after a fee is taken out
Wires, payment apps, processors
$800 wire, $15 fee
Receive $785
Percentage Increase
Measures the percentage change between two numbers
Markups, rate increases, sales growth
$30 cost to $50 price
66.7% markup
Zakat
Totals zakatable wealth and applies 2.5%
Yearly obligation on business assets
$11,000 zakatable
$275 due
If I had to pick one starting point among these calculators for freelancers, I’d say freelancers should start with Back2Total and sellers should start with the percentage increase calculator. Both fix the pricing mistakes that cost the most.
A Simple Weekly Money Routine Using These Calculators
Calculators for freelancers only help if you use them at the right moment. This is the routine I follow, and it takes about 15 minutes a week:
Before quoting: Run every new quote through Back2Total using the platform or card fee that applies.
Before invoicing: Check the payment method with the bank deduction calculator and add a line about fees to the invoice if needed.
Before a sale or price change: Use the percentage increase calculator to see the real margin at the new price.
At month end: Compare what you invoiced with what actually arrived. If the gap is growing, the fees changed.
Once a year: Total your business assets and run the Zakat calculator on your chosen date.
Freelancers who follow a routine like this rarely get surprised. The calculators for freelancers do the math, and the routine makes sure the math happens before money changes hands.
Don’t Forget Taxes When You Price
Taxes are the cost that calculators for freelancers can’t fully handle and the one freelancers forget most often, because nothing is withheld from client payments. In the US, the IRS explains on its page about self-employment tax that the rate is 15.3%, made up of 12.4% for Social Security and 2.9% for Medicare. You generally need to pay it and file Schedule SE once your net earnings from self-employment reach $400 or more. That’s before regular income tax.
You don’t need a separate tax calculator to plan for this. I treat a set percentage of every payment as “not mine” and move it to a separate account the day it arrives. Then, when I use calculators for freelancers to set rates, I make sure the take-home target already includes that tax share. Tax rules differ by country and situation, so check the numbers with a tax professional.
Calculators for Freelancers by Type of Work
Different kinds of work run into different money problems, so the calculators for freelancers you reach for first depend on what you do. Here is how I would set things up for the most common setups.
Writers, designers and developers on marketplaces. Your biggest leak is the platform’s cut. Use Back2Total on every proposal, and keep a note of the fee rate each platform charges. These are the calculators for freelancers who bid on many small jobs, where a few dollars per job adds up fast.
Consultants and agencies with direct clients. You often invoice larger amounts by wire or card. The bank deduction calculator and the currency converter matter most here. I’d also run the percentage increase calculator once a year when you review your rates, so a raise is a clear number instead of a guess.
Ecommerce sellers with physical products. Margin is everything. Use the percentage increase calculator to check markup and margin on every product, then run Back2Total with your marketplace or card fee to see the final price you need. For sellers, calculators for freelancers and ecommerce sellers work best as a pair: one for product profit, one for platform fees.
Digital product creators. Courses, templates and downloads have almost no cost per sale, so fees are your main expense. Back2Total and the bank deduction calculator cover nearly everything you need.
Muslim business owners in any of these groups. Add the Zakat calculator to your yearly routine and keep a simple list of inventory, receivables and payment balances so the yearly check takes minutes.
How to Read Your Results Without Second-Guessing
The numbers from calculators for freelancers are only useful if you trust them enough to act. Here is how I check a result before I send a quote or change a price:
Reverse the math once. If Back2Total says charge $1,250 for a $1,000 target at 20%, take 20% off $1,250 and confirm you land on $1,000.
Check the fee type. A percentage-only fee and a percentage-plus-fixed fee give different answers. Make sure the calculator input matches how you’re actually charged.
Look at the per-unit view. For sellers, divide total fees by the number of orders. A fee that looks small per month can be large per order.
Write the result down. I keep a short pricing note per client or product with the fee rate, target and final price. Next time, the calculators for freelancers only need a quick update instead of a fresh start.
Common Mistakes to Avoid
Even with good calculators for freelancers, a few habits cause most of the money leaks I see:
Using the wrong fee rate. Platforms and processors change fees. Check the current rate before you run calculators for freelancers on a new quote.
Forgetting the fixed part of a fee. A $0.30 fee is 3% of a $10 order. Small orders need their own pricing check.
Treating markup as margin. Always confirm which one a supplier or marketplace means.
Stacking discounts without checking. Two 10% discounts are not a 20% discount on the original price, and the margin left can be smaller than you think.
Rounding too early. Round only the final price. Rounding each step can shift your result by several dollars on large invoices.
Running Zakat on the wrong date. Pick a fixed date each year and use your balances on that day when you run calculators for freelancers like the Zakat tool.
Things to Consider Before Choosing Your Tools
Not every business needs all four calculators for freelancers on the same day. Before you build a routine around calculators for freelancers and ecommerce sellers, think about these points:
Your transaction volume. A seller with hundreds of orders needs fast margin checks. A freelancer with three clients a month gets more value from fee and pricing tools.
Where your money leaks. If international clients pay you often, start with bank deductions and currency conversion.
How your platforms charge. Some take a percentage, some add fixed fees, and some charge both. Pick the formula that matches.
Your yearly obligations. Taxes and Zakat both depend on accurate totals, so keep clean records all year.
Privacy. Browser-based calculators for freelancers that need no account let you check numbers without storing your financial data anywhere.
Key Takeaways
The four calculators for freelancers and ecommerce sellers that protect profit most are Back2Total, bank deduction, percentage increase and Zakat.
To cover a percentage fee, divide your target by (1 − fee rate). Adding the fee percentage on top leaves you short.
Card fees often include a fixed amount, so small payments lose a bigger share.
Markup is profit divided by cost. Margin is profit divided by price. They are not the same number.
A 20% discount needs a 25% increase to get back to the original price.
Zakat is 2.5% of zakatable wealth above the nisab, and business inventory and money owed to you usually count.
Plan for taxes inside your take-home target when you use calculators for freelancers, not after the money arrives.
Free, browser-based calculators for freelancers need no account and give the same right answer every time.
Frequently Asked Questions
What are the best calculators for freelancers?
The most useful calculators for freelancers are a gross-from-net calculator like Back2Total, a bank or payment fee calculator, a percentage increase calculator for rate changes, and, for Muslim freelancers, a Zakat calculator. Together they cover pricing, fees and yearly obligations, which is where most freelance income gets lost.
How do I calculate my rate after platform fees?
Divide the amount you want to receive by one minus the fee rate, or let calculators for freelancers like Back2Total do it. To take home $1,000 on a platform that keeps 20%, charge $1,000 ÷ 0.80, which is $1,250. Adding 20% on top gives $1,200, which leaves you $40 short after the platform takes its share.
What is the difference between gross and net income?
Gross income is the total amount you bill a client before anything is taken out. Net income is what actually reaches your account after platform fees, payment processing, bank charges and currency conversion. For tax purposes, net earnings also subtract allowable business expenses, so keep records of both figures.
How do I include card processing fees in my price?
Add the fixed fee to your target amount, then divide by one minus the percentage fee. With a fee of 2.9% plus $0.30, receiving $500 means charging ($500 + $0.30) ÷ 0.971, which is $515.24. International cards usually cost more, so check which card type your client will use.
What is the difference between markup and margin?
Markup is profit as a percentage of cost. Margin is profit as a percentage of the selling price. An item that costs $50 and sells for $80 has a $30 profit, which is a 60% markup but only a 37.5% margin. Mixing them up leads to prices that earn less than you expect.
How much do banks charge to receive international payments?
It depends on the bank, which is why calculators for freelancers ask for your exact fee. NerdWallet’s survey lists a median fee of $15 for incoming international wires, with some banks charging nothing. Currency conversion can add another cost on top. Check your own bank’s fee schedule and run the numbers before you agree on a payment method with a client.
Can I pass bank and payment fees on to clients?
Often you can, if your contract says so, and calculators for freelancers show exactly how much to pass on. Many freelancers state that the client covers sending fees and that the full invoice amount must arrive. For card payments, rules on surcharges vary by country and card network, so check local rules before adding a fee line to your invoices.
How do I calculate Zakat on business inventory?
Value your inventory at what it would sell for today, then add business cash, money owed to you and payment account balances. Many scholars allow short-term debts due now to be subtracted. If the total is above the nisab, pay 2.5% of it. Ask a scholar to confirm complex cases.
How much should freelancers set aside for taxes?
It depends on your country, income and expenses. In the US, self-employment tax alone is 15.3% of net earnings from self-employment, before regular income tax. Many freelancers move a fixed share of every payment into a separate account. A tax professional can help you choose the right percentage.
Are online business calculators accurate?
Online calculators for freelancers are accurate when you enter the right numbers. Most errors come from using an outdated fee rate, forgetting a fixed fee or rounding too early. Check the current fees from your platform or bank, enter exact amounts and round only the final result for the most reliable answer.
Conclusion
Small percentages, the kind calculators for freelancers catch, decide whether a freelance business or online store is quietly profitable or quietly losing money. The four calculators for freelancers and ecommerce sellers in this post cover the math that matters most: what to charge after fees, what will actually arrive, how much profit sits inside each price, and what you owe at the end of the year.
You don’t need to be good at math to price well when you have calculators for freelancers on hand. You need the right formula at the right moment, and these calculators for freelancers give you exactly that in a few seconds.
Ready to stop guessing? Open the free calculators for freelancers on X2X Converter, run your next quote through Back2Total, and see what you should really be charging.
Digitize Your Life: How to Turn Printed Notes into Editable, Searchable Documents
You can turn physical papers, whiteboard photos, and textbook pages into fully editable and searchable files using Optical Character Recognition technology. This software scans the pixels in your images, identifies the letters, and translates them into digital text. To fully process and utilize your physical notes, you can leverage three specific utilities. Image to Text converters handle raw data extraction, Image to Word tools create formatted documents, and Word to Audio converters provide an accessible supplementary step by generating listening materials.
Everyone has photos of whiteboards, textbook pages, or printed receipts that they need to edit or search. This post explains how to digitize physical text easily so you never have to manually retype information again. Drawing from the firsthand experience of professionals; such as the team at x2xconverter.com, who process thousands of document conversions daily; this guide highlights which methods yield the highest accuracy and the most practical results for daily workflows.
The Core Tools for Document Processing
Different tools serve completely different purposes when processing physical documents. Understanding what each tool does helps you choose the right application for your specific task.
When you need to extract basic text strings, Image to Text serves as your primary tool. Students frequently use this method to pull exact quotes from library books without photocopying pages. Researchers rely on it to digitize data points from printed journals into spreadsheets. You simply capture an image, upload the file, and the software reads the visual data. The resulting plain text file is incredibly lightweight. You can copy this plain text directly into an email, a presentation, or a digital notepad. Because plain text removes all original styling, you never have to deal with weird spacing or hidden font sizes when pasting the information into a new document.
Bonus Tip: Always ensure your physical document is well-lit and photographed directly from above. Shadows and extreme angles decrease image recognition accuracy significantly.
Sometimes, the layout of a document carries as much meaning as the words themselves. Image to Word conversion recreates the exact spatial arrangement of your original paper. If an office worker receives a printed financial report, they cannot simply retype the numbers into a blank document. They need the exact columns, headers, and footer notes. Modern Image to Word processors map the original document and generate a Microsoft Word file. You can click directly into the newly generated text boxes, adjust the numbers, change the font, and save the updated version. This eliminates the need to rebuild complex templates from scratch.
Many people struggle to read long blocks of text on a screen. Word to Audio utilities provide an excellent alternative by converting written text into spoken words. After you digitize a physical study guide or a business proposal, a text-to-speech engine reads the document aloud. You can generate an audio file and load it onto your smartphone. This allows auditory learners to absorb information while walking to class or driving to work. You can adjust the playback speed, allowing you to listen at a faster rate to review familiar material or slow it down when studying dense subjects.
Bonus Tip: When converting text to audio, strip out the headers, footers, and page numbers first. This prevents the text-to-speech engine from interrupting the main content with irrelevant numbers.
Why Digitizing Physical Documents Matters Today
Shifting from physical paper to digital files changes how you manage information. The global reliance on digital conversion is expanding rapidly. Data published by Market.us projects the global OCR technology market will reach $55.3 billion by 2033. This massive growth reflects exactly how heavily modern offices and universities rely on text extraction.
Students also drive this shift toward digital formats. Research from the Digital Education Council reveals that 86% of students globally rely on digital intelligence tools to manage their studies and process information. Physical documents slow down productivity because you cannot use a search function on a filing cabinet. Once you digitize your files, finding a specific keyword takes seconds instead of hours. Yet many organizations remain surprisingly attached to physical paper. A survey conducted by AIIM shows that only 18% of businesses consider themselves completely paperless.
Beyond speed and accessibility, digital files offer far superior security compared to physical paper. Anyone walking past a desk can read a printed invoice. In contrast, digital documents can be encrypted, password-protected, and stored securely in the cloud. Physical paper also occupies expensive square footage. Digitizing these documents frees up physical office space and protects your information from fire, water damage, or misplacement.
Things to Consider Before Making a Decision
Before you start scanning every piece of paper in your room, evaluate your actual needs. Not all digitization methods work equally well for every situation.
Handwriting Legibility Technology reads printed text from books and receipts with extreme accuracy. Cursive or messy handwriting often yields poor results. Test a single page of your handwritten notes before committing to scanning a whole notebook.
Formatting Requirements If you just need the data, a basic text extractor works best. If you need to submit the document officially or present it to a team, you need a tool that retains spatial formatting and tables.
Storage Capabilities High-resolution scans and audio files take up significant hard drive space. Plan where you will store these files, whether on a local drive or a cloud service, so they remain organized.
Processing Volume Consider how many documents you need to handle on a weekly basis. Processing single pages manually works for occasional needs, but bulk processing saves serious time for daily office tasks. Look for tools that allow batch image uploads.
Comparing Digitization Formats
Understanding the differences between outputs helps you build a better personal system.
Feature
Image to Text
Image to Word
Word to Audio
Primary Output
Plain text file
Formatted document
Audio file
Best Used For
Pulling quotes and raw data
Editing scanned forms
Studying on the go
Formatting Kept
No
Yes
Not Applicable
Storage Size
Very small
Medium
Large
Frequently Asked Questions
Does OCR Work on Old or Faded Documents?
Yes, but the accuracy drops. Software relies on high contrast between the ink and the paper. If a document is faded or yellowed, adjust the contrast settings on your phone’s camera before processing the image. Making the text as dark as possible against a bright white background yields the best results.
Can I Convert a Digital Note Back into Physical Handwriting?
No direct software naturally translates typed text back into physical ink, but you can use handwriting-style fonts and print the document. Some specialized mechanical plotters can hold a pen and write out digital text, though this requires physical hardware.
Will I Lose Original Images When Converting to Word?
High-quality Image to Word converters will extract the pictures from your physical scan and place them into the digital document exactly where they appeared on the page. Basic text extractors will ignore the images completely and only pull the readable letters.
What Languages Do Text Extraction Tools Support?
Most standard tools support major global languages including English, Spanish, French, and Mandarin. If you need to process specialized alphabets or historical texts, you will need to find dedicated software trained specifically on those character sets.
Wrapping Up Your Digitization Strategy
Moving from a desk full of paper to an organized digital system requires consistent habits. Start by converting the documents you access most frequently. Try using different methods like basic text extraction for quick quotes and Word document conversion for structured files. Test an audio conversion if you prefer listening to your study materials. Evaluate your current workflow, identify the bottlenecks caused by physical paper, and apply the appropriate digital tool to solve the problem directly.
Why Browser-Based File Conversion is the Safest Way to Manage Your Data
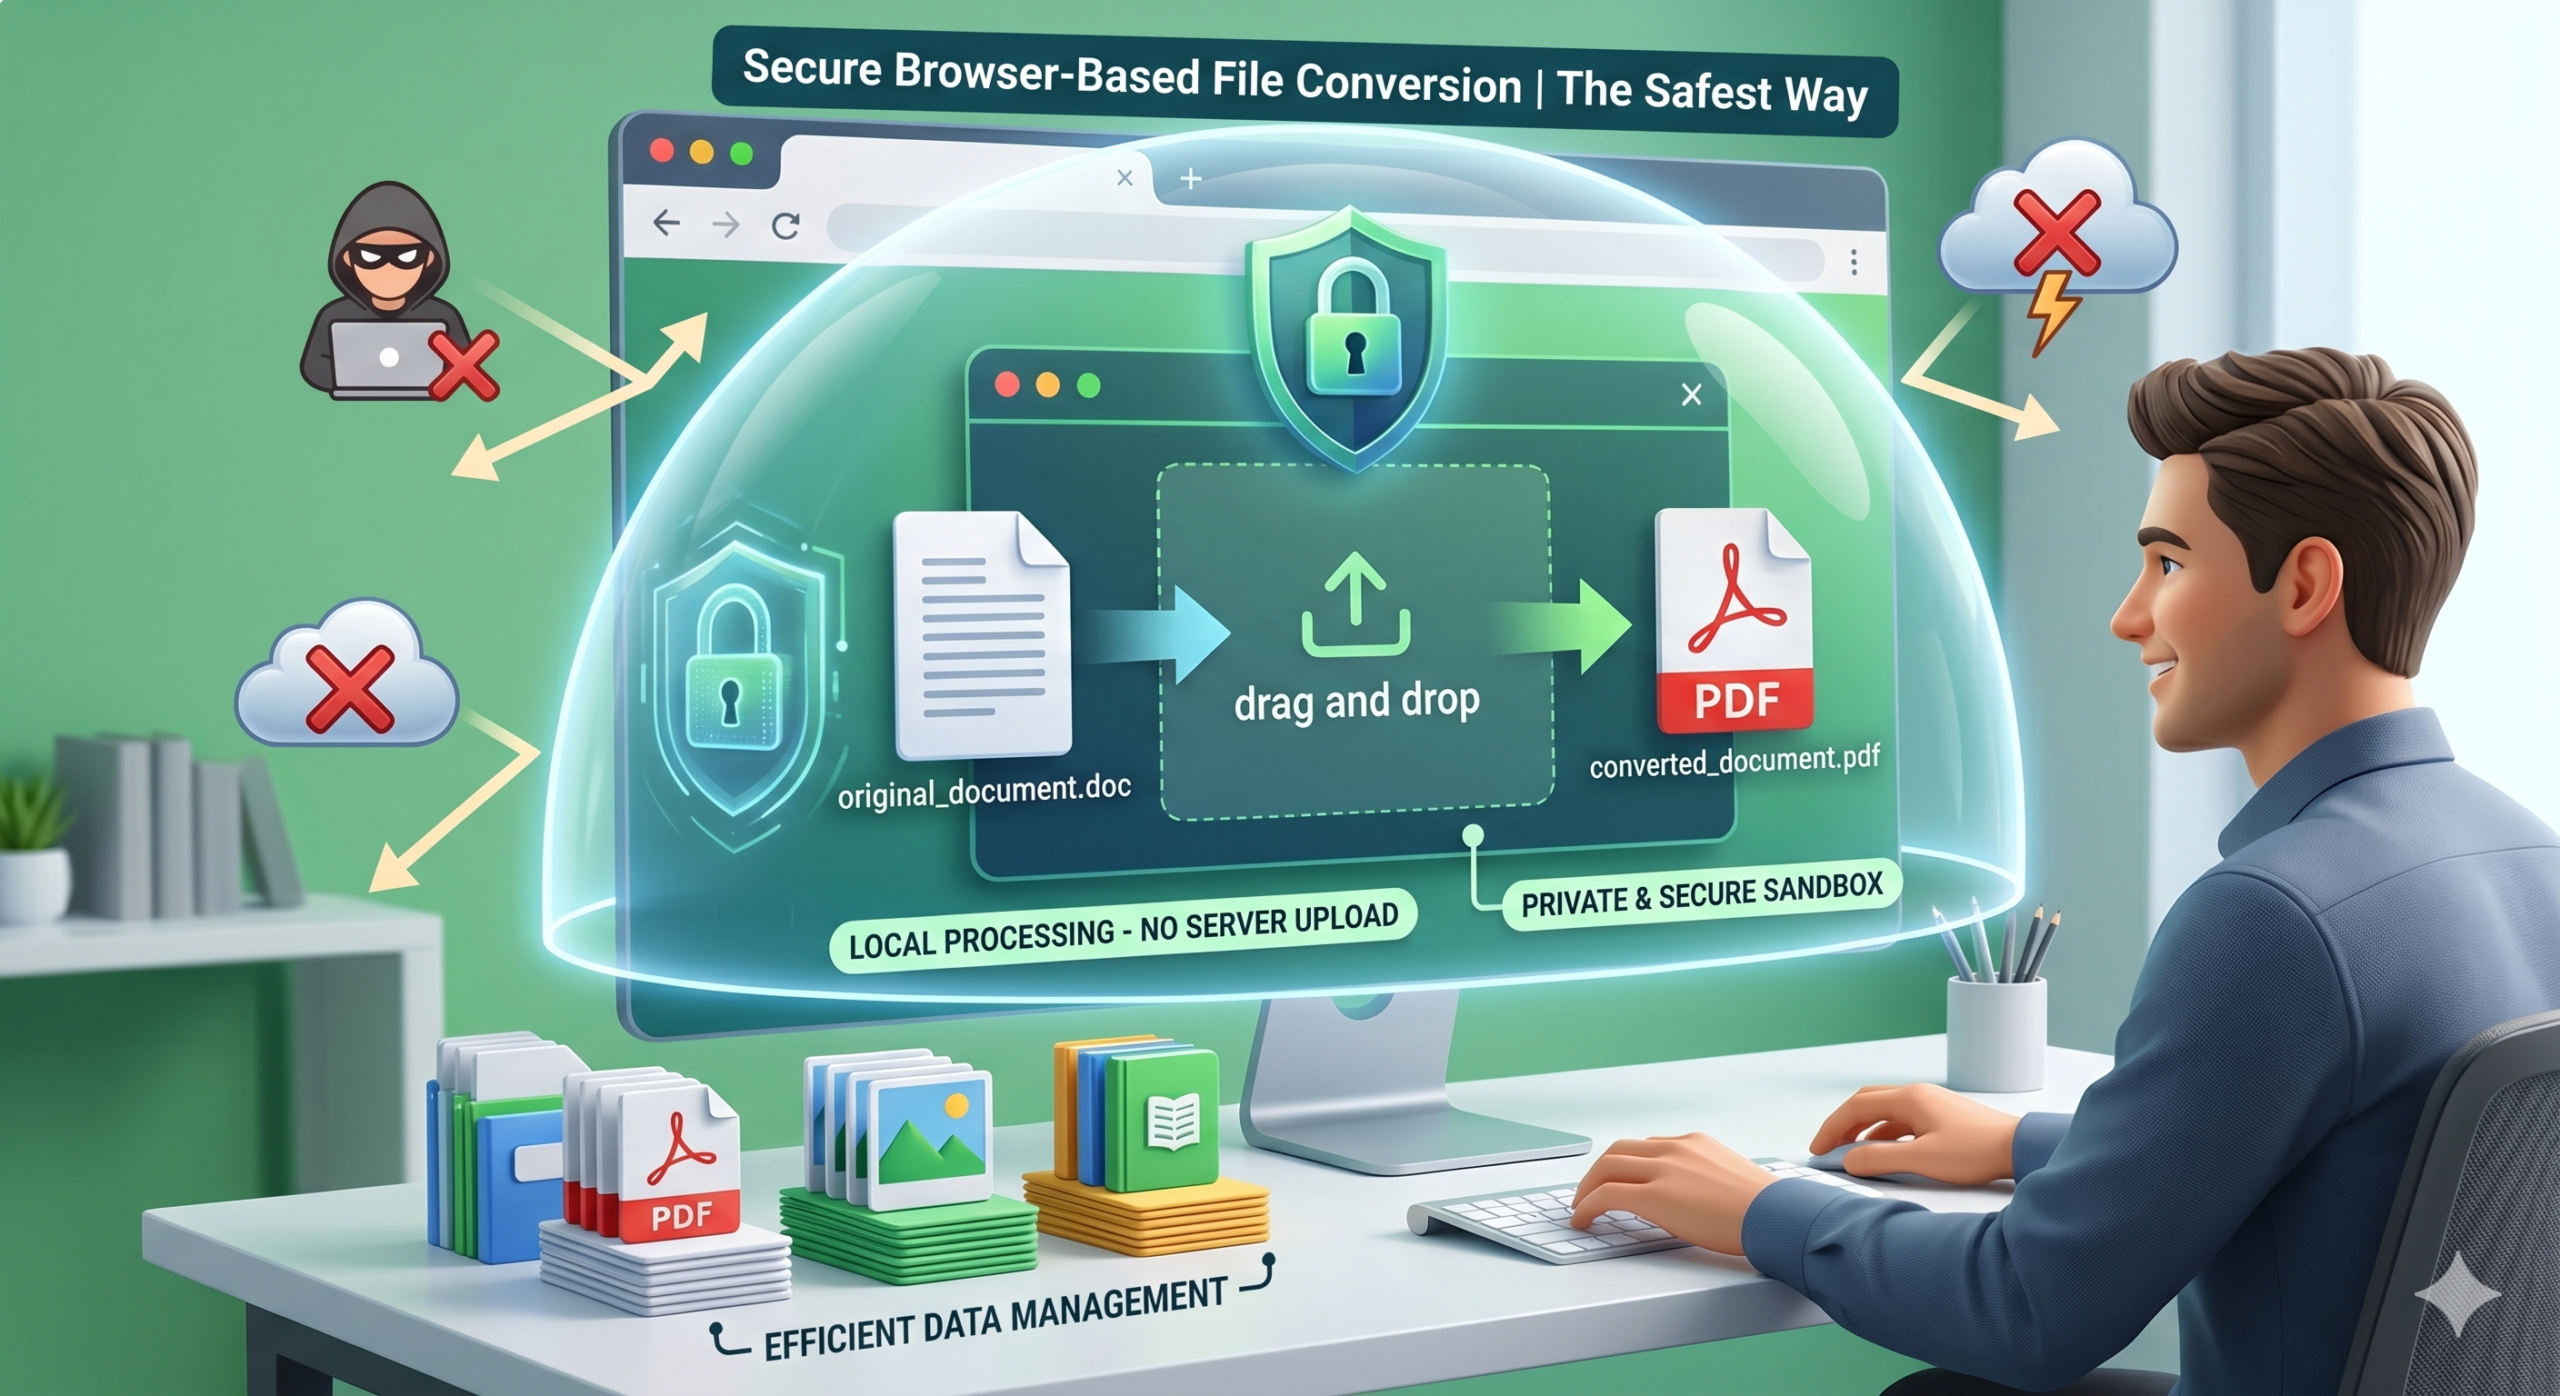
Browser-based file conversion is the safest method for handling sensitive data because it keeps all files on the local device. Unlike traditional online converters that require uploading documents to a remote server, browser-based tools use client-side processing to perform the conversion within the computer’s own memory. This ensures that personal information never travels across the internet or sits on a third-party database, effectively eliminating the risk of data breaches or unauthorized access during the conversion process.
The shift toward local processing provides a secure alternative for privacy-conscious users who need to convert files without compromising their security. By leveraging the power of modern web browsers, users gain the convenience of an online tool with the privacy of offline software. This article examines the technical advantages of browser-based processing and explains why it is the superior choice for remote workers, students, and anyone handling private documents.
The Difference Between Server Side and Client Side Processing
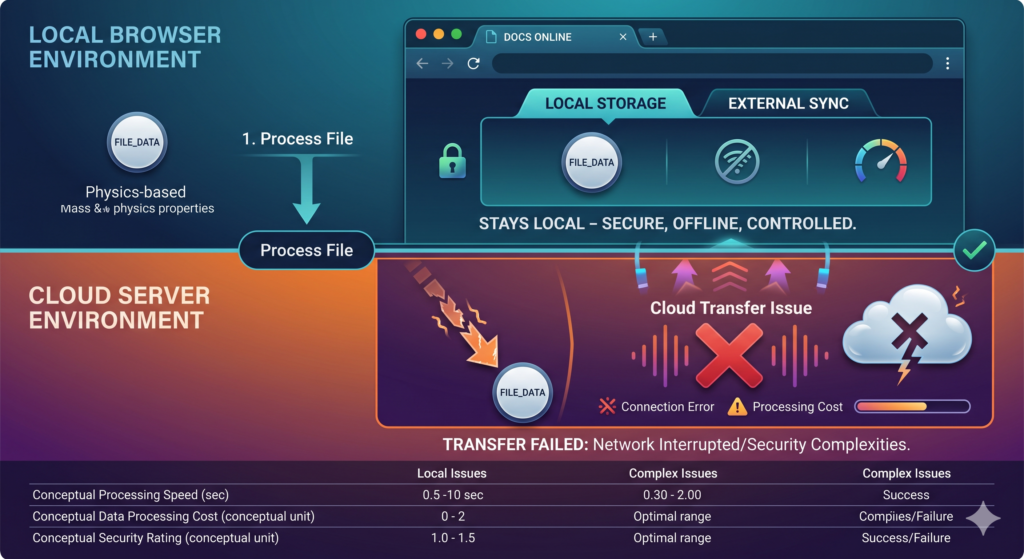
Understanding the security of a file converter requires looking at where the actual work happens. Most free tools use server-side processing. When a user clicks convert, the file travels from their computer to a company’s server. The server processes the file and then sends a download link back. This method creates multiple points of failure. Data can be intercepted during the upload, or the server itself could be compromised.
Client-side processing works differently. When a user visits a browser-based converter like X2X Converter, the website sends a small piece of code to the browser. This code acts like a tiny application that runs locally. When a file is selected, the browser uses its own resources to change the file format. The file never leaves the user’s hard drive.
A study by the Electronic Frontier Foundation emphasizes that minimizing data transit is a fundamental principle of digital privacy. By keeping data local, users maintain full control over their information throughout the entire workflow.
Benefits of Local Processing
No Data Retention: Since the files are never uploaded, the service provider cannot store, analyze, or sell the data.
Faster for Small Files: There is no waiting for an upload or download to finish. The conversion happens as fast as the local hardware can process it.
Works Without a Strong Connection: Once the web page is loaded, the conversion can often happen even if the internet connection drops, because the logic is already in the browser.
Security Risks of Traditional Upload Converters
Traditional online converters often seem convenient because they are free. However, these “free” services frequently involve hidden costs related to data privacy. Beyond the technical risks of interception, the long-term management of your uploaded data remains a concern.
Many services have terms of use that allow them to keep files for a set period. Some might even use the content of these files to train artificial intelligence models or improve their internal algorithms. For a professional handling a client’s intellectual property or a home user managing personal records, this exposure is a significant liability. According to the IBM Cost of a Data Breach Report, the financial impact of lost data continues to rise, making preventative measures like local processing a financial necessity.
Hidden Data in Files
Files often contain metadata, which includes the creator’s name, location, and the software used. When uploading a file, this metadata is also shared. A browser-based tool ensures this extra information stays private.
Bonus Tip: When converting images to PDF for official use, check if the tool allows for the removal of EXIF data. Local conversion ensures that sensitive information, such as GPS coordinates from a photo taken at home, is not accidentally shared with a recipient.
Comparing Conversion Methods
The following table highlights the differences between the two main types of online conversion tools.
Feature
Server-Side Converters
Browser-Based (Client-Side)
File Path
Uploaded to a remote server
Stays on your local device
Data Privacy
High risk of third-party access
Zero risk of external access
Potential for Breaches
Vulnerable to server hacks
Only as vulnerable as your PC
Ownership
You lose control once uploaded
You maintain 100% control
Performance
Limited by internet upload speed
Limited by your CPU and RAM
Log Records
Likely kept by the provider
No server logs of your content
Practical Use Cases for Secure Conversion
There are specific situations where using a server-side converter is unacceptably risky. Protecting identity and financial history should be a top priority for every internet user.
Handling Tax and Financial Documents
Converting a bank statement or a tax form from an image to a PDF is a common task. These documents contain Social Security numbers, addresses, and income details. If these files are uploaded to a server that is later compromised, the user faces a high risk of identity theft. A browser-based converter allows these files to be changed in a secure environment.
Managing Medical Records
From individuals submitting insurance documents to remote workers managing health clearances, this information is highly sensitive. Using a tool that processes data locally ensures that private health information remains confidential and compliant with basic privacy standards without involving third-party servers.
Corporate and Intellectual Property
Employees working from home must protect company secrets. Uploading a draft of a new product or a confidential contract to a random website could violate employment agreements and lead to data leaks. Local conversion provides the same utility without the compliance risk. For example, you can merge scanned contracts into one file with the image to PDF converter without uploading them anywhere.
Things to Consider Before Selecting a Tool
While browser-based conversion is the safest route, users should still evaluate the tool they choose. Not all tools are created equal.
Browser Performance: Since the browser does the heavy lifting, ensure your computer has enough memory (RAM) available. Closing extra tabs can help when you are converting a large file.
File Size Limits: Some browsers may struggle with extremely large files, such as high-resolution videos. For most documents and images, this is rarely an issue.
No Account Requirements: A truly private tool should not require an email address or login. If a site asks for your identity, it is collecting data, even if the conversion logic is local.
Open Standards: Look for tools that use well-known libraries like WebAssembly or JavaScript. These standard technologies allow for high-speed processing directly within the browser.
Bonus Tip: To maximize security, use your browser’s private or incognito mode when converting sensitive files. This prevents the browser from keeping a record of the file name in your history and ensures that third-party extensions cannot monitor your activity.
For most documents like PDFs, Word files, and images, it is often faster. You do not have to wait for the file to upload to a server or wait in a queue for a remote computer to become available. The processing starts as soon as you select the file.
Does the file size stay the same?
Yes, the conversion logic is identical to professional software. The output quality and file size are determined by the settings you choose, rather than where the processing happens.
Can I use these tools on a phone?
Most modern smartphones have browsers capable of running client-side conversion. As long as the device has an updated version of Chrome, Safari, or Firefox, the security benefits remain the same.
Effective Data Management Questions
How can I verify if a converter is actually processing files locally?
A simple way to check is to load the page and then disconnect your internet. If the conversion still works without an active connection, the tool is processing data on your device. Most server-side tools will fail immediately without an internet connection.
Is there a limit to how many files I can convert?
Since the tool uses your own hardware, there are usually no artificial limits placed by a server. You can convert as many files as your computer can handle without worrying about hitting a daily upload cap.
Are browser-based tools updated as often as cloud tools?
Yes, updates happen automatically every time the page is refreshed. Developers can push new features or security patches directly to the web application, ensuring you always use the latest version of the conversion code.
Do I need to install any software?
No, the primary advantage is that no installation is required. This is especially helpful for individuals using work computers where they do not have administrative rights to install new programs.
Summary of Safe Conversion Practices
Securing data requires a proactive approach to how files are handled online. Traditional upload-based converters introduce unnecessary risks by moving private information to external servers. Browser-based conversion offers a reliable solution by keeping the entire process on the user’s machine. This method protects against data breaches, prevents the logging of sensitive information, and allows for faster processing of common file types.
When managing documents like tax forms, medical records, or corporate files, using a tool that prioritizes local processing is the most effective way to maintain privacy. Data security is not just about passwords; it is about where your data travels. Choosing to keep your files local ensures that your information remains under your control.